Bike Pedal Maintenance
Looking after your bike pedals is like giving your trusty steed a little TLC—it makes your ride smoother and keeps those calves pumping efficiently. And let’s be honest, nobody wants squeaky pedals ruining their cycling groove. We’re about to explore why keeping those pedals in check is key and what kinds of pedals are out there waiting to be part of your biking adventures.
Importance of Regular Maintenance
So, why bother with pedal upkeep? For starters, stopping that annoying wear and tear in its tracks means your pedals will keep spinning happy and free. A bit of dirt, moisture, or grime can really jam things up if left unchecked. A little scrub here and some lube there can keep your ride as smooth as butter.
And hey, nobody wants a pedal to go rogue mid-ride. If your pedal decides to become a renegade and malfunction, you could end up doing an unplanned dance right off your bike. Giving those pedals the once-over regularly could save you a heap of trouble—and maybe some embarrassing moments, too. Check out our trusty bike safety checklist if you want to keep everything in tip-top shape.
Plus, when your pedals are in prime condition, your ride becomes a breeze. Less effort to pedal means more time to enjoy the wind in your hair and the scenery zooming by. Curious about more bike care? Have a peek at the bike maintenance schedule.
Types of Bike Pedals
Choosing the right pedal is all about finding your vibe. Let’s break down the main pedal personalities you’ll come across:
| Pedal Type | Description | Best For |
|---|---|---|
| Clipless Pedals | Use cleats that connect shoes to pedals | Fast roadies, mountain trail conquerors |
| Flat Pedals | Bog-standard pedals, require no special shoes | Easy rides, city cruising, BMX shredding |
Clipless Pedals
Despite the somewhat misleading name, clipless pedals click you in with a cleat system for a snug fit, boosting your power play (Park Tool). They’re the go-to for anyone looking to pile on the performance, whether you’re tearing down a mountain or pacing a peloton on the open road. Feeling a bit lost in clipless tech? Check out our tips in the bike bearing maintenance guide.
| Clipless Pedal Brand | What’s Cool | Wallet Range |
|---|---|---|
| Shimano | Sturdy build, adjustable tension | $50 – $150 |
| Look | Light as a feather, broad contact area | $70 – $200 |
Flat Pedals
Flat pedals are all about keeping it simple. Put your foot down and go—no cleats required. These are perfect whether you’re just popping to the shops, cruising to work, or doing some serious BMX tricks. They’re uncomplicated to keep ticking, too, with only the occasional clean or lube needed.
| Flat Pedal Brand | Perks | Price Points |
|---|---|---|
| Race Face | Generous size, sturdy pins | $50 – $100 |
| DMR | Tough as nails, grippy AF | $40 – $90 |
Choosing the right pedal comes down to what suits your riding swagger. Want more repair know-how? Our bike repair guides are loaded with useful nuggets.
Keeping those bike pedals spruced up means more epic rides, and less hassle. Whether you’re a flat pedal fan or a clipless connoisseur, a little know-how goes a long way in making your rides slicker and safer. Now, go forth and pedal like the wind!
Choosing the Right Bike Pedals
Picking the perfect pedals can really up your cycling game. If you’re thinking of fixing up those bike pedals, let’s chat about two popular options: clipless and flat pedals.
Clipless Pedals
Don’t let the name fool ya; clipless pedals actually mean you’re “clipping in” your shoes. This pedal type gives you some solid control and gets the job done efficiently, especially when you’re road cycling or mountain biking where every move counts.
| Feature | Description |
|---|---|
| Control | Super control for speedy rides and fancy moves like hopping curbs. |
| Stability | Keeps your feet from flying off when you’re really going for it. |
| Efficiency | Congrats! You’re now pedaling like a pro with more power. |
| Ease of Use | Got a bit of a learning curve, practice makes perfect. |
If you’re just starting with these, it might feel like a new dance at first, but once you catch the rhythm, your pedaling will thank you. Curious about keeping ’em in tip-top shape? Check out our article on bike pedal maintenance.
Flat Pedals
Flat pedals, a.k.a. platform pedals, are loved by many for being straightforward and adaptable. They sport a flat surface and are a go-to for a chill ride and daily commuters—no special shoes are needed here!
| Feature | Description |
|---|---|
| Safety | Quick foot removal if things go south. |
| Use | Fits any shoe type and is a downhill mountain biker’s best friend. |
| Grip | Offers enough grip and does the trick in most conditions. |
| Convenience | No need for special shoes, perfect for every now and then riders. |
These are the top picks for downhill mountain bikers and folks on the daily commute, thanks to how simple they are and the freedom to release your foot rapidly. Peek at our bolt tightness check tips for the low-down on keeping your flat pedals trusty.
Understanding the story behind clipless vs. flat pedals makes choosing a breeze based on how you ride and what you need. For more about bike upkeep, dig into our bike maintenance schedule and how to adjust your brakes.
Bike Pedal Replacement
Switchin’ out bike pedals sounds fancy, but it’s just about keepin’ your ride smooth and steady. Let’s chat about when it’s time to say goodbye to your old pedals and the easy-peasy steps to pop on new ones.
Signs for Replacement
Knowing when to swap your bike pedals can seriously up your ride game and dodge any hiccups. Here’s how you know it might be time for a change:
- Excessive Wear and Tear: We’re talking about visible damage like cracks, worn-out treads, or bent spindles. If your pedals look like they’ve seen better days, they probably have.
- Pedaling Feels Like a Workout: If it’s getting harder to pedal or feels sticky, it might be time for new pedals.
- Weird Sounds: If you hear squeaks or grindin’ noises, that’s your bike singin’ the “I need new pedals” song.
- Slippin’ and Slidin’: Pedals that don’t grip right—like they’re dancin’ on their own—aren’t safe.
- Loose Bearings: If the bearings feel loose or make noise when pedalin’, you’re in need of a swap.
Don’t skip regular check-ups as part of your bike maintenance schedule to catch these funny businesses early.
Steps to Replace Pedals
Changin’ bike pedals ain’t rocket science. Just follow these easy steps to peace out your old pedals and welcome the new pals:
- Gather Tools:
- 15mm Pedal Wrench or Allen Key
- Grease
- Clean Rag
Remove Old Pedals:
- Get cozy with your bike, have one side in your sights.
- Slide that wrench onto the spindle on the pedal’s backside.
- Turn the wrench counterclockwise to loosen the right pedal.
- To loosen the left pedal, just switch to clockwise.
- Wave goodbye and remove ’em both.
Clean Pedal Threads:
- Use a rag to give those crank arms’ threads a good wipe.
- Add a slick layer of grease to the threads so the new ones slip on easily and come off smooth next time.
Install New Pedals:
- Find the right (R) and left (L) pedals (they usually got letters chillin’ on ’em).
- Thread that right pedal into the right crank arm, turnin’ it clockwise.
- Hit the left pedal into the left crank arm turning it counterclockwise.
- Tighten both nice and snug with your pedal wrench or Allen key.
| Pedal | Loosen | Tighten |
|---|---|---|
| Right | Counterclockwise | Clockwise |
| Left | Clockwise | Counterclockwise |
- Final Checks:
- Make sure both pedals are tightened like they mean it.
- Give each one a little’ spin and check for smooth movin’.
For more words of wisdom on keeping your bike happy, check out our bike repair guides.
Swappin’ out pedals isn’t just about better performance—it’s about not wiping out. Keep an eye on your pedals and give other parts of the bike love too. For more handy tips, peek at our advice on cleaning bike chains and adjusting bike brakes.
Coaster-Brake Hub Overhaul
Understanding Coaster Brake Hubs
Coaster-brake hubs, also known as back-pedaling brakes, bring a unique twist to your biking experience. Inside their metal shell, these hubs hide clever little brake shoes and a nifty clutch mechanism. When you pedal backward, the magic happens—the brake shoes expand, pressing against the hub shell to slow down or stop the bike in its tracks. It’s like having brakes that know a secret handshake!
| Part | What’s It Do? | Why It Matters |
|---|---|---|
| Brake Shoes | Rubs against hub | Stops your bike when pedaled backwards |
| Metal Shell | Keeps bits together | Houses all crucial parts |
| Clutch Mechanism | Starts the bike | Engages to make you go |
Time’s cruel hand tends to smooth those brake shoes, cutting their grip. The clutch’s little notches can also wear smooth, meaning a delayed pedal engagement. So if your back pedal feels a bit like an old slipper, it’s time for some TLC.
Maintenance Steps for Hub Overhaul
Give your coaster-brake hub the love it deserves with these simple steps. With some elbow grease and attention, your brakes won’t just work—they’ll sing.
- Pop Off the Rear Wheel: First things first, take off the back wheel to get cozy with the hub.
- Crack It Open: Gently take apart that hub shell, laying bare the clutch, brake shoes, and bearings.
- Squeaky Clean: Grab a trusty degreaser and wipe every piece till it gleams. Old grime, begone!
- Spot Check: Peep those brake shoes and clutch for any shine—too much means wear. Time to replace if needed.
- Grease Monkey Time: Smear on some high-temp grease like it’s going outta style. Keep those internal bits happy and spinning (Park Tool).
- Put It Back Together: Like a reverse magic trick, fit all the bits back where they belong.
- Wheel It On: Slide that wheel back on, secure your bolts, and send your bike out to perform once more.
For more nitty-gritty details, take a peek at our guide on service bike hub. Routine check-ups and proper lubrication make sure your brake isn’t just a showpiece. With a little care, you’ll have a braking system you can trust your ride to every time. For a smooth ride overall, check our bike maintenance schedule and helpful how-tos on a clean bike chain and adjust bike brakes.
Keep those rides safe and breezy!
Inspecting and Maintaining Your Mountain Bike
Keep your mountain bike in good shape and it’s like having a trusty sidekick that’s always ready for fun! Regular check-ups can catch those sneaky problems before they become giant headaches. Let’s talk about keeping your ride happy and healthy.
Regular Bike Inspection
Giving your bike a quick once-over isn’t just smart; it’s the way to dodge costly fixes and ride with peace of mind. A five-minute check before each ride is all it takes (Tracks Less Travelled). Here’s a simple checklist:
- Frame Check: Got any cracks or dents? It’s like a bad selfie—spot ’em before they get worse.
- Tire and Wheel Inspection: Scan for wear and tear like you’re Sherlock with a magnifying glass.
- Brake Test: Squeeze those brakes to make sure they aren’t snoozin’. Worn-out pads? Time to swap them out.
- Chain and Drivetrain: If it squeaks, it speaks—lube it up! Check for wear, and be sure to peek at our bike chain wear guide.
- Suspension: Make sure it moves like butter and isn’t leaking. Our suspension tips should help.
- Cables and Housing: Frayed cables are a no-go. Replace when you see one (Tracks Less Travelled).
Table of Things to Watch
| What to Check | What to Do | How Often |
|---|---|---|
| Frame | Look for damage | Every ride |
| Tires/Wheels | Watch for wear/punctures | Every ride |
| Brakes | Give ’em a squeeze | Every ride |
| Chain | Inspect and oil it | Weekly or after wet rides |
| Suspension | Check for leaks/damage | Monthly |
| Cables | Replace if frayed | Monthly |
Bolt Tightness Check
All those nuts and bolts need a little love too. Tight screws could save your ride from squeaks and clunks (bike noise problems). Here’s what to focus on:
Main Bolts:
- Stem bolts
- Handlebar bolts
- Seat post clamp bolts
- Crankset bolts
Torque Specifications:
- Our bike bolt torque specs guide is the place to find out how snug things should be.
Tools Needed:
- Torque wrench
- Allen keys
- Screwdrivers
Inspection Steps:
- Use a torque wrench to keep bolts nice and tight, not too strong though, or you risk breakin’ parts.
Table of How Tight to Make ‘Em
| Bolt Spot | What You Need | Tighten To… (Nm) | How Often |
|---|---|---|---|
| Stem Bolts | Allen Key | 6-8 | Weekly |
| Handlebar Bolts | Allen Key | 5-7 | Weekly |
| Seat Post Clamp | Screwdriver | 6-7 | Weekly |
| Crankset Bolts | Allen Key | 35-50 | Monthly |
Keep checkin’ those bolts and parts, and you’ll be cruisin’ with confidence. For more deep dives into the nitty-gritty of bike care, have a peek at our bike repair guides. Let your bike live its best life while you get to enjoy the thrill.
Gear Shifting Tips for Mountain Bikes
If you want your mountain bike to purr like a kitten on those bumpy trails and last longer than the Energizer Bunny, proper gear shifting is your golden ticket. Let’s dive into why getting it right is the name of the game and how dodging mistakes keeps your ride as smooth as a smoothie.
Importance of Proper Shifting
Why bother with shifting right? Glad you asked!
- Efficiency: Who doesn’t want to pedal less and do more? Proper gear changes mean you’re not wrestling with the wrong gear on tricky tracks, making each pedal as smooth as a warm knife through butter.
- Durability: We all like things that last, don’t we? Spot-on shifting means you’re not stressing out your bike’s guts—the chain, cassette, and chainring get to live out their days without wearing themselves thin too soon (Tracks Less Travelled).
- Safety: Sudden gear jumps are about as welcome as stepping on a LEGO. Keep your shifts crisp to avoid nasty surprises, especially if you’re taking on steep descents or gnarly paths.
Effects of Improper Shifting
Mess up your shifting, and it’s a fast track to headache city.
- Accelerated Wear: Your bike’s insides will toss in the towel quicker if you’re sloppy with gear changes. Chains and cassettes are not cheap and love attention (Tracks Less Travelled).
- Chain Damage: Bad shifts can make your chain give up or snap like a twig. Nobody likes mid-ride disasters, so treat your chain well and dodge those sad bike days.
- Pedal Inefficiency: Picking the wrong gear makes pedaling up a hill feel like dragging a grand piano along. Talk about a fast way to tire yourself out!
- Inconsistent Performance: Jumpy rides and unplanned shifts are about as much fun as a poke in the eye. Keep it smooth by staying on top of your gear game.
You can sidestep these problems by making sure your bike’s gears are in tune. Give your derailleur a little TLC regularly to keep things flowing. For some home-grown wisdom, check out our bike gear indexing guide.
| What Can Go Wrong | Fix-It Tips |
|---|---|
| Fast track to worn parts | Stay on top of maintenance and nail your shifting skills |
| Chain crying for help | Give ’em regular check-ups and a TLC lube rub from the best bike lubricants |
| Pedaling ain’t easy | Make sure you’re adjusting shimmy with our bike maintenance schedule |
| The ride ain’t slick | Regularly adjust and keep your derailleur behaving |
Nail your gear shifting, and not only will your bike feel more like a trusty steed, you’ll also be saving bucks on repair bills. For more nuggets of wisdom on keeping your bike in tip-top shape, hop over to our guides on clean bike chain and rear derailleur maintenance. Get that bike sparkle and watch it ride buttery smooth!
Drivetrain Maintenance
Keeping your bike’s drivetrain in tip-top shape is key to smooth rides and ensuring your two-wheeler doesn’t give up on you midway. Here’s the scoop on swapping out chains and cables, plus a how-to for when that chain decides to snap just when you’re in the mood for a perfect ride.
Chain and Cable Replacement
You have to keep an eye on those chains and inner cables, folks. They’re the unsung heroes behind smooth gears and keeping you from an unexpected workout walk home. You don’t want your bike letting you down because no one likes the sound of malfunctioning gears—trust me.
- Chain Replacement: Give that chain a once-over using a chain checker tool. Rule of thumb? Swap it out around the 0.5% to 0.75% wear mark. Stretch it too far, and you’re looking at extra wear and tear on the cassette and chainrings and a good chunk of change down the line.
- Cable Replacement: Derailleur and brake cables live hard lives; they can fray, get rusty, and just generally decide they’ve had enough. Give these guys a quarterly once-over and change them out annually. Avoid the surprise of a no-brakes situation or stubborn gears.
| Part to Check | Look Over This Often | Change It Up |
|---|---|---|
| Chain | Monthly | Every 2,000 – 3,000 miles |
| Inner Cables | Every few months | Once a year |
Need a hand changing out those parts? Check out our handy bike repair guides for a step-by-step how-to.
Handling a Broken Chain During a Ride
A busted chain while riding is enough to have anyone groaning. But with a bit of know-how, you can patch things up and get back to pedaling without breaking a sweat.
- Chill and Park It: Find a safe spot off-road to stop. No need to fight traffic while sorting this out.
- Find the Kink: See where the chain’s taken a day off.
- Remove the Bad Link: Snap out the broken bit with a chain tool.
- Pop in a Quick Link: Quick links are like magic for on-the-go fixes. Most don’t even need tools to install—easy peasy.
- Take It for a Spin: Hop on, pedal slowly, and make sure things feel just like butter.
| Must-Haves in Your Repair Kit | |
|---|---|
| Chain Tool | ✅ |
| Quick Links | ✅ |
| Multi-tool | ✅ |
| Spare Chain Pins | ✅ |
You’d be doing yourself a favor by packing these lifesavers for those “just in case” bike moments. More deets about must-have tools? Peep our bike tool kit essentials.
For oodles more tips on bike upkeep and emergency fixes when you’re out and about, scope out our reads on emergency bike repair and how to clean your bike chain.
On-Trail Bike Repairs
Knowing how to fix your bike on the go is like having a superhero power, especially when you’re caught in an “oops” moment with a busted chain.
Fixing a Broken Chain
A snapped chain can turn your pedal dreams into a walk of shame. But fear not, with a bit of know-how and the right stash of tools, you’ll have your ride purring again in no time. Quick links are lifesavers when you need a fix pronto (Tracks Less Travelled). Here’s how to make the magic happen:
- Remove the Broken Chain Link:
- Whip out your chain tool to pop off the mangled link.
- Make sure both ends of the chain are showing their sweet inner links.
- Insert the Quick Link:
- Slide one half of the quick link onto each chain end.
- Connect the halves like a jigsaw puzzle that loves being outside.
- Secure the Quick Link:
- Pull the chain tight like you’re snapping a fresh twig.
- Listen for that satisfying click or “aha!” moment.
- Test the Chain:
- Pedal like you’re meandering along a beach path– smooth and easy.
- If it’s skipping like a scratched record, give it another look-see.
| Step | Tool Needed |
|---|---|
| Remove broken link | Chain tool |
| Insert quick link | Quick link |
| Secure quick link | Hand pressure, pliers |
For all things chains and keeping ’em spinning, head over to our bike chain wear guide.
Essential Tools to Carry
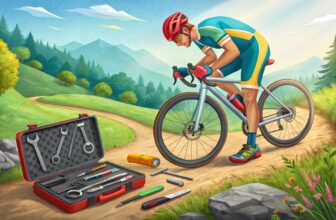
Don’t hit the trails without your trusty toolbox tucked away. You never know when you’ll need to play bike doctor. Here’s the roll call for must-have tools:
- Multi-tool: The Swiss Army knife for your bike, covering all angles.
- Chain tool: Your go-to gadget for reuniting broken links.
- Quick links: These snazzy little savers get your chain back in action.
- Spare tube or patch kit: For when your tire decides to make you sweat.
- Mini pump or CO2 inflator: To give those tires their bounce back.
- Tire levers: For boss-level tire handling.
- Zip ties and duct tape: Your MacGyver gear for last-minute situations.
| Essential Tool | Purpose |
|---|---|
| Multi-tool | Various functions |
| Chain tool | Fixing broken chain |
| Quick links | Temporary chain repairs |
| Spare tube/patch kit | Flat tire repairs |
| Mini pump/CO2 inflator | Tire reinflation |
| Tire levers | Remove/reinstall tires |
| Zip ties/duct tape | Emergency fixes |
For a deeper dive into what you should pack for your bike escapades, check out our bike tool kit essentials.
Master these on-trail tricks and pack your gear right, and you’ll be ready to handle most bike hiccups like a pro. For more insights and ‘how-tos,’ browse our emergency bike repair and bike repair guides.


