Bike Brakes Adjustment Basics
Importance of Proper Brake Adjustment
Getting those bike brakes just right is like having a trusty parachute—it’s all about safety. Well-adjusted brakes let you zip around confidently, bringing your ride to a swift stop when needed (Bike the Burg). Whether you’re flying down a mountain, cruising the streets, or pedaling to the office, knowing how to tweak your brakes is a handy trick every cyclist should have up their sleeve.
For those tackling bumpy hills or steep descents, brake tweaking becomes a real game-changer. Proper braking keeps those wild rides under control and avoids turning those brake pads to dust (Carvers Ski & Bike). Show your bike a little love and care regularly so it’s constantly ready for another epic adventure.
Tools Needed for Brake Adjustment
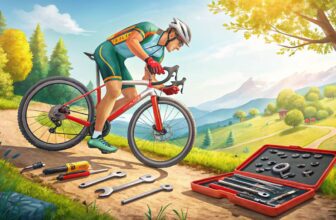
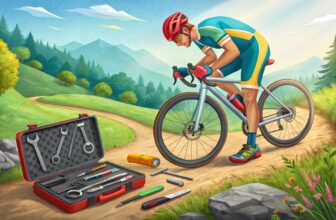
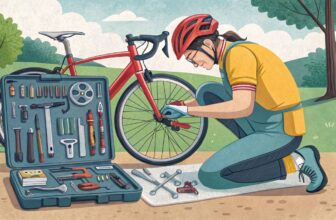
Getting your bike’s brakes adjusted needs the right gear. Depending on what kind of brakes are on your wheels, here’s what you’d usually grab:
- Hex Wrenches (Allen Keys): Never leave home without them! These little guys come in handy for most bike tweaks, especially in sizes like 4 mm, 5 mm, and 6 mm (Bicycles Stack Exchange).
- Torx Wrench: If your bike’s sporting those edgy Torx screws, a T25 wrench is your go-to.
- Screwdrivers: Be it flat-head or Phillips-head, you’ll want both in your toolkit.
- Cable Cutters: Need to snip those cables cleanly? A solid pair of cable cutters will do the trick.
- Needle-nose Pliers: Perfect for holding onto those brake cables while you fine-tune adjustments.
- Barrel Adjuster Tool: For that finesse touch in cable tension tweaks.
| Tool Type | Common Sizes/Details |
|---|---|
| Hex Wrenches (Allen Keys) | 4 mm, 5 mm, 6 mm Hex |
| Torx Wrench | T25 |
| Screwdrivers | Flat-head, Phillips-head |
| Cable Cutters | Sharp for clean cuts |
| Needle-Nose Pliers | Precision cable grip |
| Barrel Adjuster Tool | Cable tension finesse |
Keeping these gadgets in your trusty bike tool kit means you’re always ready to handle most brake tweaks like a pro. Want to gear up for chilly rides or solve certain bike mysteries? Don’t miss our sections on winter bike maintenance and bike repair guides.
Checking Brake Pads and Wheels
Getting your bike’s brakes in tip-top shape starts with making sure those brake pads and wheels are up to par. It’s a must for anyone keen on keeping their bike’s stopping power in check.
Assessing Brake Pad Condition
Keep an eye on your brake pads. It’s a must-do for every bike owner. Here’s what to look out for:
- Wear Lines: Most pads come with little lines that act as wear guides. If you’ve worn those down, time to swap them out with new ones.
- Pad Placement: Pads need to hug the rims right. If not, you’ll end up ruining both your pads and rims.
- Pad Surface: A shiny, crumbly pad? That’s a bad sign. Ditch those for fresh ones.
| Brake Pad Condition | Key Checkpoints | What To Do |
|---|---|---|
| Good/Brand New | Lines visible, not shiny | Keep as is |
| Curtains Down | No wear lines | Change them, pronto |
| Off-kilter | Not rim snuggled | Fix the alignment |
| Slicked Over | Glossy or stiff | Swap ‘em out |
Verifying Wheel Alignment
Straight wheels mean smooth brakes. Wonky wheels? Not so much. Here’s your checklist to keep things rolling:
- Center Stage: Ensure your wheels sit right within the dropouts (thanks, Bicycle Network):
- Crack open the quick-release or bolts holding your wheel.
- Jiggle the wheel side-to-side ‘til it’s centered.
- Snap it back tight.
- Wheel Wobble Watch: Spin your wheel and lurk for any shimmying. If it wiggles, you’ll need to sort that out. Check out our guide on wheel truing for the fix.
- Bolt Check: Got hydraulic disc brakes (lookin’ at you, BR-MT520 folk)? Make sure those bolts are tight and centered using a 5mm hex key (Bicycles Stack Exchange).
Pay attention to these tips, and your brakes should stay spot-on and safe. For more tips on bike care, cruise our guides like bike safety check, flat tire fixes, and all other bike fixes.
Addressing Common Brake Issues
Brakes—might not be the most exciting part of your bike, but they could be the most important. If the brake pads are misbehaving or the brakes just aren’t doing their job, it can make any ride a real pain. So let’s look at how you can keep everything running smoothly.
Fixing Dragging Brake Pads
Got brakes that drag more than your neighbor’s garden tools? This happens when the wheel’s a bit on the wonky side after putting things back together. Here’s how to sort that out:
- Check Wheel Alignment:
- Make sure the wheel’s sitting nice and cozy in the fork or frame.
- Loosen that skewer or those axle nuts.
- Jiggle things around until it’s centered.
- Tighten them back up like you’re sealing a pickle jar.
- Re-center Sidepull Brakes:
- Sometimes the brakes get a bit off-center too.
- Loosen the mounting bolt a smidge.
- Line up those brake arms so they look like they’re hugging the rim.
- Tighten the bolt again and check the alignment.
- Lubricate Pivot Points:
- Dry pivots are the sneaky culprits behind annoying dragging.
- Get some lubricant on those pivot bolts.
- Work the brakes like you’re testing a squeaky couch cushion.
Want more tips on pampering your brakes? Head over to our replace brake pads guide.
Resolving Braking Inefficiencies
If your brakes are more spongy than a kitchen sponge, it’s time to dive into some detective work. Frayed cables or worn-out components could be the villains here. Let’s fix it:
- Inspect Brake Cables:
- Take a good look—are any cables fraying like an old sweater?
- Swap out those damaged ones so your brakes run like a charm.
- Adjust Cable Tension:
- Getting that cable tension just right is the trick.
- Mess with the barrel adjusters:
- Counterclockwise for more tension.
- Clockwise to ease things up a bit.
- Lubricate Cables:
- Get cozy with those housing sections and reveal the cables.
- A little lubricant goes a long way.
- Make sure cables slide smoothly, like butter.
- Check Brake Pads and Rims:
- Worn or glazed brake pads? Toss ‘em and get some fresh ones.
- Clean the rims—they should sparkle, not stop your rides.
| Problem | Cause | Solution |
|---|---|---|
| Dragging Brake Pads | Misaligned wheel | Center the wheel in the fork or frame |
| Inefficient Braking | Dry cables | Lubricate cables and pivots |
| Binding Brakes | Dry pivot points | Apply lubricant to pivot points |
For a tune-up schedule, check out our bike maintenance schedule.
By tackling these hiccups, your biking experience transforms from “meh” to marvelous. Do more repairs or adjustments to make? Our full stack of bike repair guides is just a click away.
Adjusting Brake Components
Getting your bike’s brakes in tip-top shape is key to keeping you safe and sound on the road. We’re gonna walk you through some simple steps for getting those brake calipers just right and making sure the brake pads are in perfect harmony with the rims.
Fine-Tuning Brake Calipers
Brake calipers are the unsung heroes of your bike, squeezing the brake pads just right when you need to stop. Here’s how to get them playing nice:
- Get to know your calipers: Not every bike caliper is created equal. Some, like those fancy BR-MT520 hydraulic disc brakes, need a 5mm hex key to handle them. Before you start, make sure you’ve got the right tools in your tool belt.
- Center that caliper: Using a 5mm hex key, loosen those caliper mounting bolts. Now, squeeze the brake lever until the caliper lines up beautifully with the rotor. Keep holding that squeeze and tighten the bolts back up. Now, both brake pads get to play fair.
- Align and Test: Let go of the brake lever, give the wheel a whirl, and see how it spins. The caliper should be sitting pretty in the center with no annoying rubbing. Tweak it a bit until the rotor is spinning just right.
Aligning Brake Pads Properly
Good brake pad alignment means your bike stops on a dime and it helps your brake pads and rims last longer too. Here’s the lowdown on doing it right:
- Check your brake pads: If your pads are looking a bit shabby or uneven, it’s probably time for new ones. We’ve got easy peasy steps on how to replace brake pads right here.
- Get those pads loose: Use that trusty 5mm hex key and loosen up the bolts holding the pads snug.
- Perfect pad position: Line the pads up so they’re all snug against the rim and touch when you press the brake lever. Make sure they don’t rub against the tire or dangle too low.
- Give them a toe-in: Angle the pads a smidge so the front end kisses the rim first. This little tweak can hush that annoying squealing and make braking smoother than butter. Tighten ‘em up and make sure they’re locked and loaded.
| What You Need | Tool Box | How You Do It | Tips to Remember |
|---|---|---|---|
| Caliper | 5mm Hex Key | Center it with the Rotor | Keep those gaps even |
| Brake Pads | 5mm Hex Key | Make them Parallel with the Rim | Full contact is key |
| Barrel Adjusters | Hands/Tool | Set Tension Right | Might need extra fine-tuning |
- Brake test time: Give those levers a good squeeze and see how smoothly they hit the rims. If it’s a bit off, don’t worry—tweak it until it’s just right.
If you’re itching for more on keeping your bike fit and fabulous, swing by our guides on a bike maintenance schedule and bike tool kit essentials. Keeping your bike’s brakes in check means smooth rides whether you’re out for a spin or zipping through traffic on your daily commute.
Cable Tension Adjustments
Getting your bike to stop just right can make the difference between a smooth ride and a heart-pounding battle with the brakes. This part’s gonna break down how to mess with that cable tension so your brakes do their job without fuss.
Understanding Cable Tension
Okay, so cable tension is the secret sauce in making your bike brakes work. Too loose, and you’re squeezing that lever like it’s a stress ball, but ain’t much happening. Too tight, and you’re dragging those poor brake pads like a heavy backpack, slowing you more than you’d like.
Nail the sweet spot instead! When you grip the brake lever, it should catch about the width of a couple of fingers before it gets tough to pull.
Adjusting Barrel Adjusters
Barrel adjusters are your best buddies for dialing in cable tension. They perch right near the brake lever or brake caliper, serving as your tweak tool kit. Here’s how you put ‘em to work:
- Locate That Adjuster: Scout out the barrel adjuster. Usually, they’re hanging out where the cable meets the brake lever or chillin’ on the caliper.
- Feel Out the Cable: Pull that brake lever. Too easy? Too tough? Get ready to make things right.
- Turning Counterclockwise: Cables loosey-goosey? Spin the adjuster counterclockwise to tighten them up a bit. Bring those pads in closer and find that tension you’re after.
- Turning Clockwise: Cables feeling like a vise grip? Clockwise turns will loosen things up, giving those pads some breathing room.
- Time for Tweaking: Tinker with the tension until the lever’s about 3-4 cm from tough-guy status.
- Give It a Go: Try those brakes out. Squeeze that lever, and see if the pads are doing their thing right. If not, just go another round with adjustments.
| Brake Lever Engagement | Action Needed |
|---|---|
| Too tight (pads drag) | Turn the barrel adjuster counterclockwise |
| Too loose (lever touches handlebar) | Turn barrel adjuster counterclockwise |
| Just right (3-4 cm before tough to squeeze) | Chill, it’s all good |
Keeping your brakes in tip-top shape is just what the bike doctor ordered. A regular check can save you plenty of trouble down the line. Make sure those cables aren’t out of whack when doing your bike checkups. You can learn even more about making your ride safe by checking out guides on swapping brake pads and staying up to speed with bike fix-it tips.
Testing Brake Functionality
Good bike brakes are like your trusty safety net on the road. Giving them a once-over can save your skin.
Making Sure Your Brakes Do Their Job
Here’s a little checklist to make sure your bike brakes are working like a charm:
- Give Those Levers a Squeeze: Grab those brake levers with some gusto. You’re looking for smooth movement and steady pressure. Nobody likes frayed cables or wonky parts, right? If it feels like a bowl of spaghetti, it might be time to fix things up.
- Pad Connection Parade: Pop in and see if the brake pads are making even contact with the rim or rotor. Wacky alignment can mess up your braking and chew up your wheels. Those pads should tap the rim like they’ve practiced it for days.
- Cable Tension TLC: Peek at those cables. If they’re slacking, your brakes might not listen when you really need them to. Overly tight cables ain’t good either – hello, wheel drag! A few tweaks of the barrel adjusters and your cables will sing the right tune.
Testing Brakes Like a Pro
Once your initial check is done, time to take it up a notch and test your brakes in real time.
- Still As a Statue Brake Test: While standing still, squeeze each brake lever one at a time and try to push the bike forward. The bike shouldn’t budge if the brakes are in tip-top shape.
- Rolling Brake Adventure: Hop on the bike and pedal to a flat spot where cars aren’t buzzing around. Try both brakes separately at a decent speed to see how they feel. You want stopping power, but you don’t want an unexpected front-wheel somersault – so keep an eye on how the front brake reacts.
- Power House Brake Test: Get a buddy to ride and put some oomph into it, hitting those brakes hard. This rocks the bike back and forth and shows if the brakes can handle some heavy-duty action.
| Test Type | Steps | Outcome |
|---|---|---|
| Lever Squeeze | Squeeze brake levers firmly. | Look for brisk, consistent pressure. |
| Pad Contact | Expect no movement, proving the brakes work fine. | Pads should hit the center of the rim with even spacing (WikiHow). |
| Cable Tension | Adjust barrel adjusters if necessary. | Just-right tension for peppy brakes. |
| Stationary Test | Make sure pads contact the rim/rotor evenly. | See if the brakes can take some force. |
| Riding Test | Pedal and apply each brake on its own. | Expect controlled stops, no wheel skidding. |
| Braking Power | Sway the bike by pulling each brake. | Expect controlled stops, and no wheel skidding. |
Keeping your bike brakes in check not only helps you stop when you need to but also keeps you pedaling with peace of mind. For more tips or a full maintenance routine, swing by our bike maintenance schedule. Happy and safe riding!
Specific Brake Systems Adjustments
V-Brakes Adjustment Tips
V-brakes are awesome for power braking, giving you that “whoa!” moment when you really need it. Let’s get them working just right.
- Wheel Alignment Check: Make sure the wheel’s all lined up and spinning smoothly, like a well-oiled machine. If it’s crooked, your brakes won’t hit the mark evenly.
- Tighten or Loosen Cable Tension: Tweak the cable tension using that little barrel adjuster at the brake lever or caliper. Crank it to tighten or ease up to loosen until you get that “just-right” brake feel (Cycle Plan).
- Brake Pads Positioning: Check those brake pads! They should hug the rim nicely but keep off the tire. Get ’em squared up using the mounting bolts.
- Pad Fine-Tuning: Use the teeny tension screws on the brake arms for a bit of finesse. Balance both sides for a snappy grab on the rim (Bicycle Network).
| Adjustment Point | Tool Needed |
|---|---|
| Wheel Alignment | Nope |
| Cable Tension | Barrel Adjuster |
| Pad Placement | Allen Wrench |
| Fine-Tuning Tension | Screwdriver |
Check out how to fix a flat tire and other handy dandy bike repair guides.
Disc Brakes Adjustment Guidelines
Disc brakes bring their A-game in the rain and muck. Here’s how to keep them sharp.
- Rotor Alignment Check: Flip the bike or pop it on a stand, spin the wheel, and watch the rotor. It should glide by without wobbling or pad-rubbing.
- Caliper Adjustment: If there’s friction, time to adjust the caliper. Loosen its bolts with an Allen wrench, pinch the brake hard, and retighten those bolts (Cycle Plan).
- Inspect The Pads: Pads looking dicey? Swap ’em out so they press the rotor evenly.
- Caliper Fine-Tuning: If the rotor’s still sneakily touching pads, tweak the caliper position bit by bit with your eye. Aim for a smoothly spinning rotor (Bicycle Network).
| Adjustment Point | Tool Needed |
|---|---|
| Rotor Alignment | Nope |
| Caliper Adjustment | Allen Wrench |
| Pad Positioning | Allen Wrench |
| Fine-Tuning Alignment | Allen Wrench |
Peek at our articles about heat protectants for hair straightening or gather your bike tool kit essentials.
Regular brake tweaks mean safe, reliable riding. Know your brakes and you’ll stop on a dime. For more know-how on stuff like bike bearing maintenance or tackling bike noise issues, don’t miss our bike repair guides. Have fun riding!
Final Brake Adjustments
Getting your bike’s brakes just right isn’t rocket science, but it does require a keen eye and a little patience. Let’s roll through the final steps needed to make sure those brakes are your best friend when you need them the most.
Final Checks and Fine-Tuning
After you’ve dialed in the basic adjustments on the brake system, it’s time to dig a bit deeper. Make sure everything’s running smoothly and ready for adventure.
- Brake Lever Response: Squeeze the brake lever. You’re looking for it to move about 3-4 centimeters before the brakes kick in. If it feels like you’re wrestling with a bear or playing an accordion, more tweaking is required.
- Cable Tension: Not feeling the tension? Give the barrel adjuster at the caliper a twist to find that sweet spot.
- Pad Alignment: Peek at those brake pads. They should hug the rim or disc evenly. If they’re playing favorites or throwing a tantrum when untouched, it’s time for an attitude adjustment.
- Brake Pad Wear: Take a gander at the brake pads. If they look uneven or more battered than your knees after a tumble, it might be time to swap them out.
| Checkpoint | You’re Looking For |
|---|---|
| Brake Lever Response | Moves about 3-4 cm before brakes engage |
| Cable Tension | Just right with a barrel twist |
| Pad Alignment | Pads give a fair and square hug to the rim/disc |
| Brake Pad Wear | Pads wear evenly, replace if they’re looking too sad |
Importance of Regular Brake Maintenance
Keeping your brakes in check isn’t just good practice; it’s your ticket to a smooth, safe ride. Here’s why keeping brakes on your maintenance radar makes you the Einstein of bike care:
- Safety: Good brakes are your safety net. Regular check-ups save you from those “Oh, no!” moments.
- Performance: A well-maintained brake system is like having a superpower: control and seamless rides every time.
- Longevity: Loving your brakes as they should be loved means stretching out their life and saving cash on costly fixes.
Wanna keep your bike purring like a kitten? Check these out:
- Bike tool kit essentials
- Bike bearing care
- Chilly weather bike care
- Choice bike cleaning products
In the game of bikes, consistency wins. Stick to your bike’s own maintenance rules and refer to our handy repair guides for step-by-step walk-throughs.


