Imagine cruising down your favorite trail or city street, the wind in your hair, when suddenly—flat tire panic!
Flat tires can derail your ride plans and dampen your biking spirit. But fear not! Whether you’re a seasoned cyclist or a weekend warrior, mastering the art of preventing and fixing flat tires is essential for uninterrupted adventures.
In this guide, we’ll unveil expert strategies and practical tips to keep your wheels spinning smoothly. Say goodbye to unexpected stops and hello to seamless, enjoyable rides every time you hit the road or trail.
Preventing Flat Tires
Avoiding Road Hazards
So here’s the deal, dodging stuff like potholes, nails, sharp rocks, and glass is pretty much your best friend if you hate dealing with flat tires as much as we do. Staying away from sketchy construction zones and bumpy roads can seriously save you some headaches and possibly your Saturday morning bike ride plans. If you’re all about mastering the art of keeping your bike in shape, have a look at our bike maintenance schedule.
Now, picture this: cruising down the road, minding your own business, then bam! Rough terrains, cracks, potholes, and surprise debris parties can mess up your rims and tubes faster than you can say “flat tire.” So, do your tires a favor—keep out of road trouble and they’ll stick around longer.
Checking Tire Pressure Regularly
Guess what? Keeping your tires at the right pressure is like telling flat tires to take a hike. Seriously, just whip out that trusty tire pressure gauge at least once a month and check in with your tires. Your wallet will thank you since proper pressure means your tires can go the distance without any drama—plus your fuel efficiency gets a nice boost. Wanna become an expert? Our bike tire pressure guide is calling your name.
Let’s make it simple: tires are like Goldilocks—not too soft, not too hard. Check your owner’s manual or that shiny tire pressure sticker for the sweet spot. Inflate ’em right, and you can say goodbye to unnecessary wear and risky roads.
| Tire Type | Recommended Pressure (psi) |
|---|---|
| Road Bike | 80-130 |
| Mountain Bike | 30-50 |
| Hybrid | 50-70 |
| E-bike | Ask your bike manufacturer |
Keep an eye on that pressure if you want smooth rides and zero mishaps. Got a bike snafu? Our bike repair guides might just be your new favorite bookmark.
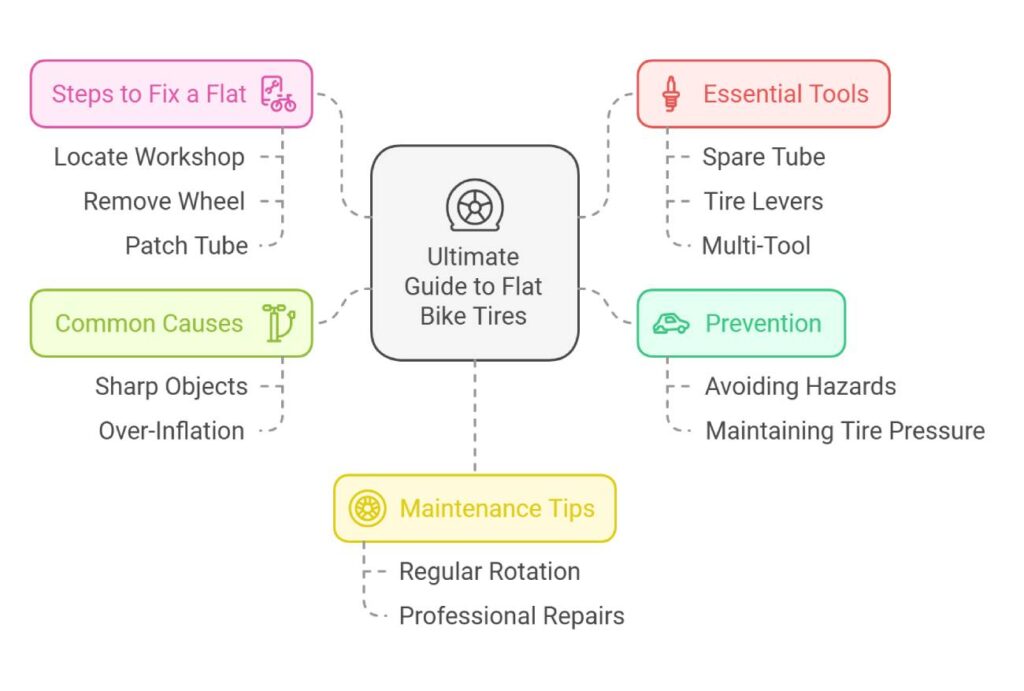
Common Causes of Flat Tires
Wanna know what might leave you stranded with a flat tire? Let’s spill the beans. Flat tires often sneak up on folks, and figuring out why can help dodge them and keep you rollin’ smooth. Two main culprits: sharp stuff and going all-in on the air pump.
Sharp Objects
Sharp objects, like bits of glass, nails, and those pesky thorns, are the sneaky troublemakers who love to punch holes in your tires. Pedal over something sharp on the road or trail and BAM! Flat tires. Keep your eyes peeled and steer around spots packed with debris, like road shoulders and intersections, to sidestep these tire terrors.
If you’re interested, here’s a link to more ways to keep your ride in check: bike safety check.
| Type of Sharp Object | How Often They’re Guilty |
|---|---|
| Glass shards | Often |
| Nails and screws | Sometimes |
| Thorns | Rarely |
Over-pumped Tires
Now, let’s chat about over-pumping. It’s tempting to think more air makes your ride feel better, but it can stretch your tire too thin, setting the stage for an unexpected kaboom. Check your tire’s sidewalls for the sweet spot on pressure to avoid accidental over-pumping.
Get the lowdown on tire pressure with this handy guide: bike tire pressure guide.
| Tire Type | Recommended Pressure (PSI) |
|---|---|
| Road Bike | 80 – 130 |
| Mountain Bike | 30 – 50 |
| Hybrid Bike | 50 – 70 |
For those who like to DIY and save a buck, keeping those tires filled just right and dodging sharp stuff is your ticket to avoiding flats. Toss in some regular tire checks into your bike maintenance schedule for good measure and to stay ahead of flat surprises.
Need tools for a quick fix-up? Check out: bike tool kit essentials.
Tire Maintenance Tips
Keep those bike tires in tip-top shape to dodge those annoying flats and ride smooth like butter. Here’s some scoop on basic upkeep like flipping tires now and then and getting those sneaky leaks checked by a pro.
Rotating Tires Regularly
Giving your bike tires a spin—a switcheroo—could save ’em from wearing out faster than Netflix seasons. Keeping the wear even means less chance of flats and more miles to grin. Stick to what the folks who made your tires say on how often they need rotating.
| How Often to Rotate | Do It Here |
|---|---|
| Road Bikes | Every 1,000 miles |
| Mountain Bikes | Between 500 and 1,000 miles |
| E-Bikes | Every 500 miles |
Swing by your local bike shop, and while they’re at it, they’ll give ’em a once-over to spot any nasty surprises lurking around. Catching stuff early means fewer flat tires messing up your vibe. Want the full scoop? Take a gander at our piece on bike tire rotation.
Professional Repairs for Slow Leaks
If you’ve got a slow-leaking tire, it can be more annoying than a mosquito—plus a real flat-out party crasher if ignored. Spot a twilight leak? Quick, snap! Please take it to the pro shop. Patch kits are like band-aids—okay for now, but a solid fix needs an expert touch.
| Leak Source | Fix-it Options |
|---|---|
| Small Holes | Patch it or get a fresh inner tube |
| Valve Shenanigans | Swap the valve out |
| Tire Rim Issues | Professional eyeball and replacement if needed |
Sometimes the problem’s more layered, and a simple patch won’t hack it. You might need a whole wheel swap. Letting pros handle it not only tackles the leak but keeps the wheel’s mojo intact. Thirsty for more knowledge? Peek at our bike repair guides.
Stick to these nifty tire tricks, and you’ll pedal with peace, and chalk up more miles without tire tantrums. Keep those wheels wear-free with regular spinning and get sneaky leaks sorted by the pros—because biking is meant to be a joyride, not a roadside sob story.
Causes of Bike Tire Flats
Getting a flat tire on a bicycle is like stepping on a Lego barefoot—it’s a pain nobody wants. Knowing what causes these pesky flats can help you steer clear of trouble and keep your rides rolling just fine.
Spoke Issues
Those sneaky spokes can be troublemakers. If they’re poking a little too much into the scene, they might just jab a hole in your tire tube. And voilà, you’ve got a leak on your hands. Spokes should be checked often to avoid this mess.
If you notice holes on the inside rim part of your tube, blame those cheeky spokes! They might be jutting out and slicing into your tire’s inner peace. Better give them a file-down or wrap them up with some rim tape to avoid any more drama.
| Problem | Culprit | Fix It |
|---|---|---|
| Hole on rim side | Long or sharp spokes | File and tape those ends |
| Too many flats | Spoke damage | Regular check-ups |
Tire Wear and Tear
Tires grow old too, and when they go gray, they start inviting trouble. Worn-out or wobbly tires are like an open invitation for sharp objects to come over and wreck things. Make it a habit to check your rubber for signs of aging. If it’s looking wrinkled or faded, or not gripping the wheel tight, it’s time to swap in a fresh tire. Curious about more tire TLC techniques? There’s a whole bike tire rotation guide waiting for you.
| Tire Talk | Watch Out For | What To Do |
|---|---|---|
| Worn tires | Stretchy or slow rebound | Switch them out |
| Cracked/Faded | Looks tired | New tire time |
| Loose tire | Wiggles instead of fits snug | Tweak or replace |
Keeping up with tire TLC can keep flats at bay. Regular tire check-ups for wear will save you from the headache of sudden flats and make sure you cruise smoothly. Dive into our bike maintenance schedule and have a shiny chain with our chain cleaning tips!
Key Steps to Fixing a Flat Tire
Dealing with a flat tire is as inevitable as a cat chasing a laser – it’s gonna happen! But with the right know-how and a pinch of confidence, you’ll handle it like a pro. Read on to get rolling on the road again without any drama.
Locating a Repair Workshop
Okay, so you’re not really in the mood to play mechanic today. No shame in that! Sometimes, calling in the experts is the way to go, especially if you’re stuck with a tricky tire issue. A great bike shop is like finding the holy grail of cycling support; they get you riding in no time.
Here’s how you can snag the best help:
- Surf through online reviews—real folks sharing real experiences.
- Chat with fellow riders or local biking squads for shop tips.
- Seek out places with handy services like tire swapping and making wheels nice and balanced (check out wheel truing while you’re at it).
Having a dependable repair spot in your contacts list is like having a superhero at your beck and call—swift and stress-busting!
Removing and Reinstalling the Wheel
The moment of truth: The wheel’s off, fix the flat, and get it back on. Sounds tough? Nah, let’s break it down:
- Gather Tools: Get your gear together: tire levers, spare tube, pump or CO2 inflator, and a multi-tool. Need the low-down on gear? Head over to our bike tool kit essentials.
- Detach the Wheel:
- For rear tires, get the chain all friendly with the smallest cog.
- Pop the quick release lever loose or use your friendly wrench on those axle nuts.
- Hoist that bike and let the wheel shimmy free.
- Remove the Tire:
- Leverage those tire levers to get one side loose.
- Let your inner circle-solver shine as you remove the tube.
- Check and Replace:
- Do sharp nasties inside the tire? Boot ’em out with a thorough check.
- New tube in? Partially inflate and align like a pro.
- Reinstall the Tire:
- Loop one side of the tire back into its cozy rim spot.
- Make sure the tube isn’t awkwardly squished.
- Use those trusty levers to seal it back on tight.
- Reattach the Wheel:
- Slide that wheel back to its family – the fork or frame.
- Lock it in tight with the lever or nuts. Ensure it’s not playing off-center.
- Inflate the Tire:
- Pump it up to that sweet spot PSI. Need numbers? Hit the bike tire pressure guide.
- Smooth out any funky bits for a stellar spin.
Here’s a pressure cheat sheet so you’re not sweating the small stuff mid-pump session:
| Tire Type | Recommended PSI |
|---|---|
| Road Bike Tire | 80-130 |
| Mountain Bike Tire | 30-50 |
| Hybrid Bike Tire | 50-70 |
Rookies, keep those tools close for ahh-snap moments with emergency repairs. Take a look at our true bike wheel for more tips on wheel love. Before you know it, you’ll be a flat-tire ninja, cruising along like nothing can stop you. Now go ride like the wind!
Repairing the Tube
Fixing a flat bike tire isn’t just for the gearheads—any rider should be ready for this classic pit stop fix. Making sure that a mangled tube doesn’t put your ride on ice is easier than you think. We’ve got the play-by-play on how to spot and patch up any issues.
Inspecting for Damage
You don’t want to slap a patch on without knowing what you’re dealing with. Start with a really good scope-out of not only the tube but also the tire and the gizmos like the valve and rim. Here’s how to get started:
- Take Out the Tube: Gently pry that tube out of the tire.
- Give It Some Air: Pump it up just a hair so you can zero in on the puncture.
- Listen In: Move the tube around like you’re tuning a radio and listen for the hiss.
- Dunk Test: Dunk that tube in a bucket of water and watch for bubbles to ID the leaky spot.
- Mark the Spot: Found it? Mark it with a pen, pencil, or that piece of chalk you’ve been keeping in the garage for years.
- Check the Scene: Raid the tire’s innards for anything sharp and make sure the rim’s not a silent accomplice with those sneak attack rough spots.
Heads up: If the tube is more patchwork than a tire at this point, it might be time to call it quits and grab a new one.
Patching Techniques
Here’s the lowdown on getting that tube back in action using a patching kit that would make MacGyver proud. Just follow along:
- Scrub-a-Dub: Clean the puncture area with some elbow grease and rough it up a bit with a tad bit of sandpaper to get things sticky.
- Glue it: Spread a thin layer of glue right where you need it—don’t go crazy here, just enough.
- Give It a Minute: Let the glue get a bit tacky—the perfect time for a quick breather.
- Patch It Up: Slap that patch on the crime scene and hold it like you mean it.
- Clincher Grip: Push down hard and make sure it sticks.
- Test the Waters Again: Pop a bit of air back into the tube, stir it back into the water, and check your handiwork for any sneaky air leaks trying to weasel through.
| Tool | What It’s For |
|---|---|
| Sandpaper | Gets the area prepped for glue action |
| Glue | The sticky stuff that makes everything stay put |
| Patch | Closes up the leak like it never existed |
Thinking about how to handle flats on the fly? Check out our emergency bike repair guide for those quick fixes when you’re out and about. Keeping an eye on your tire pressure and shaking up your tire rotation (bike tire rotation) can stop flats before they start. For all sorts of tips on keeping that bike in primo shape, dive into our bike repair guides.
Reinstalling the Wheel
So, you’ve tackled the bike tube fix, and now comes the grand finale: popping that wheel back on! Follow these easy tips to install the tube and get the tire inflated and adjusted properly.
Tube Installation Steps
1. Get Some Air in the Tube
- Give the tube a little puff before it goes into the tire. Makes it easier to squeeze in and helps avoid that dreaded pinch.
2. Line Up the Valve Stem
- Start by fitting one side of the tire onto the rim. Then, poke the valve stem through its little hole, making sure it stands nice and straight.
3. Nestle the Tube Inside the Tire
- Nestle the tube right inside, spreading it out evenly without any twisty surprises.
4. Slide the Tire onto the Rim
- Starting from the valve stem, tuck the tire bead back onto the rim. Rotating the wheel, use your thumbs to convince the tire bead into place, always watching to make sure no tube gets trapped.
5. No Tube Pinches Allowed!
- A quick check to make sure the tube isn’t stuck between the tire and rim. If you spot any trouble, adjust things gently.
Proper Inflation and Adjustment
1. Pump It Up!
- Inflate to the right pressure, often scribbled on the tire’s side. For precision, a pump with a pressure gauge is your best buddy here.
| Tire Type | Recommended Pressure (psi) |
|---|---|
| Road | 80 – 130 |
| Mountain | 30 – 50 |
| Hybrid | 50 – 70 |
2. Check the Spin
- Spin the wheel, checking for any wild wiggles. Make sure everything’s sitting nice and even on the rim.
3. Lock That Wheel In
- Do you have a quick-release wheel? Pop it in the frame and clamp that lever tight. If bolts are your game, reattach them nice and snug, centering that wheel as you go.
In case things get sticky or you need backup, our emergency bike repair guide is there to help. And, having a proper bike tool kit handy can speed things up.
By following these pointers, you’ll have your bike road-ready in no time, whether you’re commuting, racing, or just enjoying a weekend spin. For more bike TLC tips, check out our bike repair guides.
Essential Tools for Flat Tire Repair
Nobody plans for a flat tire, but having the right gear can save your day when out cruising on two wheels. Whether you’re a weekend escapist, a daily pedaler, or a helmet-donning speedster, being prepped for a flat makes life easier. Here’s the lowdown on what every cyclist oughta have for those pesky tire troubles.
Spare Tube and Repair Kit
Think of these as your tire’s first aid kit. A spare tube can be your best bud when your bike decides to go flat on you. Whatever tube you pick, just make sure it’s the right size for your tire to avoid any awkward moments later.
| What You Need | What It Does |
|---|---|
| Spare Tube | Swaps out a busted or poked inner tube |
| Repair Kit | Features patches, glue, and sandpaper for minor boo-boos |
For little punctures not worth a full tube swap, a repair kit gets the job done. Usually packing patches, a dab of glue, and sandpaper, this kit lets you patch up holes in a pinch. Need more advice on putting together your perfect kit? Check out our guide on bike tool kit essentials.
Multi-Tool and Tire Levers
If Batman rode bikes, he’d definitely have a multi-tool. This ingenious gadget crams all sorts of tools—like hex wrenches, screwdrivers, and the infamous spoke wrench—into one neat package. It’s like a Swiss Army knife for bike folks. To see what tops our list, click best bike multi tools.
| What You Need | What It Does |
|---|---|
| Multi-Tool | Offers a suite of tools for speedy fixes and tweaks |
| Tire Levers | Pops the tire off the wheel hassle-free, sparing your fingers |
Then there’s the underdog hero: tire levers. These little guys help you pry the tire off the wheel like it’s no biggie, so you can fix up the tube without turning the whole thing into a mess. Typically, two do the trick to wrangle a stubborn tire away from the rim.
Got these set? You’re golden. You’ll be back on the road faster than a biker chugging down an energy drink. For more breakdowns on fixing flats and keeping your ride in shape, peek at our bike maintenance schedule and emergency bike repair guide.
In a nutshell, having essentials like a spare tube, repair kit, multi-tool, and tire levers is key for any cyclist. These goodies keep you ready for flat surprises and help ensure a smooth ride. For deeper dives into bike care, like learning how to true those wheels or tighten up the brakes, swing by our extensive bike repair guides.
Conclusion
Dealing with flat tires doesn’t have to be a dreaded experience that sidelines your biking adventures. By implementing proactive strategies like avoiding hazardous terrains and maintaining optimal tire pressure, you can significantly reduce the chances of encountering flats.
Understanding the common causes, such as sharp objects and over-inflation, empowers you to take preventative actions effectively. Regular maintenance, including tire rotation and timely professional repairs, ensures your bike remains in peak condition, enhancing both performance and safety.
When flats do occur, having the right tools and knowledge to fix them swiftly is invaluable. Whether you choose to tackle the repair yourself or seek professional assistance, being prepared means less downtime and more time enjoying the ride.
Remember, a well-maintained bike not only prolongs the life of your tires but also enhances your overall cycling experience. Embrace these tips and techniques to keep your journeys smooth, enjoyable, and free from the frustration of unexpected flat tires.
Ride on with confidence, knowing you’re equipped to handle any tire trouble that comes your way!
FAQs
How often should I check my bike tire pressure?
Aim to check your tire pressure at least once a month and before every long ride to ensure optimal performance and prevent flats.
What tools are essential for fixing a flat tire?
A basic bike repair kit should include spare tubes, tire levers, a multi-tool, a pump or CO2 inflator, and patches for minor repairs.
Can I prevent flat tires by using different types of tires?
Yes, selecting tires suited to your riding conditions—like puncture-resistant tires for rough terrains—can significantly reduce the likelihood of flats.
What should I do if I frequently get flats in the same spot?
Inspect your tires and rims for damage, ensure proper alignment, and consider using rim tape or spoke protectors to prevent repeated punctures.
Is it better to repair a flat tire or replace the tube?
For small punctures, patching the tube is a cost-effective solution. However, if the tube is extensively damaged, replacing it is the safer option.
Final Thoughts
Flat tires are an inevitable part of biking, but they don’t have to ruin your rides. By taking proactive steps to prevent flats and equipping yourself with the right tools and knowledge to fix them, you ensure that your cycling experiences remain enjoyable and uninterrupted.
Regular maintenance not only prolongs the life of your tires but also enhances your bike’s overall performance and safety. Embrace the tips and strategies outlined in this guide to become a more confident and prepared cyclist.
Remember, every challenge on the road is an opportunity to learn and grow.
Keep pedaling, stay prepared, and enjoy the countless adventures that await you on two wheels!
Key Tips Around Flat Tire Prevention & Repair
- Regularly Inspect Tires: Look for wear and tear, embedded debris, and proper inflation before each ride.
- Maintain Correct Tire Pressure: Use a reliable gauge to ensure your tires are inflated to the manufacturer’s recommended PSI.
- Choose the Right Tires: Select tires appropriate for your terrain to minimize the risk of punctures.
- Carry Essential Tools: Always have a spare tube, tire levers, a pump, and a multi-tool in your bike kit.
- Rotate Tires Periodically: This promotes even wear and extends the lifespan of your tires.
- Avoid Hazardous Areas: Steer clear of roads with heavy debris, potholes, and sharp objects when possible.
- Learn Basic Repair Skills: Being able to fix a flat on the go can save you time and frustration.
Recommended Biking Products and Accessories
- Spare Tubes:
- Schwalbe SV15 Road Tubes – Durable and easy to install, ideal for road bikes.
- Continental Race X Road Tubes – High-performance tubes designed for long-distance cycling.
- Bike Repair Kits:
- Park Tool AK-5 Advanced Mechanic Tool Kit – Comprehensive kit for various bike repairs.
- Topeak Mini 20 Repair Kit – Compact kit including patches, glue, and tire levers.
- Tire Levers:
- Pedro’s Tire Levers – Sturdy and reliable, perfect for quick tire removals.
- Park Tool TL-1 Tire Levers – Lightweight and easy to use for all tire types.
- Multi-Tools:
- Crankbrothers M19 Multi-Tool – Versatile tool with 19 functions for on-the-go fixes.
- Lezyne RAP-21 Multi-Tool – Compact and durable with essential tools for bike maintenance.
- Portable Pumps:
- Lezyne Pressure Drive Portable Floor Pump – High-pressure pump with a built-in gauge.
- Topeak Road Morph G Mini Pump – Lightweight and efficient for road biking needs.
- Patch Kits:
- Park Tool GP-2 Patch Kit – Reliable patches and glue for durable repairs.
- Vittoria Tire Repair Kit – Comprehensive kit with all necessary materials for tube patches.
- Rim Tape:
- Stan’s NoTubes Rim Tape – Protects inner tubes from spoke holes and rim edges.
- Planet Bike Rim Tape – Durable tape available in various widths for different rims.
- CO2 Inflators:
- Pro Bike Tool Mini CO2 Inflator – Quick and easy inflation solution for emergencies.
- Lezyne Fabric Drive CO2 Inflator – Compact and efficient for rapid tire inflation.
- Chain Tools:
- Park Tool CT-3.3 Chain Tool – Essential for repairing and maintaining your bike chain.
- Topeak Defender Chain Tool – Durable and easy to use for on-the-go chain fixes.
- Bike Lock Repair Kits:
- Master Lock Repair Kit – Keep your bike secure with essential lock repair tools.
- ABUS Lock Fix Kit – Comprehensive tools for maintaining your ABUS bike lock.
By integrating these elements, your article will not only provide valuable information to your readers but also enhance engagement and SEO performance, driving more traffic to MyBikeReview.com.

