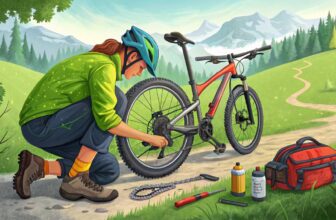
Cycling isn’t just a mode of transport—it’s a lifestyle that offers freedom, fitness, and fun. Whether you’re navigating bustling city streets or exploring serene trails on weekends, ensuring your bike is in top-notch condition is essential.
Imagine gliding smoothly without unexpected hiccups or mishaps disrupting your ride. This guide is your ultimate guide to mastering bike maintenance.
From checking tire pressure to fine-tuning your gears, we’ve got you covered with easy-to-follow tips that keep your two-wheeled companion reliable and safe for every adventure. Let’s pedal towards safer, smoother rides together!
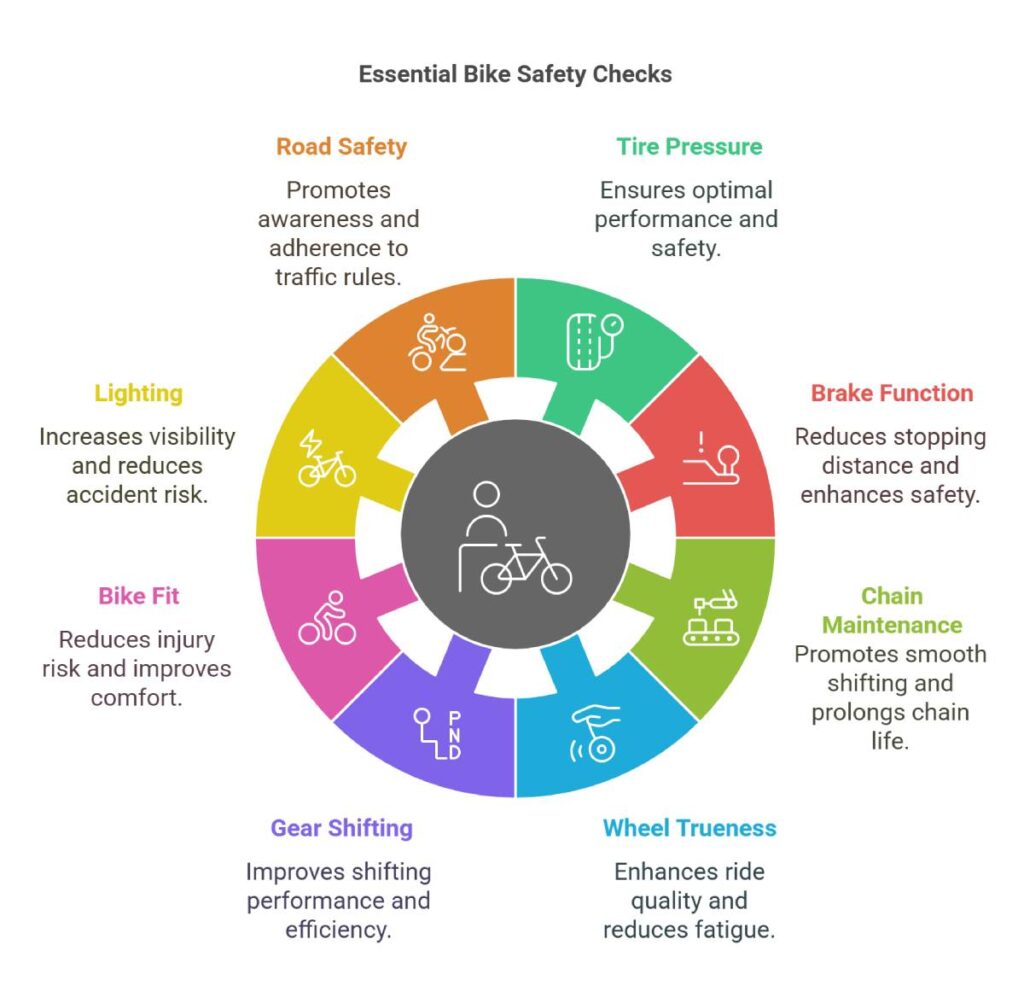
Bike Safety Check Basics
Importance of Regular Checks
Whether you’re the type to pedal to work each day or just scoot around on weekends, giving your bike a regular check-over is a no-brainer. We’re talking about keeping all those nuts and bolts in top shape to dodge any nasty spills and to get the most out of your two-wheeled adventure.
Not only will it keep mishaps at bay, but it’ll also save you some cash by stretching out the life of your bike parts. And for those racing folks? Well, this is your ticket to keeping every spin of those wheels smooth and fast.
The ABC Bike Check
There’s a nifty little reminder for a quick bike safety check: the ABC Bike Check. Before rolling out, remember to check your Air, Brakes, and Chain. Let’s break it down so you have the know-how on each part:
Air
Getting the tire pressure right is key to riding safely and smoothly. If your tires are feeling flat, it’ll be like pedaling through mud, and if they’re too pumped up, you might be one pothole away from a nasty pop. Use a trusty pressure gauge to hit the sweet spot listed on the tire side. Here’s a quick look at the numbers:
| Tire Type | Recommended PSI |
|---|---|
| Road Bike | 80-130 |
| Mountain Bike | 30-50 |
| Hybrid Bike | 50-70 |
Brakes
Brakes—they’re the real MVPs of bike safety. Squeeze those levers and make sure the brake pads are greeting the rim or disc with just the right touch. A good set of brakes stops the bike lickety-split. A gentle shove while you apply each brake will show you if they’re up to snuff.
Chain
Keeping your chain in ship-shape means easier pedaling and less wear and tear on all the gears and gadgets. Look out for any rust or junk messing with your chain’s mojo—you want a clean, well-oiled beast here. Regular cleanings and lubes will make it happy. Dig into our chain cleaning guide if you need detailed steps.
By making the ABC Bike Check part of your routine, you’ll be riding safer and happier. For more details on how to keep your bike purring, take a peek at our bike maintenance schedule.
Tire and Wheel Inspection
Peeking under the hood—or rather, under the chain—of your trusty bike means giving those tires and wheels a good once-over. This is where you can really get a glimpse of how your wheels are spinning and ready them for all the adventures ahead. Let’s dig into the need-to-know steps, like checking tire pressure, spotting wear, and perfecting wheel alignment, so you stay steady and secure on the road.
Tire Inflation and Wear
Picture this: You’re cruising down the street with just the right amount of air cushioning your ride—sounds dreamy, right? That’s the beauty of nailing the right tire pressure.
Having your tires filled to that sweet spot not only saves you from the dreaded flat but also kicks up your ride quality. Look for the pressure info right along the tire’s edge (handy, huh?). It’s also key to jot some love notes in the form of frequent checks for cracks or gnarly wear.
| Tire Type | Recommended Pressure (psi) |
|---|---|
| Road Bike | 80 – 130 |
| Mountain Bike | 30 – 50 |
| Hybrid Bike | 50 – 70 |
Regular tire peeks are your best friends to spot any stray stuff stuck in them that could turn into a flat waiting to happen (pokey rocks and nails, we’re looking at you). If you find a tire flirting with disaster—like major wear or cracks—it’s time to show it the door and get a new one. For more scoop, swing by our bike tire pressure guide.
Wheel Truing and Cracks
Ever noticed your bike doing the cha-cha as you ride? That might mean your wheel needs a little help getting back in line. This is where wheel truing steps in—making sure things roll as they should. If your wheel is doing the hokey-pokey (wobbling or swaying), time to give it some TLC in the form of trying.
Here’s how to get the wheels back to behaving:
- Secure the bike on a truing stand.
- Give the wheel a spin and watch for any wobbles that shouldn’t be there.
- Adjust those spokes just right with a spoke wrench until the spin is smooth as a buttered-up pancake.
And don’t shy away from peering at the rims. Any cracks or wonky spots there are safety risks, so get those switched out pronto. For all the nitty-gritty, swing by our guides on true bike wheel and bike spoke maintenance.
Keeping your tires pumped and wheels straight isn’t just about the smooth ride—it’s your ticket to top-notch bike safety. Feel the need for more bike tweaks? Check out our guides on bike maintenance schedules and the best bike cleaning products. Keep rolling smooth!
Brake Testing
Brake testing is the backbone of any solid bike safety check. Ensuring both front and rear brakes are shipshape is what keeps riders from hair-raising stops or worse, a tangle with the pavement.
Front Brake Assessment
Give the front brake a once-over, and then a good ol’ squeeze test.
Visual Inspection:
- Peek at the brake pads. If they’re looking skinny, it’s time for a swap.
- Scope out the brake cable for any fringe or rust. Check out our bike cable maintenance guide if stuff’s looking dicey.
- Make sure the calipers aren’t sticking.
Functional Test:
- Stand next to your trusty ride and give the front brake lever a good tug. Pads should hug the rim or rotor tight.
- Give the bike a little push forward to see if it stops on a dime.
Keep an eye on these parts often, that way your front brake stays as sharp as ever. For the lowdown on tinkering, take a look at adjust bike brakes.
| Checkpoint | What to Spot | Fix It |
|---|---|---|
| Brake Pads | Worn Out | Swap them out |
| Brake Cables | Fraying/Rusty | Swap cables |
| Brake Calipers | Sticky | Grease or tweak them |
Rear Brake Assessment
Same deal with the rear brake—check it out and give it a whirl.
Visual Inspection:
- Check if the brake pads have seen better days and change ’em if needed.
- Give the brake cable a once-over for any frayed or rusty bits.
- Make sure the caliper’s not giving you any grief.
Functional Test:
- Tug on the rear brake lever. The pads should grab that rim or rotor like it’s going out of style.
- Try to push the bike—the rear wheel should be stuck solid, showing the brakes on the job.
Rear brakes that are on point are your ticket to smooth stops, especially when you’re zooming down those hills. Follow up with regular touch-ups or changes using our guide on replace brake pads.
| Checkpoint | What to Spot | Fix It |
|---|---|---|
| Brake Pads | Worn Out | Swap them out |
| Brake Cables | Damaged | Swap cables |
| Brake Calipers | Sticky | Grease or tweak them |
Getting both front and rear brakes in peak condition is a major part of ensuring bike safety. They should grab when needed and not put up a fuss. Just ask the folks at REI. Regular brake checks are your best friend for making sure you and your bike stick together through thick and thin. For more details on brake adjustments, hit up our adjust bike brakes guide.
Chain and Gear Examination
You can’t ignore the vital task of checking your bike’s chain and gears if you’re looking to pedal smoothly and keep your trusty two-wheeler in tip-top shape. It’s like giving your bike a hug it didn’t know it needed!
Chain Lubrication
When it comes to showing some love to your bike, lubing up that chain is your top move. Make it an easy roll and extend the life of the whirring bits and bobs, known as the drivetrain stuff—yep, I’m talking chainrings, rear cassette, and derailleur. Grab some bike-specific goo, slap it on, and kiss most of that friction goodbye, ensuring a ride as smooth as butter on a hot pancake.
If you’re the DIY kind or bike to work more often than you grab a taxi, you know skimping on lube is a big no-no. Without it, expect creaks, groans, and sad wear and tear.
| Maintenance Task | How Often Should You? | Gear Up With: |
|---|---|---|
| Chain Lubing | Every 100-150 miles | Best bike lubricants |
| Cleaning that Chain | Monthly | Best bike cleaning products |
For true blue bike buffs, take a peek at how to clean a bike chain like a pro.
Gear Shifting Performance
Wanna keep your bike’s gearbox happy? The performance checks are your friends! Smooth gear transition ain’t just for the pros—it’s an every rider mantra. So whether you’re coasting on a weekend or fighting for the podium, make sure to prop up the chainrings, cassette, and derailleurs whenever you can.
Things to do to keep that gear shifting sweet:
- Shift through each gear; if it’s clunky, you have work to do!
- Peek at the derailleur and ensure it’s aligned like a pro.
- Feel those cables—are they tight? Loose? Just right?
If your gears aren’t playing nice, it’s likely time for an adjustment or some TLC. Worn-out stuff or slack cables can muck things up. Regularly giving those bike cables a once-over can save a heap of trouble.
| Gear Shifting Task | When to Tackle It | Gear It Up With: |
|---|---|---|
| Test Gear Shifting | Every week | – |
| Tweak Derailleur | When it’s misbehaving | Bike tool kit essentials |
| Check Cable Tension | Every month | Bike cable maintenance |
Craving more wisdom? Learn about bike gear indexing to keep those gears singing sweetly through ups, downs, and straightaways.
Keeping a regular schedule of chain lubing and gear checks means happier rides and longer-lasting bike parts. Whether you’re a newbie or tearing up tracks on an e-bike, let regular maintenance be your best pal. Dive deeper into our stash of bike repair secrets for more juicy tips.
Frame and Component Evaluation
When you’re giving your bike the once-over for safety, it’s like a health checkup – you gotta poke and prod a bit. This section is all about making sure the crank arms and the body of your two-wheeler are rock-solid and ready to roll.
Crank Arm Tightness
Keeping those crank arms good and tight is like making sure your shoelaces are tied. A loose crank arm? It’s an accident waiting to happen!
How to keep ’em snug:
- Eyeball It: Look closely to see if the crank arms are hugging the bottom bracket as they should.
- Give It a Shake: A gentle wiggle is all it takes. If they budge, it’s wrench time.
- Torque Wrench Time: Grab that magic wrench and tighten the crank bolts as per the manufacturer’s settings. Check out our bike bolt torque specs guide for the numbers.
| Checkpoint | Action Required |
|---|---|
| Crank Arm Alignment | Check if they’re kissing the bottom bracket right |
| Movement Test | Give ’em a wiggle to see if they’re loosey-goosey |
| Torque Check | Tighten bolts to manufacturer’s orders |
More on crank arm upkeep can be found in our bike crankset installation guide.
Frame and Wheel Integrity
Just like bones in our bodies, the bike frame and wheels keep the whole thing together. Any cracks or bends need attention like pronto!
Frame Integrity
Here’s how you play detective with the bike frame:
- Look It Over: Search for cracks, dents, or rust like a treasure hunter protecting their loot.
- Scrub-a-Dub-Dub: Clean off the grime. Sneaky damage might hide under dirt. Hit up our frame cleaning article for tips.
- Call in Reinforcements: Weird blemish? Don’t play doctor – let a pro take a look.
Wheel Integrity
Make sure the wheels are as solid as your mid-ride coffee break plan:
- Spin to Win: Give the wheel a spin. Wobbling? That’s no good! Check out our wheel truing guide for fixes.
- Crack Check: Peek for any cracks or wear ‘and tear on the rims.
- Spoke Squeeze: Give those spokes a good squeeze. Feel a difference? That’s a sign something’s up. For an in-depth tutorial, see our bike spoke maintenance article.
| Checkpoint | Action Required |
|---|---|
| Visual Frame Inspection | Spot cracks, dents, rusty patches |
| Surface Cleaning | Scrub to uncover hidden nasties |
| Wheel Truing | Watch for wobbles as the wheel spins |
| Spoke Tension | Check for equal tension on all spokes |
Both frame and wheels face a ton of pressure on rides. Keep an eye out for regular checkups to make sure they handle life’s bumps smoothly. For all things bike care, pop over to our bike maintenance schedule. This attention not only avoids spills but can make the ride feel like you’re gliding through the air.
Bike Fit and Comfort
One way to up your cycling game and feel like a pro is to get your bike fit just right. Not only does it make your ride more enjoyable, but it also saves you from those pesky aches and pains that can sneak up on you from improper alignment.
Proper Bike Sizing
Bike sizing isn’t rocket science, but getting it right can make a world of difference. When it comes to sizing, a simple rule of thumb is to have a smidge of space between your crotch and the bike’s top tube.
Road bikes should give you 1-2 inches of breathing room, while for mountain bikes, you’re looking at 2-3 inches. This small detail ensures you’re not squished against the frame and allows your power to flow smoothly as you pedal along.
| Bike Type | Top Tube Space |
|---|---|
| Road Bike | 1-2 inches |
| Mountain Bike | 2-3 inches |
Feeling lost about what size you should pick? Our bike sizing guide is your new best friend.
Handlebar and Seat Adjustment
Your handlebars and seat work best as a team, ensuring you’re not mimicking a circus clown while you ride. Here’s how to keep your comfort on point:
Handlebar Adjustment
- Height: Your handlebars should feel like they’re welcoming you with open arms—easy to reach without making your back scream.
- Reach: You want to keep a gentle bend in your elbows. Think of them as shock absorbers for those unexpected bumps in the road.
Seat Adjustment
- Height: Your seat should be high enough for a slight knee bend when your feet are at the bottom of the pedal stroke. No need to do the splits.
- Fore-aft Position: Slide your seat forward or backward until your knees are doing the little cha-cha over the pedals as you cruise.
| Adjustment Point | What to Check |
|---|---|
| Handlebar Height | Reach without a twist |
| Handlebar Reach | Elbows slightly bent |
| Seat Height | Slight knee bend on lowest pedal |
| Seat Position | Knees aligned with treadle motion |
For more hands-on tips, peek at our guides on maintain seat post and install bar tape.
With your bike’s fit dialed in, you’re all set for smooth, blissful rides without the risk of injury. Be sure to include these adjustments in your usual bike checkup routine.
Lighting and Visibility
Cruising on your bike, especially when it’s getting dark, is kind of like playing hide and seek with traffic – except nobody is seeking except for danger! You’ve got to make sure folks can see you.
Front and Rear Lights
Being all lit up is a no-brainer when it comes to staying safe on your bike. Front lights illuminate your path while rear lights give a loud and clear “Hey, I’m here” to those approaching from behind. It’s all about not becoming one with the asphalt.
Front Lights
Bike lights come in many brightness flavors, measured in lumens – think of them like sprinkles: more lumens equals more shine. Urban riders can skate by with 100 lumens, but the adventurous types peddling in the pitch-black wilderness will want between 300 – 800 lumens.
LEDs are your best bet because they’re super bright and won’t drain your wallet or your batteries. Double check that your front light is aimed for the road ahead, not for the stars.
Rear Lights
Those red glow bugs buzzing on your bike have multiple personalities – steady beams, flashy flickers, you name it. Whichever you choose, make sure cars can’t miss you. Go for battery-swallowing rear lights plugged onto your seat post, ones that’ll keep blinking long into the night.
| Light Type | Recommended Lumens | Usage |
|---|---|---|
| Front Light | 100 – 800 | Urban, Off-road |
| Rear Light | Any with high visibility | All riding conditions |
Check both front and rear lights on the reg to make sure they’re alive and well. Always pack spare batteries or a charger – you never want to go dark before your ride is over.
Reflectors Inspection
Reflectors are the bling on your bike, tossing car lights right back at drivers and making you hard to miss. They’ve got their special spots on your ride:
- Front Reflector: Pops on the handlebars or fork for being well spotted head-on.
- Rear Reflector: Perched on the seat post, this red fella signals folks behind.
- Wheel Reflectors: These little amber beauties sit on your wheel spokes.
- Pedal Reflectors: Sparkle underfoot to catch attention with each pedal.
Give a good once-over for smudges or cracks and ensure they’re affixed tightly. Even the tiniest dirt can dull their shine.
| Reflector Type | Location | Color |
|---|---|---|
| Front Reflector | Handlebars/Fork | White/Clear |
| Rear Reflector | Seat Post/Rear Frame | Red |
| Wheel Reflector | Wheel Spokes | Amber |
| Pedal Reflector | Pedals | Amber |
If you need more tips on bike upkeep, peek at our reads on bike maintenance schedules and clean bike chains. Keeping your bike lit up and shiny isn’t just for safety; it makes every ride smoother and more fun!
Additional Safety Checks
Pedal and Crank Inspection
Pedals and cranks on your bike are your trusty partners on the road, and keeping them in top shape is just good common sense. You’ll wanna check these bad boys from time to time:
- Attachment: Check that those pedals are really gripping the crank arms tight and secure.
- Smooth Spinning: They should glide along like butter on a hot skillet—no rough sounds allowed!
- Bearings: Got some wobbles? It’s time to look into those bearings—they might need a little TLC or even a swap.
Regularly checking up on these could save you from a surprise walk home. Curious about more nitty-gritty details? Jump over to rebuild bike pedals and service bottom bracket.
| Component | Checkpoint | Action Needed |
|---|---|---|
| Pedals | Secure attachment to crank arms | Tighten if loose |
| Pedals | Spin smoothly | Lubricate or swap out bearings |
| Crank Bearings | No looseness or play | Adjust or replace if needed |
For a deeper dive into pedal and crank care, check out our bike repair guides.
RSA and Road Safety Audit
An RSA, or Road Safety Audit, is like a guardian angel for cyclists. It scopes out the roads for any spooky safety concerns, offering ideas to make the area safer for everyone. This inspection comes from a mix of experts who know their stuff inside and out.
Key Elements of an RSA:
- Independent Eyes: A team not in on the initial plan takes a fresh look.
- Team Effort: Combines brains from road engineering, traffic safety, and cycling advocates.
- Cyclist Safety Checker: The Bicycle Road Safety Audit Guidelines lay out how to keep cyclists out of harm’s way and suggest what can be done better.
You can squeeze more juice from these insights in the Road Safety Audit Guidelines.
Want to keep your ride secure and sound? Pop over to our wealth of knowledge on bike maintenance schedule and bike noise issues.
Keeping your bike rolling without a hitch is all about regular check-ups and maintenance. Keep up with the latest and greatest by hitting up our bike repair guides and snagging the best bike multi tools for your kit.
Conclusion
Maintaining your bike might seem like a chore, but it’s a small investment that pays off with every ride. By integrating the ABC Bike Check into your routine, you ensure that your bike remains reliable and safe, whether you’re commuting daily or embarking on weekend adventures.
Regularly inspecting your tires, brakes, chain, and other components not only prevents unexpected breakdowns but also enhances your overall riding experience. Proper maintenance extends the life of your bike, saving you money in the long run and keeping you on the road longer. Additionally, ensuring your bike fits correctly and is equipped with adequate lighting and reflectors boosts both comfort and safety.
Remember, a well-maintained bike is your ticket to countless enjoyable and accident-free rides. Embrace these maintenance habits, and let your bike be a steadfast partner in all your cycling endeavors.
For more detailed guides and product recommendations, explore our comprehensive resources and become the savvy cyclist you aspire to be!
FAQs
What is the ABC Bike Check?
The ABC Bike Check stands for Air (tire pressure), Brakes, and Chain. It’s a simple routine to ensure your bike is safe and ready for any ride.
How often should I check my bike’s tire pressure?
It’s recommended to check your tire pressure before every ride to ensure optimal performance and prevent flats.
Why is regular brake testing important?
Regular brake testing ensures that your brakes are functioning correctly, providing reliable stopping power and enhancing overall safety.
How can I maintain my bike chain?
Keep your bike chain clean and well-lubricated. Regularly inspect for rust or debris and apply bike-specific lubricant to maintain smooth pedaling.
What should I do if my wheel is wobbling?
A wobbling wheel may need truing. Secure your bike on a truing stand and adjust the spokes with a spoke wrench until the wheel spins smoothly.
Key Tips
- Regular Inspections: Make bike checks a habit before every ride to catch issues early.
- Proper Lubrication: Keep the chain and gears well-lubed to ensure smooth operation and prevent wear.
- Brake Maintenance: Always ensure your brakes are responsive and pads are in good condition.
- Tire Care: Maintain the recommended tire pressure and inspect for wear or damage regularly.
- Comfort is Key: Adjust your bike’s fit to prevent discomfort and enhance your riding experience.
- Visibility Matters: Use adequate lighting and reflectors, especially for evening or low-light rides.
- Quality Tools: Invest in reliable bike maintenance tools to perform effective checks and repairs.
- Stay Educated: Continuously learn about bike maintenance through guides, videos, and expert advice.
- Safety First: Prioritize safety checks to enjoy worry-free and enjoyable cycling adventures.
Recommended Biking Products and Accessories
- Bike Pressure Gauge: Accurate and easy-to-use gauge for maintaining optimal tire pressure.
- Recommended Product: Topeak JoeBlow II Dual Gauge
- Multi-Tool Kit: Compact kit with essential tools for on-the-go adjustments.
- Recommended Product: Crankbrothers M19 Multi-Tool
- Bike Lubricant: High-quality lubricant to keep the chain and gears running smoothly.
- Recommended Product: Finish Line Dry Teflon Bicycle Chain Lube
- Truing Stand: Essential for maintaining wheel alignment and smooth spinning.
- Recommended Product: Park Tool TS-2 Home Mechanic Truing Stand
- LED Bike Lights: Bright and durable lights for enhanced visibility during rides.
- Recommended Product: Cygolite Metro Pro 1100 Front Light & Cygolite Hotshot 650 Rear Light
- Reflector Kit: Comprehensive set of reflectors to increase bike visibility.
- Recommended Product: BV Bicycle Reflector Set
- Bike Pump: Reliable pump for quick and efficient tire inflation.
- Recommended Product: Lezyne Steel Floor Drive Pump
- Chain Cleaning Kit: Tools for effective and easy chain maintenance.
- Recommended Product: Park Tool CG-2.3 Cyclone Chain Scrubber
- Comfortable Saddle: Ergonomically designed saddle for enhanced riding comfort.
- Recommended Product: Brooks B17 Cambium All Weather Saddle
- Helmet with Integrated Lights: Safety helmet that includes built-in lighting for convenience.
- Recommended Product: Lumos Matrix Smart Helmet
By equipping yourself with these quality products, you ensure your bike remains in excellent condition, enhancing both safety and performance on every ride.
Final Thoughts
Ensuring your bike is in optimal condition is fundamental to enjoying every ride safely and confidently. Regular maintenance not only prevents unexpected issues but also enhances the performance and longevity of your bike.
By adopting simple routines like the ABC Bike Check and staying vigilant about tire pressure, brake functionality, and chain health, you set the foundation for countless smooth and enjoyable rides. Moreover, paying attention to bike fit and visibility ensures that each journey is comfortable and secure, whether you’re navigating city streets or exploring rugged trails.
Remember, a well-maintained bike is more than just a machine—it’s a reliable companion that supports your cycling adventures. Embrace these maintenance habits, invest in quality tools and products, and never hesitate to seek professional assistance when needed.
At MyBikeReview.com, we’re committed to providing you with the knowledge and resources to keep your bike—and your rides—at their best. Happy cycling!