Importance of Handlebar Maintenance
Keeping your handlebars in tip-top shape is like giving your bike a big ol’ hug for both comfort and safety while you’re out on two wheels. Snugly wrapped handlebars help you hang on tight, lessen the ache in your hands, and make you feel like the master of your biking universe. Read on to discover how taking care of those bars impacts both your cushy ride and your sense of security.
Enhancing Riding Comfort
When your handlebars get the TLC they deserve, your overall riding comfort shoots through the roof. Think of a nice, tight wrap on the bars as a massage for your hands. It keeps those long rides from turning into wrist-wringing marathons. Making sure the tape wraps start at the ends and work their way up stops those edges from peeling away when you lean into it (Bike Reveal).
| Benefits of Tidy Handlebars | Why It Feels So Good |
|---|---|
| Reliable grip | Kicks hand fatigue |
| Consistent tape work | Gives you control |
| No bumpy tape mess | Keeps hands comfy |
Mess around with different wrapping styles like the spiral wrap or figure-eight wrap to find your comfort zone (Bike Reveal). Check our bike tool kit essentials guide to stock up on must-have tools for that perfect wrap job.
Impact on Safety
Handlebar maintenance plays a starring role in the safety of your bike. When your handlebars are neatly wrapped and cared for, they become your trusty sidekick, giving you better control over your ride, especially when the terrain gets a bit wild or you’re zipping down slopes. A snug wrap makes sure the tape stays put, dodging potential mishaps from it coming loose (Park Tool).
| Safety Perks of Handlebar TLC | Safety Factor |
|---|---|
| Solid grip | Superior control |
| Reliable tape | Less chance of coming undone |
| Smooth wrap | Dodge surprise slips |
It’s easy to overlook the value of fending off handlebar wear and tear, but minding this maintenance can boost your bike-handling skills by a bunch. Check out our bike safety check guide for more crucial maintenance tips that will keep you safely on the road.
Taking care of your handlebars means your bar tape will last longer, and you’ll have a calm, safe ride, no matter if you pedal for fun or competition. Delve into our bike maintenance schedule to stay on top of other essential bike upkeep chores.
Tools for Installing Bar Tape
Wrapping your handlebars in bar tape is about more than just comfort—it’s about holding onto those handlebars like your life depends on it, because, well, maybe it does! So let’s dig into the basics of what you’ll need and how to prep like a pro.
Essential Equipment
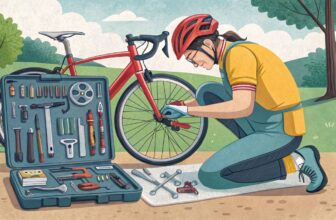
Grab your gear, folks! Here’s what you need to get this job done:
- Handlebar Tape: Your main squeeze for a cozy, slip-free ride.
- Sharp Scissors: To make sure your tape ends don’t look like a botched haircut.
- Bar End Plugs: Little lifesavers that keep everything in place, preventing unraveling chaos.
- Clean Cloth or Alcohol Wipes: Because a clean workspace is a happy workspace, amirite?
- Electrical Tape: To ensure your hard work stays put.
- Small Screwdriver: Handy for getting those bar end plugs nice and snug.
Visual learner? Snoop around our bike tool kit essentials for a peek at the must-haves.
Preparing the Surface
Nothing sticks to dirt or gunk, right? Let’s get those handlebars shining and smooth:
- Clean the Handlebars: Wipe down with a cloth or those fancy alcohol wipes. Nix the old sticky stuff to ensure a nice, fresh start.
- Inspect the Handlebars: Spot any potential problem areas? Sand them smooth or fix ’em up to make sure the tape sticks like peanut butter on bread.
- Remove Accessories: If your bars are wearing bells or whistles, give them a break so you can wrap them without hassle.
Preparing the Surface for Optimal Tape Application
| Step | What You Need to Do |
|---|---|
| 1. | Clean those bars with alcohol wipes to take off the dirt and gluey mess. |
| 2. | Look for any damage; sandpaper’s your friend for smoothing rough spots. |
| 3. | Move accessories out of the way—no obstacles allowed in this rodeo! |
Once you’ve got your handlebars all dressed up, you’ll ride smoother and safer than ever (Bike Reveal). Make sure you follow these steps, and your handlebars will be the envy of the cycling world. Craving more gear wisdom? Roll into our bike maintenance schedule and keep your ride in peak condition.
Selecting the Right Bar Tape
Picking the right bar tape is as crucial as matching socks—it can make or break comfort and style. This stuff plays a big role in how comfy or in control you feel while riding, giving some serious personality points to your bicycle. Let’s have a look at what you need to know.
Things to Think About
Here’s what really matters when you’re on the hunt for bar tape that suits you:
- Cushion and Comfort: Thick tape means more padding. If your rides turn into marathons or your roads resemble the surface of the moon, a meaty tape cushion will be your best buddy.
- Grip and Feel: Whether you like your bar sticky like a post-it or smooth like jazz, the tape’s texture is key.
- Toughness: If you’re a pedal-to-the-metal kind of person, make sure your tape can take a beating.
- Looks: The tape that doesn’t clash with your bike’s vibe scores style points.
- Weatherproofing: Rain or shine, some tapes anchor your hands like glue.
Picking the Right Tape
Silca Nastro Cuscino 2.5mm
The Silca Nastro Cuscino 2.5mm does its fancy thing with PEBAX foam to soak up shocks like a champ, mirroring tapes that stack up at 3.5mm. Smooth control at high speeds? You’ve got it right here. Plus, if you spill on a ride, a replacement won’t break the bank at $35. Pricey, sure, but pro-riders know where their money belongs.
Fizik Tempo Bondcush 3mm Soft
The Fizik Tempo Bondcush 3mm Soft combines cushy foam and Microtex magic, keeping your grip snug in scorching heat or downpours. With a $45 tag, it’s not afraid of water, but be ready to give it some TLC with a good clean to keep it friendly.
Arundel Wraptor Wrap
The Arundel Wraptor Wrap comes at 3.3mm of pure smoothness, spinning out a consistent grip even when the skies let loose. Feel every light buzz but not in an annoyance kinda way. All this at just $27.95. It’s easy on the wallet and classy too.
Ergon BT Allroad Tape
For $37.95, the Ergon BT Allroad tape brings EVA foam with non-slip ninja skills to the table. From the fast city track to country gravel, its two-way grabbing texture takes care of you, hugging road curves like a long-lost friend.
| Bar Tape Model | Material | Thickness (mm) | Price ($) | Highlights |
|---|---|---|---|---|
| Silca Nastro Cuscino 2.5mm | PEBAX Foam | 2.5 | 35 (with crash fallback) | Smooth rider feedback and control, considerate crash backup |
| Fizik Tempo Bondcush 3mm Soft | Polymer Foam & Microtex | 3 | 45 | All-weather buddy, soaks moisture, loves routine cleaning |
| Arundel Wraptor Wrap | Polyurethane and Shock Foam | 3.3 | 27.95 | Sticks in rain, good vibrations on ride quality |
| Ergon BT Allroad Tape | EVA Foam & Polyurethane | – | 37.95 | Non-slip prob, comfort across the board on all sorts of roads |
Picking the right bar tape turns the ordinary into an epic ride. For more on keeping your bike in tip-top shape, wander over to our bike maintenance schedule and grab the lowdown on bike cleaning products.
Techniques for Wrapping Handlebars
Wrapping handlebars is something every cyclist needs to get the hang of if they want a firm grip and reduced hand cramps. We’re breaking down two go-to methods: the spiral wrap and the figure-eight wrap. Knowing these will keep your bar tape on point and your rides comfy and safe.
Spiral Wrap Method
The spiral wrap method is the trusty sidekick of bar-taping—reliable and easy. It works for any ride, whether you’re cruising through the neighborhood or tackling a trail.
Here’s how to roll with the spiral wrap:
- Start at the End: Stick that angled end of the tape into the bar’s open end and plug it in tight.
- Wrap It Up: Go clockwise on your right bar, and counter-clockwise on your left. Leave a tiny bit of the handlebar peeking out at the end—about an inch or so.
- Overlap the Tape: The trick is to overlap the tape halfway as you move up toward the stem. This trick keeps it snug and comfy.
- Behind the Hoods: When you hit the brake hoods, wrap the tape behind them to cover the lever.
- Finish It Off at the Stem: Keep going till you reach the stem. Lock it down with some electrical tape or those fancy finishing strips.
Consistency is key in the spiral wrap—keep it tight to avoid those annoying gaps. If you’re itching for more detailed pics and steps, jump into our bar tape guide.
Figure-Eight Wrap Method
Meet the figure-eight method, the beefed-up version. It’s perfect for keeping everything tight around the brake hoods, offering that pinch-worthy grip.
Here’s your figure-eight game plan:
- Kick Off at the Bar End: Just like before, plug in that tapered bit.
- Onward and Upward: Same wrapping idea, keeping your overlaps steady.
- Around and Around the Hoods: Here’s where the magic happens: wrap in a figure-eight around the hoods. Go over the clamp, under the lever, and back over.
- Wrap It to the Finish: Once the hoods are all secure with your figure-eight flair, continue upwards.
- Seal the Deal at the Stem: Lock it down with the tape of your choice.
This method keeps the tape from slipping, especially around the hoods where your hands work overtime. Testing some sturdy bar tape and keeping that tension spot on is crucial. For more tape tips, cruise over to our guide on choosing bar tape.
| Technique | Advantages | Who’s It For |
|---|---|---|
| Spiral Wrap Method | Even coverage, simple, user-friendly | Everyone—regular rides, just-for-fun cycles |
| Figure-Eight Method | Toughness, grip magic around brake hoods | Racers, terrain conquerors |
Wrap your bars right, and you’ll ramp up comfort, nail control, and fend off fatigue on long trips (Bike Reveal). For more on what tools you’ll need in your cycling stash, check out our bike tool essentials.
Installing Bar Tape Step by Step
A comfy ride and great bike control can hinge on how well you install your bar tape. Let’s walk you through it in a way that’s as easy as a Sunday morning ride.
Beginning the Wrap
First stop, the end of the handlebars:
- Prep the Ends: Wipe down those bar ends till they sparkle. No room for old gunk or sticky residue. Start fresh.
- Plug In: Stick a little piece of tape inside the bar end. This bit’s like the tape’s wingman, making sure the bar end plugs stay snug and secure.
- Wrap It Up: Begin wrapping at the bar end, with a little extra tape hanging out. That extra bit? Tuck it into the bar plug later, like packing a suitcase just right.
Wrap direction like a pro:
| Side | Direction |
|---|---|
| Right Side | Clockwise |
| Left Side | Counter-Clockwise |
Swirling it just so helps counter any hand-tension antics (Park Tool).
Ensuring Consistent Coverage
Aim for tightness that’s Goldilocks-level: just right.
- Overlap’s the Game: Go for overlapping every wrap by about half the tape’s width to keep things smooth and tidy.
- Tension’s Key: Maintain a steady pull on the tape. A loose wrap is like a soggy handshake—just, no.
- Wrapping the Levers: Facing the brake levers? It’s time for the nifty figure-eight maneuver (Bike Reveal). This trick gives that lever clamp some neat coverage without leaving gaps.
Securing the Ends
Finish like a pro:
- Final Touch: As you near the stem, cut the tape at an angle—it’s like giving your wrap a smart haircut.
- Tape to Seal the Deal: Use some finishing tape to wrap things up tidy. Electric tape? Sure thing, it does the job well.
- The Plug Finale: Tuck that extra tape into the bar end hole and lock it down with the plug.
If you’re keen on getting fancy with advanced tricks like double-sided tape for a grip boost, swing by Advanced Bar Tape Installation Tips.
Find help on every wobble and hiccup with our sprawling bike repair guides. Or dive into our bike maintenance schedule and bike tool kit essentials to pedal toward cycling mastery. Nailing handlebar tape is your ticket to a smoother cruise, leaving you with comfort and control in the saddle.
Advanced Bar Tape Installation Tips
Hey there, handlebar hero! Ready to up your game with some pro bar tape tricks that’ll make your ride look slick and stay put? Let’s do this.
Using Sticky Tape
Here’s the deal: getting double-sided sticky tape or even trusty electrician’s tape on those bars can be a game-changer. It helps keep that bar tape from going on its own little adventure.
- Slap on the Tape: Grab a bit of double-sided stuff and stick it on the handlebar where your wrap starts.
- Lock It Down: As you wrap the tape over it, make sure to press down firmly so it sticks like a champ.
- Smooth Moves: Keep wrapping nice and tight. Don’t forget evenly spaced, it’s all about looking sharp.
This trick keeps the tape where it should be, even when you’re pushing your limits on those epic rides.
Finishing Touches
Now let’s jazz up the ends for a look that says “I’ve got skills.”
- Tapered Swagger: Snip the end of the tape at an angle. Makes the start and finish look cleaner and without that bulky feel.
- Blend with Style: Got some black electrician’s tape? Use it to secure that last wrapping end. A magic marker will match up any tape edges for a seamless vibe.
- Heat Trick: Secure your work with a bit of heat using a soldering iron, but be gentle! You don’t wanna fry your tape.
- Stay Spotless: White or light tape users, you don’t want grubby mitts leaving marks. So grab some MG-2 gloves to keep things pristine.
Follow these tips, and your handlebars will scream style and durability. Hit up our bike repair guides for more wisdom.
Your Go-To Cheat Sheet
| Technique | Why It Works | Pro Tip |
|---|---|---|
| Sticky Tape | No slipping | Start on lower handlebar |
| Tapered Wrap | Looks sleek | Angle cut it |
| Matchy-Matchy Tape | Smooth look | Edge it with color |
| Solder Time | Lock it in | Warm it with iron |
| Clean Work | Pristine finish | Wear gloves |
For more cool bike hacks, dive into our bike maintenance schedule and clean that chain.
Give these techniques a shot and watch your handlebars go from drab to fab. Tinker, test and find what tickles your fancy. You’re the artist here — your bike is the canvas.
Recommended Bar Tape Options
Picking the right bar tape is like choosing the right pair of shoes – essential for a comfy ride. Let’s break down some fantastic bar tapes that cater to all your cycling needs.
Silca Nastro Cuscino 2.5mm
Ever think F1 cars and your bike could have something in common? Well, Silca’s Nastro Cuscino 2.5mm bar tape sure does. With PEBAX foam, usually found in speedy cars and snazzy running shoes, it provides killer road feedback but without the bone-rattling vibes. This tape keeps you in control around corners and when the speed picks up. Silica offers a nifty deal on replacements, letting you swap it out for $35 if you have a wipeout, making it worth the initial splurge.
| Feature | Description |
|---|---|
| Material | PEBAX Foam |
| Thickness | 2.5mm |
| Price | $70 |
| Key Benefits | Top-notch control and feedback, wallet-friendly crash replacement |
Fizik Tempo Bondcush 3mm Soft
The Fizik Tempo Bondcush 3mm Soft wraps your handlebars in comfort, combining squishy mid-padding polymer foam with a tough outer layer. It’s built to take on every season – rain or shine. This tape doesn’t get all slippy when wet and sticks to your hands like glue. Remember to give it a wash now and then, and keep it out of harsh sunlight to make it last.
| Feature | Description |
|---|---|
| Material | Polymer Foam, Microtex |
| Thickness | 3mm |
| Price | $45 |
| Key Benefits | Weather-ready, comfy grip |
Arundel Wraptor Wrap
Made from polyurethane rubber and shock-absorbing foam, Arundel Wraptor Wrap is your go-to for slick rainy rides or clear sunny days. At 3.3mm thick, it transforms those pesky vibrations into a bearable buzz, all while being gentle on the wallet. It looks great, performs even better, and really improves the feel of your ride.
| Feature | Description |
|---|---|
| Material | Polyurethane Rubber, Shock-Damping Foam |
| Thickness | 3.3mm |
| Price | $27.95 |
| Key Benefits | Superb grip, absorbs shocks, wallet-friendly |
FSA PowerTouch Handlebar Tape
The FSA PowerTouch Handlebar Tape uses a mix of cork and hybrid materials to keep the grip solid and the ride plush. Whether you’re going full blast in a sprint or dealing with unruly roads, this tape handles it all, bringing a fresh look to your bike without breaking the bank.
| Feature | Description |
|---|---|
| Material | Hybrid Cork |
| Thickness | – |
| Price | $33 |
| Key Benefits | Grippy, cozy, tames rough rides |
Ergon BT Allroad Tape
Ergon brings a magic touch with its BT Allroad Tape, blending cushy EVA foam with a non-slip polyurethane surface. It’s perfect for both smooth highways and bumpy trails. With a unique pattern and wrapping instructions that improve handling, it’s perfect for any cycling adventure you embark on.
| Feature | Description |
|---|---|
| Material | EVA Foam, Polyurethane |
| Thickness | – |
| Price | $37.95 |
| Key Benefits | Comfort galore, adaptable to any surface |
For pointers on keeping your bike spick-and-span, check out our tips on cleaning bike chains and fine-tuning your brakes.
Maintenance and Care Tips
Looking to keep your bike in tip-top shape? It all starts with taking care of that handlebar tape. You’ve got to treat it right to guarantee a comfy, safe ride, and we’ll even tackle those tricky carbon fiber handlebars too.
Cleaning Light-Colored Tape
Let’s face it—if your handlebar tape’s a lighter color, it won’t take long for grime to show up. But don’t sweat it, we’ve got a foolproof way to keep it sparkling like new:
- Use Mild Soap and Water: Mix a little mild soap with water. Moist and all, give your cloth or sponge a bath in this mix.
- Gently Scrub: Lightly rub down your tape, giving special attention to the grubby bits.
- Rinse and Dry: With a clean, damp cloth, shoo away any soap leftovers. Then, let that tape dry off completely before your next adventure.
| Cleaning Step | What to Do |
|---|---|
| Soap and Water | Stir mild soap in water |
| Scrubbing | Lightly rub down the tape |
| Rinsing | Clear soap off with a damp cloth |
| Drying | Let the tape dry before riding |
Need a deeper look at bike maintenance? Hop over to our bike maintenance schedule page.
Handling Carbon Fiber Handlebars
When it comes to carbon fiber handlebars, they’re like the divas of the cycling world—treat them with kid gloves. Here’s your cheat sheet:
- Use a Torque Wrench: Anytime you’re fastening the handlebar tape or any bits and pieces, grab a torque wrench to avoid going too tight. Our bike bolt torque specs has all the tension numbers you’ll need.
- Avoid Harsh Cleaners: Stick with mild soaps. Harsh stuff will mess with the carbon fiber’s delicate structure.
- Inspect Regularly: Make it a habit to check out your carbon handlebars for any cracks or funky stuff. If something’s up, give a professional a shout.
Scroll through our carbon frame maintenance page if you’re curious about keeping carbon frames happy.
Look after your bike’s tape and handlebars, and not only will your ride look fab, but you’ll also elevate your biking game. Don’t miss out on more wisdom—check out our articles on clean bike chain, adjust bike brakes, and bike safety check.


