
Unlock the secrets to a flawless ride with our comprehensive guide on bike gear indexing! Whether you’re a seasoned cyclist or just starting out, mastering gear compatibility and proper indexing can transform your biking experience.
Imagine shifting effortlessly through gears, enjoying smooth transitions without the frustration of missed shifts or noisy drivetrains.
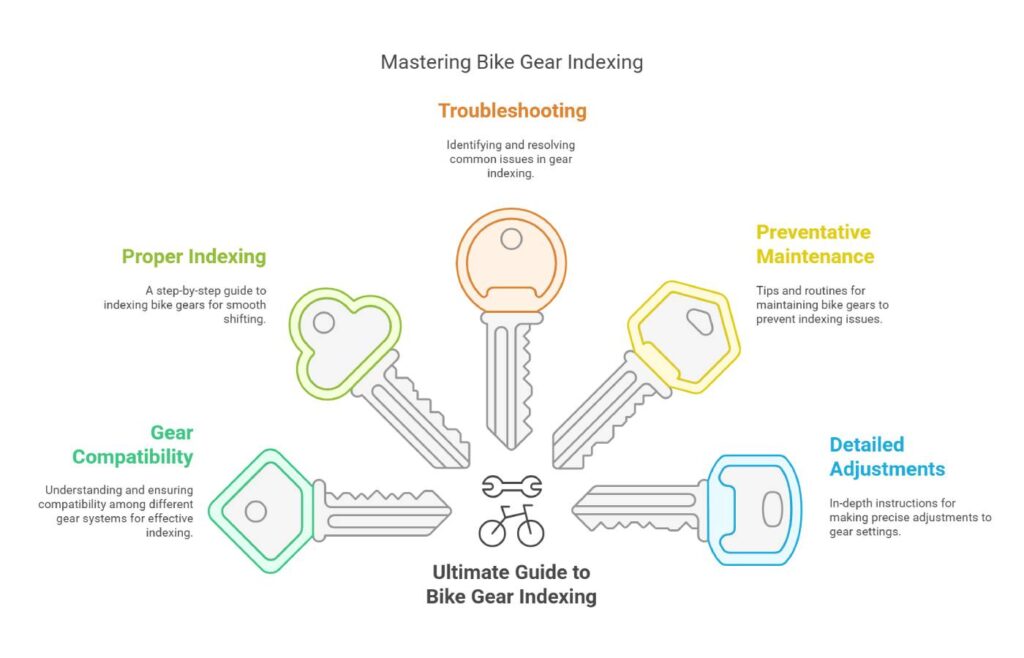
Dive into our ultimate resource, packed with expert tips, troubleshooting advice, and essential maintenance strategies to keep your bike performing at its peak. Gear up for success and pedal your way to biking bliss today!
Gear Indexing Basics
Understanding Gear Compatibility
Getting your bike’s gears to work in harmony isn’t rocket science. Chains have their speeds too. They can be 9, 10, 11, or even 12-speed—and each has its own chain width. It’s like fitting a key into a lock (Park Tool). Mixing brands or models might seem fun, but it’s a train wreck waiting to happen. Your gears need a seamless relationship to give that smooth ride.
| Speed | Chain Width (mm) |
|---|---|
| 9-speed | 6.6 – 6.8 |
| 10-speed | 5.88 |
| 11-speed | 5.62 |
| 12-speed | 5.3 |
Keep your chains consistent like peanut butter on a sandwich. If you want a deeper dive into keeping your bike parts happy, check out our rear derailleur maintenance guide.
Importance of Proper Indexing
When gears aren’t doing their job right, it feels like trying to yodel with a cold. Gear indexing helps—it’s all about making sure that each shifty click makes your bike jump exactly to the next gear it’s supposed to. When things go off-kilter, shifting turns into a hot mess. And that’s not just annoying, it can turn costly too.
| Shifting Problem | Possible Cause | Solution |
|---|---|---|
| Ghost shifting | Loose cable tension | Tighten that cable up |
| Chain skipping | Worn out chain/derailleur | Give the chain a once-over, maybe a replacement |
| Hard shifting | Dirty cables | Give them cables a clean and some love (also known as lubricant) |
Setting those derailleur limit screws right is key, sorta like locking the door before you leave home. Use a hex key for newer models, and don’t have tension twisting your results (Bike Radar). For the ins and outs of bike tinkering, our bike tool kit essentials article is your friend.
Knowing these basics morphs any bike fan, from amateur to pro, into someone who keeps things rolling smoothly. If you’re jonesing for more tips or need a helping hand, dive into our bike repair guides.
Troubleshooting Gear Shifting Issues
Signs of Worn Derailleurs
When your derailleurs start acting like they’re on a coffee break, it’s usually them throwing in the towel. Sluggish pivots and crooked connections can stop your chain from seating properly on the gears, turning a smooth ride into a bumpy mess. As Park Tool wisely recommends, if your derailleurs are giving you the side eye, it’s time for a swap.
Here’s what to watch for:
- Shifting that’s all over the place
- The chain that misses its mark
- An orchestra of noise when gears are changing
Keep your rides breezy and check out our tips on rear derailleur upkeep.
Addressing Shift Lever Problems
Shift levers are your bike’s sign language interpreters, so if they’re not up to scratch, confusion reigns. Gummed up or worn-out levers make shifting a guessing game. Park Tool suggests making a clean break with faulty levers showing these issues.
Spot These Shift Lever Gremlins:
- Ratchets worn smoother than a cat’s back
- Teeth gritted with grime
- Cables that just won’t sit right
Regular eyeballing of your shifters can save the day. For step-by-step salvation, pop over to our bike repair guides.
Dealing with Cable Friction
Grime could clog a saint, and it sure gums up cables, making gear changes a sticky business. That grit at the back bend? It’s why higher gears take an eternity to engage. This sticky situation hinders the derailleur’s spring from doing its job right, as noted on Bicycles Stack Exchange.
Breaking Down Cable Friction Woes:
| What’s Wrong | DIY Fix |
|---|---|
| Poor cable route | Give it a better path |
| Crumpled cable | Swap it out for fresh wires |
| Grime-packed | Get cleaning and add some lube |
| Old cable | Time to upgrade with a new one |
Dusting off the old and greasing up shiny (or entirely new) cables usually clears up any ‘hiccups’. For full-on cable care, our bike cable maintenance guides have your back.
Figuring out these common hiccups gives cyclists the power to keep their bikes’ shifting game sharp, ensuring a ride that’s all pleasure, no pain. Stick to a regular bike maintenance checklist to keep those wheels turning just right.
Specific Gear Adjustment Issues
A smooth biking adventure hinges on well-tuned gears. But sometimes, your bike might throw a tantrum. Bent derailleur hangers, cable tightness, misaligned derailleurs, and grime – these are troublemakers we need to handle. Let’s dive into what’s behind these gear grumbles.
Bent Derailleur Hangers
These pesky bent hangers can wreck your ride. They often bend after a crash or little bump, leaving your gears feeling clunky and your derailleurs and pulleys all misaligned. If your gear shifting feels off, this might be the culprit.
Spotting a bent hanger:
- Your bike hesitates or skips gears randomly.
- Slowpoke reaction to gear shifts.
- Chains jumpin’ or parts ain’t lining up.
Special tools can help straighten these out, but if you’re more of a Starbucks gal than a grease monkey, a bike shop or a handy guide on adjusting the front derailleur might be your best friends.
Cable Tightness and Derailleur Alignment
Think of cable tension as the Goldilocks of biking – it has to be just right. If your bike’s acting lazy in high gears or struggling in low ones, your cable might have trust issues, indicative of derailleur alignment troubles.
Ways to get things back on track:
- Check cable tension: It should be snug across all gears for that seamless shift.
- Inspect derailleur setup: The high and low limits need to be goldilocks-perfect too.
Tackling the Grimy Bits
No one likes a sticky situation, especially not your bike gears. Grime at the rear shift cable can make your bike grumpy, resisting shifts into the highest gear due to pesky friction.
To keep things squeaky clean:
- Tidy up the cable housings: Regular cleanup and a dash of oil go a long way.
- Spot those grimy bits: Seek and destroy with the right cleaning kit to keep it slick.
| Issue | Symptoms | Solution |
|---|---|---|
| Bent Derailleur Hanger | Random shifting, delayed response, chain skips | Fix using the right tools, consult rear derailleur maintenance |
| Cable Tightness and Alignment | High/low gear issues, derailleur not aligned | Tweak cable tension, ensure everything’s lined up |
| Grime Buildup | Clean and oil cables inspect housings | Clean and oil cables, inspect housings |
Explore our treasure trove of bike wisdom to solve these hiccups with a bike maintenance schedule, clean bike chain, and bike cable maintenance. Keep your bike in top form for countless tales of adventure out on the trails!
Preventative Maintenance for Gears
Cable Replacement Considerations
Keeping an eye on gear cables is like checking your car’s oil. You ignore it, things get clunky quickly. Dirt, grime, or rust jamming up the gears could mean it’s time for fresh cables or a good lube job. Cables can get stretchy over time, pulling things out of whack and causing nasty surprises like chain jumps or the gears saying ‘nope’ when you want to shift.
Importance of Proper Cable Routing
Here’s the secret sauce for seamless gear shifting: cable routing. Get this wrong, and it’ll feel like pedaling through molasses.
- Internal Routing: Looks snazzy and shields cables from the weather.
- External Routing: Simple upkeep and easy fixes, but watch out for dirt and dings.
Snug cable routing means less friction and less wear, keeping your shifts slick. Want more on how to keep your cables in tip-top shape? Head over to bike cable maintenance.
Checking for Fraying and Bending
Checking your gear cables for fraying or bends is as important as keeping the tires pumped. Dirt gunked up in the cable bends can make your bike sluggish to shift up to the top gear, as it battles a friction monster.
| Problem | Tell-Tale Sign | What to Do |
|---|---|---|
| Fraying | Strands sticking out | Swap out those cables now |
| Bending | Twisted or squished cables | Straighten or replace quick |
| Rust | Spots or rough patches | Clean or renew cables |
For sweet, smooth gear performance, keep an eye out for these signs. Dive deeper into cable TLC with our handy guide on bike cable maintenance.
By staying on top of preventive checks, you’ll have silky smooth gear changes, boosting your bike’s pep and keeping it running longer. For a treasure trove of bike care tips, look up rear derailleur maintenance and adjust the front derailleur.
Gear Indexing Process
Getting your bike’s gears just right is key for smooth and easy shifts. Here’s a step-by-step approach to adjust both rear and front derailleurs, and setting those limit screws.
Rear Derailleur Adjustment Steps
Want your rear derailleur to work like a charm? Do this:
- Tweak the Barrel Adjuster: Start by twisting the barrel adjuster all the way in, then back it out one turn. This helps adjust the cable tension finely.
- Let Loose the Cable: Loosen the bolt holding the cable in place.
- Tighten the Cable: Pull the cable tight again and lock that cable bolt down.
- Check Shifting Gears: Move the chain to the smallest cog and spin those pedals as you shift. Watch how the chain behaves, and tweak the barrel adjuster to keep things smooth.
- Fix Cable Tension: Adjust the barrel for each gear until every shift is as smooth as butter.
For more nitty-gritty details, swing by our rear derailleur maintenance page.
Front Derailleur Indexing Process
Lining up the front derailleur right means slick shifts between those chainrings. Here’s how to do it:
- Initial Positioning: Start with the chain on the smallest chainring.
- Tweak the Barrel Adjuster: Like at the rear, twist the front barrel adjuster all the way in and back it out one turn.
- Slack the Cable: Loosen that front cable, pull it tight, and fasten it down.
- Test Shifts and Adjust: Pedal and shift through the chainrings. If it’s tough moving to a bigger ring, twist the barrel counterclockwise to tighten tension. For trouble with smaller rings, go clockwise to loosen a bit.
Check out our detailed guide on adjusting the front derailleur.
Setting Derailleur Limit Screws
Limit screws are the boss when it comes to keeping that chain from going AWOL. Here’s how you nab them:
- Find the Screws: Look for the H (High) and L (Low) limit screws on your derailleur.
- Twist the High Limit Screw: With the chain on the smallest cog/chainring, adjust the H-screw so the chain can sit on the smallest spot without jumping off.
- Twist the Low Limit Screw: Move the chain to the largest cog/chainring, then tweak the L-screw to keep the chain in line, preventing it from overshooting.
- Eye the B-Gap: When it comes to the rear, make sure there’s about a 5 to 6mm gap between the top pulley and the cassette. Some bike makers give out tools for this checking gig.
Need more help? Peek at our guides on fixing a flat bike tire and adjusting bike brakes.
Getting those gears to shift right is a big deal for an enjoyable ride. Tinker and tweak using these steps, and those bike shifts will feel like second nature. For all things bike care, keep checking out our bike maintenance schedule and bike repair guides.
Detailed Gear Adjustments
Let’s chat about getting your bike’s gears to shift like butter without needing a PhD in cycling mechanics. In this guide, we’re breaking it down for making your bike’s gear shifting a breeze—focusing on twiddling with that barrel adjuster, playing with cable tension, and nailing those derailleur limit screw tweaks.
Barrel Adjuster Spinning
Barrel adjusters are the unsung heroes in the saga of gear shifting. These bad boys fine-tune your bike’s cable tension. Whether it’s the front or rear derailleur you’re dealing with, here’s how you tango with them:
- Find the Barrel Adjuster: They like to hang out near the shifters or on the rear derailleur.
- Get Shifting: Start by nudging that chain onto the smallest chainring and the tiny cog.
- Twist the Barrel Adjuster: If your bike’s giving you attitude shifting up, twist the adjuster counterclockwise for more cable tension. Acting up while shifting down? A clockwise twist should knock some sense into it.
Fiddling with Cable Tension
Nailing it with the right cable tension is like finding the sweet spot for a smooth ride. Here’s the lowdown on how to do this for the rear derailleur:
- Go Small: Kick things off with your chain on the smallest cog.
- Loosen Up: Got too much tension? Use the barrel adjuster to slacken things off before getting hands-on.
- Get Tight: Whip out that 5mm hex key. Loosen the bolt gripping the cable, pull it snug, and tighten it back up.
- Tweak Away: Glide through all gears like a pro, using the barrel adjuster to finesse things to perfection.
The front derailleur’s playing by similar rules, yet it asks for tender loving care to get the cable tension just right for those chainrings. Need more intel? Check out our how-to adjust bike brakes.
Twiddling with Derailleur Limit Screws
Messing with these screws stops your chain from doing a Houdini act of the gears. Let’s simplify it for both front and rear derailleurs:
- Locate High and Low Screws: Track down the high (H) and low (L) limit screws on your derailleur.
- Sort the Low Limit Screw: For the rear derailleur, move the chain to the biggest cog and tweak the L screw so the jockey wheel squares up under the cog. For the front, hit up the smallest chainring and get the chain in line.
- Tweak High Limit Screw: Swing the chain to that tiny cog and adjust the H screw until everything lines up nicely. On the front derailleur, switch to the big chainring and adjust the H for alignment.
- Check the B-Gap: Leave space—5-6mm to be precise—between the top jockey wheel and the biggest cog for primo shifting, as recommended by BikeRadar.
| Component | Adjustment |
|---|---|
| Barrel Adjuster | Twist to adjust cable tension |
| Cable Tension | Manually tweak cable for smooth shifting |
| Derailleur Limit Screws | Adjust to stop chain from jumping ship |
Get down with more bike know-how by diving into our bike repair guides.
Related Biking Guides:
Fine-Tuning Gear Performance
Getting your bike’s gears to run as smooth as butter is key for a comfy ride. Let’s break down a few steps to get your gears in top shape:
Disconnecting Cables for Adjustment
First things first, those shift cables gotta be set free. It keeps things neat and stops any unwanted tugging while you’re tweaking.
- Go ahead and shift to the smallest sprocket on the back.
- Grab a 5mm hex key to loosen that bolt clamping the derailleur cable.
- Gently slip the cable out, don’t yank it – just a nudge.
Doing this makes sure everything glides better when you’re adjusting.
Precision Adjustments with Hex Key
Now, let’s get down to business with that hex key. We’re talking about limit screws and barrel adjusters.
Tinkering with Limit Screws: These screws keep your derailleur from overstepping its bounds. Use the hex key to fiddle with the high (H) and low (L) screws – gives you complete control.
| Screw Type | What It Does |
|---|---|
| High (H) | Stops chain from ditching outwards |
| Low (L) | Stops chain from falling into spokes |
Ensuring Smooth Shifting Operation
Once you’ve got things how you like ‘em, reconnect everything and check that it’s all purring along nicely.
- Slip the shift cable back where it belongs in the derailleur and tighten it with your trusty hex key.
- Test all gears, making sure everything glides neatly across the sprockets.
- If it’s cranky, recheck those derailleur limits and barrel settings.
Keeping up with routine care, like swapping cables and tidy routing, keeps it all shipshape. See how-tos in our bike cable maintenance guide.
Staying on top of your bike’s gears needs a bit of elbow grease and focus. Whether you’re rolling for fun or gunning for the finish line, these bits and bobs will help you ride smoothly on every trip. For more on gear indexing, see our rear derailleur maintenance and bike gear indexing articles.
For more bike smarts, peep our bike safety check and emergency bike repair guides.
Gear Indexing for Optimal Performance
Dialing in the bike gear indexing is a biggie for getting that just-right shifting groove. Every move on the shifter should slide you into the next gear like butter, ramping up your cycling fun and efficiency.
Why Getting Gear Indexing Right is Key
Nailing the correct gear indexing ensures that each flick of your shifter moves you flawlessly up or down both rear and front gears. Spot-on gear indexing keeps your shifts slick and dependable, stopping the chain from wandering or leapfrogging gears. It also gives your drivetrain a longer life by cutting down on unnecessary rough and tumble.
Clues It’s Time to Tweak Your Gears
Spotting when the bike’s gear indexing needs touching up is essential to keeping your ride as smooth as silk. Lookout for these telltale signs:
- Skipping Gears: The chain’s playing hopscotch with the gears.
- Stuck Shifting: Shift but no lift? Chances are the indexing is kaput.
- Excessive Noise: Weird grumbling or rattling from the drivetrain.
- Upshift/Downshift Woes: Struggling to shift gears cleanly?
If any of these ring a bell, time to give your bike gears some love. Need a crash course in adjusting the front derailleur? Hit our adjust front derailleur guide.
Steps for Rear Derailleur Indexing
Getting the rear derailleur just right involves a set of steps that even the most ham-fisted among us can follow:
1. Initial Adjustments:
- Tighten the shifter’s barrel adjuster all the way, then back it off a turn.
- Let the cable at the derailleur take a breather—loosen that cable mounting bolt.
2. Line Up the Derailleur:
- Aim the derailleur at the littlest cog on the block.
- Make sure those limit screws are dialed in to prevent chain chaos. Check out our rear derailleur maintenance guide for more dirt.
3. Cable Reconnections and Tweaks:
- Hook that cable back up, no slackers allowed—keep it snug.
- Tweak the barrel adjuster to fine-tune those tensions.
4. Shifting Test Drive:
- Work through the gears, adjusting barrel tension for smooth sailing.
- Every shifty click should mean a gear lane change with zero drama.
5. B-Gap Fine-tuning:
- That B-gap (space between derailleur and cogs) should chill between 5 to 6mm for slick 11- and 12-speed setups.
6. Final Once-over:
- Fasten all bolts to meet the maker’s torque script (peep our bike bolt torque specs).
- Confirm the chain flows through all gears like a boss—no skipping or funky noise.
| Adjustment Gig | Gear You’ll Need |
|---|---|
| Tinker with barrel | Barrel adjuster tool |
| Set those screws | Phillips or flat screwdriver |
| Cable dance | 5mm Hex key |
| B-Gap finesse | Tool from the manufacturer |
| Finish with flair | Torque wrench |
Pondering over bike maintenance? Don’t miss our bike repair guides. Proper gear indexing transforms your ride into a hassle-free cruise, making every gear shift smooth and your journey a delight.
Conclusion
Mastering bike gear indexing is essential for any cyclist aiming to enhance their riding experience. By understanding gear compatibility, you ensure that each component works harmoniously, preventing frustrating shifts and extending the life of your drivetrain.
Proper indexing is not just about smooth gear changes; it’s about maintaining the overall health of your bike. Regular troubleshooting and preventative maintenance can save you time and money, keeping your bike in top condition for countless adventures.
Whether dealing with worn derailleurs or cable friction, our guide provides actionable solutions to keep your gears performing flawlessly. Embrace these maintenance practices, and you’ll enjoy a more efficient, reliable, and enjoyable ride every time you hit the road or trails.
At MyBikeReview.com, we’re committed to empowering you with the knowledge to keep your bike running smoothly, ensuring that every journey is as pleasurable as the last. Happy cycling!
FAQs
What is gear indexing and why is it important?
Gear indexing ensures that each shift moves the chain accurately to the next gear, providing smooth and reliable performance.
How often should I maintain my bike’s gears?
Regular maintenance is recommended every few weeks, depending on usage, to prevent shifting issues and prolong drivetrain life.
What tools do I need for gear indexing?
Essential tools include a hex key, barrel adjuster, screwdriver (Phillips or flat), and a cable tension tool.
Can I mix different brands of chains and gears?
It’s best to use compatible brands and models to ensure seamless gear performance and avoid shifting problems.
What are the signs that my derailleur needs replacement?
Signs include sluggish pivots, crooked connections, inconsistent shifting, and excessive noise during gear changes.
Key Tips
- Consistent Chain Maintenance: Regularly clean and lubricate your chain to ensure smooth gear transitions.
- Check Cable Tension: Proper cable tension is crucial for accurate shifting; adjust using the barrel adjuster as needed.
- Inspect Derailleur Alignment: Misaligned derailleurs can cause shifting issues; ensure they are properly aligned with the gears.
- Replace Worn Components: Don’t hesitate to replace worn-out chains or derailleurs to maintain optimal performance.
- Regularly Adjust Limit Screws: Fine-tuning the high and low limit screws prevents the chain from overshooting or skipping gears.
Recommended Biking Products and Accessories
- Park Tool CC-3.2 Chain Checker: Essential for measuring chain wear and determining replacement needs.
- Shimano Dura-Ace Rear Derailleur: High-performance derailleur for smooth and reliable shifting.
- Knog Blinder Road Bike Helmet: Lightweight and aerodynamic helmet ensuring safety without sacrificing style.
- Pedro’s NoNonsense Bike Cleaning Kit: This comprehensive kit for keeping your drivetrain clean and well-lubricated.
- Silca Randonneur Multi-Tool: Versatile tool for on-the-go adjustments and repairs.
- Finish Line Wet Lubricant: Superior lubricant to protect your chain and gears from grime and corrosion.
- Topeak Zelo Expansion Pump: This reliable pump for maintaining optimal tire pressure during rides.
- Race Face Chester Handlebar Tape: Durable and comfortable tape for enhancing grip and control.
- Bontrager Alloy Cable and Housing Set: High-quality cables and housings to reduce friction and improve shifting precision.
- Feedback Sports Pro SL Pedals: Lightweight pedals offer excellent grip and power transfer for enhanced performance.
By enhancing your bike gear indexing knowledge and utilizing these recommended products, you’ll ensure a smooth, efficient, and enjoyable ride every time. Happy cycling!


