Understanding Bike Suspension
Ever take a joyride on a bike trail and wonder why some bikes bounce around like a kangaroo on a pogo stick, while others seem to glide like butter on toast? That’s all about bike suspension! Let’s get into how it plays the hero’s role in giving you that super smooth, totally controlled ride over those rough and bumpy paths.
Types of Bike Suspension
There are two main flavors of bike suspension—full suspension and trusty hardtails. Let’s figure out why some folks like one over the other.
- Full-Suspension Bikes: Imagine the comfort of riding on clouds—that’s what these bikes are going for. They’ve got shock absorbers both front and back, so they’re just the ticket for gnarly mountain paths and tricky trails. Think brands like Fox, RockShox, Marzocchi, and Manitou. They’re the cool cats making these cushy rides (REI).
- Hardtail Bikes: These guys only have front suspension—no bouncing in the back. Because they’re lighter, they’re the best buddies for smooth paths and roads. Cross-country champs usually go for them because they love that efficient pedal power (REI).
When it comes to suspension forks, it’s like picking your favorite ice cream—everyone’s got a taste. They’ve got stuff made from steel, titanium, squishy silicone stuff called elastomers, or even good old-fashioned air. Each of these gives your bike forks a different feel and travel style.
| Suspension Type | Front Shock | Rear Shock | Ideal Use |
|---|---|---|---|
| Full-Suspension | Yes | Yes | Tough and tumbling trails |
| Hardtail | Yes | No | Smooth and silky roads |
Importance of Suspension Quality
So why get picky about suspension? Let’s break it down:
- Bump-Free Chill: Quality suspension can turn cobblestone chaos into a dreamy cloud ride. Weekend warriors, you’ll seriously dig this.
- Steady As She Goes: Keeps the bike wheels gripping the ground like a barnacle on a boat, which means more control and safety for thrill-seekers (Competitive Cyclists).
- Jack of All Trails: Top-notch suspension lets you tweak the ride to match the path. Folks like Fox and RockShox are gurus at this tuning game (REI).
- Long Ride Vibes: It’s easier on your body to cruise over uneven surfaces with good suspension. Perfect for those epic cross-city commutes (Long-Distance Commuters).
Splurging on a primo suspension system pays off. We’re talking lighter rides, more tweaking options, and a major upgrade in how biking feels overall. Dive deeper into keeping that suspension running smoothly with our bike maintenance tips and repair advice.
Suspension Maintenance Tips
Keeping your bike’s suspension system in mint condition is the golden ticket to smooth rides and longevity. Below, you’ll find a quick guide on basic maintenance and occasional servicing trickery to keep that suspension rockin’ and rollin’.
Essential Suspension Maintenance
To keep that suspension smoother than a buttered biscuit, regular check-ups and tweaks are crucial. Here’s the lowdown on keeping it cute:
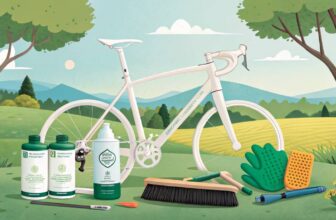
- Clean and Inspect: Give your bike’s suspension parts a good scrub to shake loose any dirt or grime that’s hitchin’ a ride. A quick once-over to spot any wonky wear or damage keeps surprises at bay.
- Lubricate Components: Slap on some lube following your bike manufacturer’s bedtime story, a.k.a, the owner’s manual. Pay extra attention to those seals and moving doodads sitting there (Bicycle Habitat).
- Adjust Suspension Settings: Many front suspensions let you fiddle with the settings, adjusting for whatever wild terrain you’re tackling. This tweak-fest not only smooths bumps but also ups your steering game (REI).
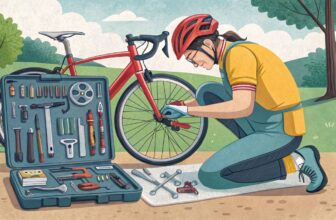
For those gearheads who love wrenching it out at home, a bike tool kit is your best partner in grime.
Periodic Suspension Servicing
Regular check-ups are like visits to the bike doctor—stop things from turning pear-shaped. Here’s a service roadmap:
- Annual Service: Your suspension has a yearly date with the bike doc or every 100 hours on the saddle (REI).
- Professional Check-Ups: Got your bike on lockdown? No fret, but a once-a-year specialist peek can catch what you might miss with the ol’ DIY goggles.
- Component Replacement: Parts like seals and bushings wear out quicker than your favorite sneakers. Regular service can catch these before things go south.
- Maintenance Schedule: Stick to a bike maintenance schedule that vibes with how and where you ride, keeping your trusty steed in top form.
| Maintenance Task | Frequency |
|---|---|
| Clean and Inspect | After every ride |
| Lube Things Up | Monthly |
| Tweak Suspension Settings | Whenever you need |
| Professional Suspension Service | Annually |
| Full Suspension Overhaul | Every 100 hours |
Following these tips is like putting a cherry on top of your biking adventures. Your suspension stays peachy, and your rides are a breeze. For more bike sorcery tidbits, dive into our bike repair guides and emergency bike repair pointers.
Lubrication for Bike Maintenance
Keeping your bike lubed up right is key to giving it a long life, smooth rides, and less time in the shop. Let’s dive into two main types of greasers for your bike: chain lubes and grease for bearings.
Chain Lubricants
Chain lubes are like magic potions for your bike chains. Swab on some good chain goop regularly, and it’ll ward off wear, rust, and any nasty corrosion. These light grease wonders sneak into the nooks of your chain links, protecting them from the inside out.
But wait, start with a clean chain, or you’ll just be mixing dirt soup. Here’s a quick run you’ve gotta do:
- Use a degreaser to strip the grime.
- Dry it till it’s desert dry.
- Dab on lube, don’t drown it.
- Wipe off the extra, so you don’t turn it into a dust magnet.
| Chain Lube Type | What It’s Good For |
|---|---|
| Dry Lube | Great in the dry, keeps mess at bay |
| Wet Lube | Made for rain and muck, sticks around longer |
| Ceramic Lube | Makes chain shifts silky, and stays put |
For more sneaky tips on your chain, check out our bike chain wear guide.
Bearing Grease
Don’t forget the grease for the other bike bits like hubs, headsets, pedals, and the bottom brackets. High-octane grease keeps them spinning smoothly and cuts down on damage. Something like Park Tool HPG-1 does the job, standing tough in rough conditions, albeit a bit less water-friendly.
| Bearing Spot | Best Grease Choice |
|---|---|
| Hubs | PPL-1 PolyLube™, HPG-1 high-performance |
| Headsets | PPL-1 PolyLube™, HPG-1 high-performance |
| Pedals | PPL-1 PolyLube™, HPG-1 high-performance |
| Bottom Brackets | PPL-1 PolyLube™, HPG-1 high-performance |
Note, though, grease ain’t a go-to for all threads or for the brakes, where anti-seize or thread locker is more the choice (Park Tool).
Give your bike innards a good greasing up and feel the difference in performance and lifespan. For a full how-to on these jobs, take a look at service bike hub and bike bearing maintenance.
Keep your wheels well-lubed, and every ride will be a coast in the park. Stay on top of it with the right lubes and tricks, and you’ll always be ready to roll.
Types of Grease for Bikes
Grease—it’s like the secret sauce that keeps your bike humming along smoothly and prolongs the life of its bits and pieces. This bit is all about when grease struts its stuff, whether in keeping threads slick or making press-fit parts play nice.
Thread Lubrication
Grease on threads? Heck, it’s a must-have trick in the cycler’s toolkit. This neat stuff eases friction, fights off seizing, and makes it a cinch to take things apart later. Still, it’s not a one-size-fits-all gig—some threads are better off with an anti-seize or thread locker, especially when you’re dealing with different metals or tackling brake bits like disc rotor bolts (Park Tool).
| Component | Recommended Lubricant |
|---|---|
| Pedal Threads | Grease |
| Bottom Bracket Threads | Grease |
| Disc Brake Rotor Bolts | Threadlocker |
| Chainring Bolts | Grease |
Getting thread lubrication right is like sticking to your bike’s health checkup. It fends off those pesky creaky noises and keeps your ride in top form.
Don’t miss out on bike tool kit must-haves for detailed tips on thread lubrication.
Press Fit Applications
Press fit bits—like crown races or those stubborn headset cups—really dig some grease. It helps dodge corrosion and makes wrestling them free way less taxing. But, when you’re dallying with carbon fiber parts, grab yourself some carbon assembly paste—not grease,.
| Application | Recommended Lubricant |
|---|---|
| Crown Races | Grease |
| Headset Cups | Grease |
| Bottom Bracket Cups | Grease |
| Carbon Fiber Components | Carbon Assembly Paste |
Choosing the right grease for press-fit gizmos is spot on for nurturing those bearings, ensuring they roll smoother and stick around longer.
For more hands-on advice about slathering grease on bike parts, check out our fix-it compilations.
Grease—it’s the MVP in the world of bike care, making sure everything runs like butter and lasts way longer. By nailing which grease goes where you’ll keep your two-wheeler tip-top with minimal fuss. For some beefier tips, dive into our emergency fixes and plenty more cycling wisdom.
Specific Lubricants for Bikes
Getting your head around lubricants can do wonders for your bike. Here, we’re spilling the secrets on the two main grease gurus: your everyday grease and its fancy cousin, assembly compounds.
Using Grease Properly
Grease is like the Swiss army knife of bike maintenance. It’s your go-to for threads and that pesky press fits. Smear it on right, and it’ll keep parts from sticking, fight off rust, and make taking things apart less of a drama.
Where to Slather Grease:
- Threads: Rub-a-dub grease on those threads, except when dealing with dissimilar metals or brake parts like rotor bolts. Those parts are better off with an anti-seize or thread locker (Park Tool).
- Press Fit Applications: Slather grease all over press fit spots like crown races and bottom bracket cups. It’s the magic wand for easy builds and teardowns, plus it scares away rust (Park Tool).
- Cables: Give cables a light grease massage to cut down on friction and make them last longer.
Where Grease is Off-Limits:
- Carbon Fiber Components: Skip the grease on carbon bits. Go for special assembly compounds made just for that fancy carbon (Park Tool).
Assembly Compounds
Assembly compounds, like Park Tool SAC-2, are the superheroes for clamping jobs, adding grip without the slip. They’re your buddy when working with carbon.
| Where It’s Used | What’s Best for It |
|---|---|
| Carbon Fiber Parts | Assembly Compound |
| Metal Threads | Grease or Anti-Seize |
| Press Fit Spots | Grease |
| Brake Rotor Bolts | Anti-Seize/Threadlocker |
Perks of Assembly Compounds:
- Extra Grip: Loaded with silicon dioxide—the gritty stuff—that ups the stickiness, making sure parts stay put (Park Tool).
- Tight Hold: Keeps clamped things solid, like seat posts or bars, without a slip-n-slide.
Wanna learn more about which lube goes where? Check out our guides on top bike lubricants and nail that bike bearing maintenance.
Using the right schmear for the right job can add years to your bike bits and boost your ride. Keep that bike lubed often if you’re peddling daily, just on Sundays, or living in Lycra. For specific tips, your bike manual or a handy repair guide can be your life-saver, so can knowing your bolt torque limits.
Mountain Bike Suspension
Mountain bike suspension has come a long way, baby! Getting the lowdown on its history can help cyclists keep their suspensions running smoothly and take their biking game to the next level.
Evolution of Suspension Gizmos
Once upon a time in 1990, Doug Bradbury, the Manitou mastermind, unveiled the first front suspension fork. This bad boy used elastomers but didn’t do much in the dampening department.
Fast forward to the early ’90s, and full-suspension bikes joined the scene. They had a few hiccups—think pedal bob and brake jack—that made pedaling a bit of a slog. Enter the AMP Research Horst link to save the day by smoothing out these bumps.
These days, suspension forks have upgraded their springs to include materials like steel, titanium, and compressed air. The spring choice changes the ride: coil springs keep it steady, while air springs mix things up with a progressive feel.
Keeping Your Mountain Bike Suspension Happy
Taking care of your suspension isn’t just for looks; it keeps your bike zipping along like a champ. Here are some easy-peasy tips:
- A Good Scrub and Look-See:
- Give your suspension parts a nice wash to ditch dirt and gunk.
- Watch out for any signs of wear or those pesky scars of damage.
- Get Your Lube On:
- Slap some lube on the moving bits to keep them shakin’ and bakin’. Need lube advice? Check out the best bike lubricants.
- Leak Peek:
- Give your forks the once-over for oil or air leaks.
- Top off or swap those hydraulic juices when needed.
- Tune It Right:
- Set your suspension to match your weight and the trail you’re tackling.
- Dial in the right sag to keep things running silky smooth.
| Component | How Often To Tweak It |
|---|---|
| Suspension Forks | Clean up after every ride, check it out monthly, and give it a full service every 50 hours on the trails |
| Rear Shock | Same as the forks: Clean after every ride, check out monthly, full service every 50 hours |
| Lubrication | Lube up moving parts every 2-3 rides, especially post mudfest (best bike lubricants) |
| Oil Swap | Change that fork and shock oil every 100 hours for primo performance (bike bearing maintenance) |
Quality suspension often means the bike’s price tag gets a little heavier. But you get what you pay for: a lighter, more adjustable, well-put-together ride that feels oh-so-right.
For more tips on keeping your trusty steed in tip-top shape, check out our bike repair guides. Keeping up with maintenance means your suspension will be ready to take on whatever the trail throws your way, giving you a sweet, smooth ride every time.
Bike Components Maintenance
Keeping your bike in top shape with regular maintenance will keep those wheels rolling smoothly and safely. Here’s your go-to for keeping bolts tight and gears humming.
Checking Bolt Tightness
Bolts on your ride might loosen up over time thanks to good ol’ vibrations and regular wear, especially if you’re hitting those bumpy trails. Tightening bolts is Bike 101 when it comes to maintenance.
Steps to Check Bolt Tightness
- Tools You Need: Grab a torque wrench, an Allen key set, and maybe a screwdriver.
- Places to Keep an Eye On:
- Crankarms: See that the crankarms are grip-tight to the bottom bracket.
- Pedals: Pedals should fit snugly on the crank arms, no wobbling allowed.
- Chainring Bolts: Make sure the chainring’s bolts are all snug.
- Seat Bolt: Lock that seat onto the seat post like it’s a roller coaster ride.
- Seatpost Bolt: Check that the seatpost isn’t going anywhere in the frame.
- Stem Bolts: Ensure the stem is hugging the fork steerer tube tight.
- Handlebar Bolts: Keep those handlebars glued to the stem.
- Accessory Bolts: Ensure things like racks, fenders, and bottle cages are all bolted down tight.
With a trusty wrench, give everything a turn to prevent your bolts from saying “see ya” mid-ride.
Gear Adjustment and Testing
Whether you’re biking to work or racing the wind, smooth gears are what you need for a no-hassle ride.
Steps for Gear Adjustment
- Look for Wear: Regularly check and swap out tired cables and chains before they drag other parts down.
- Dial in Your Derailleur:
- Set things straight between the derailleur and gears.
- Use the barrel adjuster to get that silky shifting happening.
- Cable Check: Keep the tension just right for those sharp gear changes.
- Lube It Up: Use professional lubes to keep everything sliding smoothly. More tips in our best bike lubricants section.
- Take it for a Spin:
- Run through the gears and see each one doing its thing.
- Test it while riding to make sure there’s no slipping hassle.
Regular gear tweaking and care will have your bike feeling sharp and secure. For more detailed advice, hit up our bike gear indexing article.
| Component | Tool Needed | Maintenance Frequency |
|---|---|---|
| Crankarms | Torque wrench | Monthly |
| Pedals | Allen key | Monthly |
| Chainring Bolts | Torque wrench | Monthly |
| Seat Bolt | Allen key | Monthly |
| Seatpost Bolt | Allen key | Monthly |
| Stem Bolts | Torque wrench | Monthly |
| Handlebar Bolts | Allen key | Monthly |
| Accessory Bolts/Screws | Screwdriver set | Monthly |
For more handy guidebooks on bike care, swing by our bike repair guides.
Keeping your wheels in check prolongs their life and amps up your bike rides. For more tricks and tips, visit our articles on bike tool kit essentials and bike maintenance schedules.
Tire Maintenance for Bikes
Keeping your bike’s tires in tip-top shape? It’s not just about looking good—it’s about keeping things rolling safely and smoothly on your two-wheeled adventures. Yeah, tires might not always be the first thing on your mind, but giving them a once-over can save you from headaches down the path and make your ride feel like a breeze.
Importance of Tire Maintenance
Tires, those trusty rubber guardians, are the only link between your bike and the ground. Think about it: a tiny patch of rubber, maybe the size of your thumb, is clocking overtime to keep your ride stable and safe (South Shore Cyclery). Let them wear out, and you could be in for a wild ride you didn’t exactly sign up for, especially on those epic bike journeys. So, make routine tire checks a staple in your bike maintenance checklist.
Signs to Replace Bike Tires
Wondering when it’s time to give your bike tires a rest? Spot the signs early to keep your rides drama-free.
1. Visible Cracks
Got cracks, especially on the sidewalls? Time for a swap. Old rubber doesn’t age like fine wine—it just goes brittle. Replace those tires before you’re left with your feet on the ground instead of the pedals (South Shore Cyclery).
2. Increased Punctures
Tired of patching flats? More punctures might be your tire’s way of saying it’s past its prime. Those repeated breakdowns signal it’s time to take a closer gander and see if your rubber’s under the weather (South Shore Cyclery).
3. Worn-Down Tread
No tread and seeing strings peeking through? Yikes! That’s a safety hazard on wheels. Swap those bad boys out before you end up with road rash.
| Sign | Description |
|---|---|
| Visible Cracks | Crackly, aged rubber on sidewalls screams for new tires. |
| Increased Punctures | Recurring flats? Tires are hinting they’re on their last legs. |
| Worn-Down Tread | Tread gone and threads poking through—time for new tires. |
By keeping an eye on these signs and regularly checking your bike tires, you can make sure your ride stays safe and maintains its smooth groove. For more tidbits on looking after your bike bits or fixing those courage-sapping flats, swing by our detailed bike care guides.


