Understanding Bike Maintenance & Repairs
Importance of Maintenance
Keeping your bike in tip-top shape isn’t just for gearheads or those racing to the finish line. Whether you’re cycling like Lance Armstrong or simply spinning around the block, a bit of TLC for your wheels is key. It not only saves you from shelling out more cash on fixes over time but also keeps your trusty steed road-worthy and long-lasting. A bike that’s in good nick doesn’t just glide along nicely—it’s looking out for you by minimizing risks on your journey.
Why you should baby your bike:
- Makes pedaling smoother and more responsive
- Helps your bike parts stick around for longer
- Cuts down on surprise breakdowns
- Keeps you safe
Need a game plan? Our bike maintenance schedule has got your back.
Benefits of DIY Repairs
Getting your hands greasy with some DIY bike fixes can feel like cracking open a treasure chest—one that’s full of practical perks for cyclists everywhere. Skipping the mechanic not only leaves more dollars in your pocket but also amps up your mechanic know-how. For anyone pinching pennies or those who ride daily, mending your own bike is a sweet deal.
Why DIY bike repairs are your new best friend:
- Wallet-friendly: Skip the repair shop fees.
- No waiting: Fix it when you have a minute, not just when the shop’s open.
- Confidence boost: Solve hiccups on your own and feel like a pro.
- Brain power: Learn about your bike’s ins and outs, which comes in handy when you’re in a jam.
Top fixes to try your hand at include:
New to the game? No sweat! Our repair guides are perfect for getting you rolling on DIY repairs.
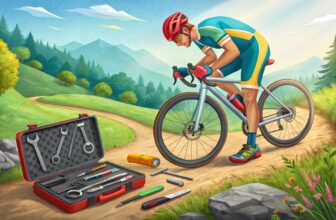
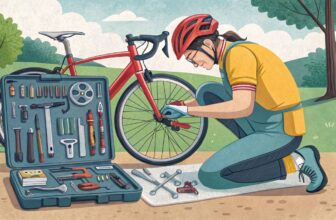
Before you dive in, make sure you have the right gear. Check out our bike tool kit essentials to stock up.
Regular check-ups and tune-ups can also nip pesky noises in the bud—nobody wants their ride to screech like a banshee. Check out more on dealing with bike noise problems.
Here’s a cheat sheet for how often to tackle some basic bike TLC:
| Maintenance Task | When to Do It |
|---|---|
| Cleaning Bike Chain | Every 200 miles |
| Keeping Parts Squeaky | Every 1-2 weeks |
| Sending Brakes Some Love | Monthly |
| Checking Tire Pressure | Weekly |
Eager for more tips? Swing by our basic bike maintenance tips and get your bike gleaming.
Jump into the groove of upkeep and quick fixes, and your rides will feel like a breeze—problem-free and more enjoyable than ever.
Essential Tools for Bike Maintenance
Biking is a blast, whether you’re just out for a Sunday cruise or gearing up for a big race. But let’s face it—without the right gear to keep your wheels spinning, you’re in for a rough ride. So, whether you’re doing the bare minimum maintenance or going all in on those intricate tweaks, here’s your go-to guide for keeping your bike in tip-top shape.
Basic Tools Needed
It’s the little things that count, right? These basic tools are the unsung heroes of bike maintenance that make sure everything runs smoothly.
- Allen Wrenches: Think of these as the Swiss Army knife for bikes. Almost every bolt you encounter will need one of these.
- Screwdrivers: Got a loose screw? Whether it’s Phillips or flathead you need, these are a must for tweaking things like derailleur limits.
- Tire Levers: These handy tools make quick work of those pesky flat tires.
- Bike Pump: No one likes a bumpy ride. Proper tire pressure makes your ride smoother and can help keep flats at bay. Check out our bike tire pressure guide for tips.
- Chain Lubricant: Lube it up! Consistent chain lubrication keeps everything running like a dream. Need a step-by-step? Dive into our Clean Your Bike chain guide.
For a quick and handy recap:
| Tool | Mission |
|---|---|
| Allen Wrenches | Tighten bolts |
| Screwdrivers | Adjust screws |
| Tire Levers | Swap tires |
| Bike Pump | Inflate tires |
| Chain Lubricant | Smooth chain |
For the complete lowdown on must-have items, take a look at our bike tool kit essentials.
Advanced Tools for Enthusiasts
For those who love to tinker and want to up their repair game, these advanced tools will become your new best friends.
- Spoke Keys: Your secret weapon for perfect wheels. The Unior 1630/2P is a top pick because it hugs all sides of the nipple, reducing damage. For more info, check out Bike Gremlin.
- Truing Stand: Get those wheels even with a truing stand like the Unior model 1689. Precision truing made simple (Bike Gremlin).
- Torque Wrench: Keeps you on point when it comes to bolt specs. We’ve got the details in our bike bolt torque specs guide.
- Pedal Wrench: Does exactly what it says—perfect for pedals.
- Chain Tool: The right hand for chain snakes. Catch up on comprehensive care in our bike chain wear guide.
Recap for the gear-heads among you:
| Tool | Duty |
|---|---|
| Spoke Keys | Truing/building wheels |
| Truing Stand | Spot-on wheel truing |
| Torque Wrench | Proper bolt tightening |
| Pedal Wrench | On/off pedals |
| Chain Tool | Fixing bike chains |
For those ready to master wheel wizardry, visit the wheel-building guide for a deep dive.
Armed with these tools, you’re all set to tackle everything from routine checks to advanced repairs, giving you a smoother, more reliable ride every time.
Basic Bike Maintenance Tips
Keeping your bike in tip-top shape is the key to a comfy and worry-free ride. Whether you’re pedaling for fun on weekends or hustling to work on weekdays, these handy bike tips will ensure your trusty steed stays roadworthy.
Keep It Spick and Span
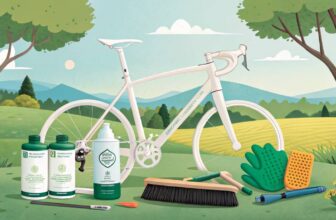
Who doesn’t love a shiny bike? Plus, a clean ride is a happy one. Dirt can sneak in and wreak havoc on parts, so regular TLC is a must.
- Round Up Your Cleaning Arsenal
- Bucket (for splashing suds)
- Bike-friendly soap (leave the dish soap under the sink)
- Sponges and brushes (get in those nooks and crannies)
- Water source (hose, sink, or rain dance)
- Scrub-a-dub Routine
- Rinse First: Start with a good rinse to shake off the loose road gunk.
- Soap Up: Lather on bike-friendly suds. Household soap can be too harsh on your ride’s skin.
- Scrub Time: Use those brushes to tackle stubborn spots, focusing on drive chains and hubs.
- Rinse Again: Douse off the soap action thoroughly.
- Dry Spell: Wipe it down with a soft towel and let it air dry—rust be gone!
Want more steps to sparkle your bike up better? Bounce over to our bike frame cleaning cheat sheet.
Lubing Like a Pro
Lube it up! This keeps your bike gliding smoothly by minimizing friction and wear on those moving bits. Here’s where to pay attention:
- Chain the Main
- Give the chain a spa day with some degreaser (clean that chain like a champ).
- Dab on chain lube with precision—drip-drip style for even spread.
- Swipe off leftover lube to keep dirt from hitchhiking.
- Dance of Derailleurs and Cables
- Lube the derailleurs’ pivots.
- A dab will do ya on the visible cable spots.
- School up on gear know-how with our gear indexing guide.
- Brake Magic
- Add lube to the brake action.
- Grease the brake cables where they meet the covers.
- Tweak brakes just so, peep our brake adjustment masterclass.
- Toe the Pedal Line
- Unscrew pedals now and then, and grease those threads.
- Smooth out pedal clip-ins with a lube touch-up.
Curious about the magic potion? Discover our best bike lubes.
Do you a hankering for more bike tinkering tools? Our essentials kit rundown and repair guides have your back, ensuring your bike stays ready to roll.
Advanced Bike Maintenance Techniques
Keeping your bike in tip-top shape is like caring for a trusty old ride. Whether you’re a bike lover or a competitive racer, some advanced maintenance tricks can make all the difference. Let’s chat about keeping those wheels straight and chains gliding smoothly like butter.
Wheel Truing Guide
Rolling wobbly wheels is like riding with a duck strapped to your handlebar—awkward and unpredictable. Getting your wheels to spin truly means a better ride and peace of mind on the track.
What You’ll Need:
- Spoke wrench
- Truing stand (use truing stand)
- Tensiometer to keep spoke tension on point (Park Tool)
Steps to True a Wheel:
- Wheel Up in the Truing Stand: Pop that wheel into the stand to get a good look at what you’re dealing with.
- Spot the Wobbles: Give it a spin. Notice any wobbles? They aren’t fans of straight paths!
- Tinker Those Spokes: Use your trusty spoke wrench. Got a wobble on the right? Tighten the left. On the left? Tighten the right. Simple.
- Check the Tension: Grab that tensiometer (it’s like a Pokémon for spokes), and make sure those babies have even tension.
| Tool | Purpose |
|---|---|
| Spoke Wrench | Tweak the spokes |
| Truing Stand | Hold the wheel steady |
| Tensiometer | Balance spoke tensions |
Need more nitty-gritty on wheel truing? Our full guide on how to true a bike wheel has what you need.
Chain Lubrication Tips
A well-oiled chain keeps your bike whisper quiet and shifting easily, like butter on a skillet. A little maintenance here can dodge rust and make your ride last longer.
What You’ll Need:
- Chain lubricant (wet or dry)
- Clean cloth
- Chain cleaning tool (clean bike chain)
Steps for Lubricating Your Chain:
- Start with Cleaning: Out with dirt first! Your cleaning tool is your bestie for a spotless chain.
- Lubricate, Baby!: Drop some lube on each chain roller. Pedal backward and let it work its way in.
- Wipe Off the Excess: After lubing, wipe away extra gunk. No need to ride with grime clinging to your chain.
| Type of Lubricant | Best For |
|---|---|
| Wet Lubricant | Messy, mucky adventures |
| Dry Lubricant | Sunny, dusty trails |
Want more lube wisdom? Check out our article on the best bike lubricants.
Nailing these skills, like wheel truing and chain lubrication, keeps your bike in top gear. Looking for more tips? Dive into topics like bike bearing maintenance and bike tool kit essentials to uncover more hidden gems.
Common Bike Repairs
Taking care of your bike means fewer headaches on the road and more time enjoying the ride. Here’s a rundown of some bike fixes every pedal enthusiast should have under their belt.
Fixing Flat Tires
Flat tires are the bane of cyclists everywhere, but you can tackle them without cursing your luck. Knowing these steps by heart might just have you swapping tales with fellow cyclists rather than sitting in the bike lane.
Steps to Fix a Flat Tire:
- Remove the Wheel: Pop those brakes open and get the wheel off the frame.
- Take Out the Tube: Let all the air out and pull the tire from the rim with tire levers in hand.
- Inspect & Patch: Check for anything that shouldn’t be poking your tube. If necessary, patch up the tube like a pro.
- Reassemble: Slide the tube back gently, tucking it in without pinch fears. Fit the tire back in the rim like you’re putting a snug cover on your phone.
- Inflate & Reattach: Pump the tire upright and reunite it with the frame. The pressure guide is just a click away if you’re not sure about this (bike tire pressure guide).
Got a minute? Dive deeper into the topic with our fix bike flat tire instructions.
Adjusting Brakes and Gears
Ensuring your brakes and gears are in tip-top shape is a ticket to a safer, smoother ride.
Brake Adjustment:
- Check Pad Alignment: Make sure those pads kiss the rim right and don’t flirt with the tire.
- Adjust Cable Tension: Get the tension just right with a barrel adjuster or your own two hands.
- Test Brakes: Grip those levers; check if they stop you like they mean it and contact the rim evenly.
Find more in our adjust bike brakes walkthrough.
Gear Adjustment:
- Indexing the Gears: Cycle through gears like a DJ at a party. Any skips? Check the cables and adjust their tension.
- Derailleur Alignment: Ensure derailleurs are lining up like a precision squad. Adjust those limit screws or cables if needed.
For more juice, head over to bike gear indexing.
Troubleshooting Common Issues:
| Problem | Fix-It Guide |
|---|---|
| Brakes squeaking | Clean ’em up or replace the pads |
| Gears skipping | Tweak the tension, grease ’em up, swap worn bits |
| Spongy brakes | Bleed or replace tired cables |
Keep your bike trusty and trail-ready. For any hiccup, our bike repair guides are here to help.
Wanna gear up more? Check these out:
- best bike multi tools
- use truing stand
- adjust front derailleur
Wheel Building Basics
Biking is awesome, and getting the hang of wheel building takes your bike repair skills to a whole new level. Knowing what you’re doing and picking the right bits ensures you end up with wheels that really hold up on the road or trail.
The Wheel Building Process
So, building a wheel means hooking up the rim and hub with spokes and little fastener thingies called nipples, then tightening it all up nicely (Park Tool). Here’s an easy version of how it’s usually done with j-bend spokes and a 3-cross style on a 32-hole rim:
- Lacing the Spokes: Start by putting those spokes through the hub’s holes, switching up directions for balance.
- Inserting into Rim: Fit each spoke through its hole in the rim.
- Adding Nipples: Spin those nipples onto the spokes until they’re snugged on by hand.
- Tensioning: Bit by bit, tighten the nipples so the wheel starts to form. Use a spoke wrench to get it just right.
- Truing the Wheel: Adjust spoke tension until the wheel spins without any weird wobbles or bumps. A truing stand helps make this precise.
- Final Tensioning: Check all spokes are tight using something like a tensiometer.
That’s your basic wheel build—small tweaks might be needed for different setups. For more nitty-gritty details, hop over to our true bike wheel article.
Choosing the Right Spokes
Picking the right spokes isn’t just a side thought; it makes your wheel ride smoother and last longer. Keep these in mind when selecting:
- Spoke Type: You’ve got j-bend and straight-pull options. J-bend is quite popular and easy to track down.
- Material: Most spokes are stainless steel or carbon. Stainless steel won’t bust your bank and lasts ages, while carbon is lighter if you’re counting grams.
- Spoke Length: Make sure they’re the right length for your rim and hub, or things might not hold up.
- Spoke Gauge: Beefier spokes beef up your wheel, but they can be heavier too. The usual suspects are 14G (2.0mm), 15G (1.8mm), and 13G (2.3mm).
Here’s a quick look at the most common spoke choices:
| Spoke Type | Material | Common Gauges | Use Case |
|---|---|---|---|
| J-bend | Stainless Steel | 14G, 15G | Daily rides, commuting |
| Straight-pull | Carbon | 14G, 15G | Racing, high-speed |
| J-bend | Carbon | 14G | Light-as-a-feather set-ups |
Curious about different spokes and what they mean for your ride? Check out our piece on bike spoke maintenance.
Knowing how to build wheels and which spokes to use lets bikers and fix-it-yourself fans make wheels just right for them. For more on keeping your bike in top shape, dive into our detailed bike repair guides.
Tools for Wheel Building
Building a wheel is like crafting the perfect pizza – you need the right tools and a bit of finesse. Your go-to gear: spoke keys, wrenches, and a trusty truing stand. These gems keep your wheels spinning true and steady, a must for any bike wizard.
Spoke Keys and Wrenches
Think of spoke keys (or spoke wrenches) as the magic wand of wheel building. They tweak the spoke tension, turning a wobbly wonder into a straight shooter. For those who take their wheelwork seriously, invest in spoke keys that grip all four sides of a nipple. Why? It saves those fragile spoke nipples from getting chewed up. The Unior 1630/2P key is a hot pick among those in the know according to Bike Gremlin.
| Type of Spoke Key | Features | Recommendation |
|---|---|---|
| Unior 1630/2P Key | Grabs four sides of nipple | Top-notch choice |
| Basic Key | Holds two sides only | Meh, better options out there |
The quality spoke keys mean less time fussing and more time cruising, ensuring you nail that spoke tension without the headache.
Using a Truing Stand
A truing stand? That’s like having a backstage pass to wheel perfection. It shows you where your rim’s gone rogue, so you can nudge those spokes back in line. While not a total must-have, a reliable truing stand like the Unior 1689 cuts down on guesswork and speeds up the tinkering, as noted by Bike Gremlin.
| Truing Method | Description | Efficiency |
|---|---|---|
| Truing Stand | Uses a zip tie near the rim | Super slick |
| Zip-tie Method | Uses a zip-tie near the rim | Kinda clunky, lots of elbow grease |
If you’re sans truing stand, fear not. A zip tie on the bike frameworks in a pinch. Just rotate the wheel and eyeball the rim’s tango with the zip-tie to fix those wonky bits. But the truing stand? That’s where you’ll find your Zen.
For more know-how on wrangling these tools, check out our guides on bike spoke maintenance and learning to use a truing stand.
Armed with these trusty tools, you’ll whip those wheels into shape. Curious for more wisdom? Head over to our bike repair guides to level up your bike skills.
Keeping Your Wheels in Check
When it comes to piecing together a bicycle wheel, you want that tension just right—like a good joke, it’s all in the balance. This means fiddling with those spokes and nipples (get your mind out of the gutter!)and using the right tools to make sure nothing wobbles, jiggles, or goes haywire down the road. A well-tensioned wheel not only stays straight but also sticks around for the long haul.
Getting Tense Over Tires
Building a wheel is like solving a jigsaw puzzle. You start by fixing the rim to the hub with spokes and their buddies, the nipples. Getting them to the perfect tightness is the holy grail of turning performance and longevity into a ride that’s as smooth as butter.
Steps to Tension Like a Pro:
- The Starter Tighten: When you’ve got all those spokes in place, give each nipple a twist just until no more threading‘s in sight. Bam! Initial tension achieved.
- Slippery Business: A dab of light lube keeps those threads and nipples from getting cranky with each other.
- Crank it Evenly: Gradually twist each nipple a similar number of turns all around. Going in circles means your tension stays balanced.
- The Finishing Touch: Check the wheel for any wobbles on a truing stand and nudge those nipples until everything’s smooth and round.
Tensiometer 101
Think of a tensiometer like a mood ring for your spoke tension—it tells you when things are off. The fancy-pants ones give you spot-on readings so you know exactly when you’ve hit that tension sweet spot.
Tensiometer in Action:
- Getting in Position: Place your tensiometer on a spoke neatly between the hub and rim. Your exact location will depend on your tool’s design.
- Read and Weep (with Joy): A gentle squeeze gives you a number that tells you if your tension’s off its rocker.
- Fine-Tuning: Compare those numbers across several spokes and adjust each nipple till you’re singing a uniform tension tune.
- Double-Check: Keep an eye on the tension after every tweak to keep everything within that tension comfort zone.
| Spoke Spot | Starting Tension (kgf) | Final Tension (kgf) |
|---|---|---|
| Non-Drive Party | 60 | 100 |
| Drive Side Action | 120 | 150 |
These numbers show why the drive-side spokes need more tension—they take some serious pedal beatings. Making a habit of bicycle maintenance checks saves you from pesky tension troubles.
Ace that wheel tension, and you’re on track for a ride that’s not just about getting from A to B, but enjoying every twist and turn along the way. To dig into other bike DIY tips, swing by our nifty bike repair manuals.


