
Ever felt the frustration of a sudden flat tire mid-ride? Your bike’s valves might be the unsung heroes ensuring a smooth journey. Just like a well-tuned engine, properly maintained valves are crucial for optimal performance and safety.
Imagine gliding effortlessly on every pedal stroke, knowing your tires are perfectly pressurized and leak-free. In this guide, we delve into the essentials of bike valve maintenance, uncovering tips and tricks to keep your ride flawless.
Whether you’re a seasoned cyclist or a casual rider, mastering valve care can elevate your biking experience to new heights. Let’s pedal towards perfection together!
Valve Maintenance Basics
Importance of Valve Care
Taking care of your bike’s valves is like taking care of your morning coffee – essential for a smooth ride. You get steady tire pressure, better ride quality, and that warm feeling of knowing you’re safe as houses on your cycle. Regular valve check-ups nip those pesky leaks in the bud and keep surprise deflation from crashing your joyride.
Your valves are like tiny gatekeepers, and they need some TLC through regular check-ups and a good scrub to clear out any gunk messing with their mojo. Picture this: a minuscule bit of dirt can keep your Schrader valve hanging loose, leaking air like it’s going out of style. Keep them clean and snug to ensure solid tire pressure and to make those tires last longer than your grandma’s secret cookie recipe.
Signs of Valve Issues
The early bird catches the worm, especially when it comes to spotting valve troubles. Here’s what you might notice if your valves are waving red flags:
- Leaking Valves: If your bike’s acting all deflated and there’s no visible culprit, suspect a valve leak. Dirt buildup or a defective valve core might be the villain here.
- Difficulty in Inflation: Struggling with the pump like it’s an unruly garden hose? That could point to a jam or a busted valve core.
- Air Escaping During Inflation: Hear that hissing during inflation? Your valve might not be closing up shop as it should.
- Loose Valve Core: Feel some shimmying when you check the valves? That’s like a loose screw needing a little tightening or a quick swap.
Putting your bicycle through a regular bike safety check is like having a loyal friend who tells you when your breath stinks—honest and needed.
| Valve Issue | Predictable Culprit | Quick Fix |
|---|---|---|
| Leaking Valve | Dirt or busted valve core | Give it a clean or swap the core |
| Inflation Headaches | Blocked valve or messed-up valve core | Unblock that valve or grab a new one |
| Inflation Escape Artist | Valve can’t keep its act together | Adjust the fitting and investigate the core |
| Jumpy Valve Core | Valve core in need of a firm hand or new home | Give it a tighten or a shiny replacement |
Keeping an eye on your bike’s valves not only saves you from spending your hard-earned dollars on fixes but also keeps you wheeling smoothly. And if you’re itching to learn more about keeping your bike in top shape, check out handy guides like bike tool kit essentials and the best bike lubricants for practical tips and advice.
Troubleshooting Valve Problems
Keeping your bike’s valves in shape is key to smooth riding. We’re tackling typical valve hiccups and sharing handy hacks to troubleshoot and swap them out.
Dealing with Leaking Valves
Leaking valves can be a pesky problem, leading to flat tires and a less-than-stellar ride. A common culprit for a sneaky Schrader valve is gunk getting in the way of the seal. Check out these steps to give that leaky Schrader valve a fix:
1. Give It Some Extra Air:
- Pump in a tad more air than usual.
- This might just pop any dirt loose from the valve.
2. Clear Out the Crud:
- Press the middle pin to let out any trapped debris.
3. Look for Persistent Dribbles:
- If it’s still acting up, there may be no saving it—time for a new tube.
4. Tighten Things Up:
- Make sure the valve core is snug. Grab a valve core tool if you need to.
A good regular clean and some proper bike-friendly oil can keep your valves happy and leak-free.
Valve Replacement Tips
Swapping out a bum valve keeps your wheels in top shape. Here’s how you do it:
1. Figure Out Your Valve Type:
- Schrader Valves: You’ll find these on the mountain and hybrid bikes.
- Presta Valves: Popular with road and high-performance bikes.
2. Out With the Old Tube:
- Let all the air out of the tire.
- Get the tire and tube off the wheel.
3. In With the New Tube:
- Tuck the new tube into the tire.
- Gently pop the tire back onto the rim.
4. Pump and Check:
- Slowly inflate while keeping an eye on how everything’s sitting.
5. Straighten the Valve:
- Ensure it’s straight; a tilted valve can spring a leak.
| Valve Type | Common Bikes | Things You’ll Need |
|---|---|---|
| Schrader | Mountain, Hybrids | Valve Core Tool, Pump |
| Presta | Road, Performance | Adapter, Pump |
Feel free to peek at our bike fix-up guides for more tips.
Regular valve check-ups should be part of your regular bike TLC routine. Keeping them clean and working right helps your bike live longer and ride better.
Need help fixing a flat? Swing by our flat tire fix-it guide. And for nailing the perfect tire pressure, don’t miss our tire pressure tips.
Understanding Bike Valve Types
Whether you’re a biking newbie or a seasoned rider, getting a grip on the different valves can make bike maintenance way easier. Let’s break down the essential players in this game: Schrader and Presta.
Schrader Valve Overview
Schrader valves are the workhorses of the valve world, especially in the USA. They’re basically the bike version of what’s on car tires, so popping over to the gas station for a quick air fill-up is a cinch. Physically, they’re on the chunky side, with a consistent width from top to bottom. Durability is their middle name, thanks to their rubber and metal build.
| Feature | Description |
|---|---|
| Material | Metal with rubber wrapping |
| Width | Chunkier |
| Common Uses | Stalwarts of mountain, cruiser, and kids’ bikes |
| Pressure Capacity | Doesn’t do high pressure like Presta can |
Schrader valves are tough cookies, less likely to get beat up. The problem is, if you’re aiming for those sky-high air pressures in competitive cycling, Schrader’s not your guy.
Presta Valve Insights
Enter Presta valves, AKA the fancy French cousins of bike valves. They’ve made their home mostly on road bikes and mountain bikes. These skinny, all-metal valves are easily spotted with their locknut and knurled tips, securing them firmly and keeping the air where you want it.
| Feature | Description |
|---|---|
| Material | All metal, nothing but metal |
| Width | Skinny |
| Common Uses | Best buddies with serious road, mountain, and gravel bikes |
| Pressure Capacity | Can go the distance up to 125 psi |
| Additional Features | Light-weight, roll with ease, adaptable with quick fixes |
Presta valves aren’t just popular ’cause they’re snazzy – they can take on high pressure, making them a favorite among racers. They’re lighter, making your wheels more nimble, and a quick adapter can make them fit different rims without breaking a sweat.
Knowing the ups and downs of Schrader versus Presta valves has its perks—whether you’re pumping your tires, looking for the perfect tool kit, or keeping the airtight (bike tire pressure guide). Dive deeper into all things bike-related, and you’ll be zipping down the tracks with confidence!
Valve Tools & Equipment
Getting your hands on the right gear can make all the difference when it comes to keeping your bike running smoothly and trouble-free, especially those pesky valves. Let’s chat about the must-have gadgets every cyclist should keep nearby to keep their bike valves in tip-top shape.
Essential Valve Maintenance Tools
First things first, you need some basic tools in your arsenal to tackle valve hiccups like leaks and replacements. These essentials will keep your bike in the fast lane.
- Bike Pump – Let’s face it, a trusty pump is your best buddy. Keeping your tires pumped just right can be a game-changer, and most pumps these days play nice with both Presta and Schrader valves. Just grab one with a dual-head, and you’re golden.
- Valve Core Whatchamacallit – This little tool’s great for tweaking valve cores, whether you’re fixing up a leak or dolling out some sealant.
- Fix-It Patch Kit – We’ve all been there, a quick patch kit can save your ride by patching up small punctures without lugging around a spare tire.
- Tire Leverage Bars – Use these to wrangle the tire off the rim, giving you easy peasy access to the tube and valve.
- Tinker Spoke Key – This tool’s like a secret weapon for when you need to fine-tune your spokes, which keeps the rim sure-footed and aligns the valve nicely.
| Essential Tool | Why It’s Handy |
|---|---|
| Bike Pump | Inflate and go |
| Valve Core Tool | Replacing valve bits |
| Patch Kit | Fix-it for small holes |
| Tire Leverage Bars | Get at tube fast |
| Tinker Spoke Key | Rim tweaking |
Check out our bike tool kit essentials for the full rundown of what you need.
Specialized Valve Equipment
While basic tools get the job done, some snazzy specialized gear can make your maintenance smoother and faster.
- Presta Valve Adapter – So you wanna pump that Presta valve with a plain old Schrader pump? You’ll need this nifty bit of kit.
- Digital Pressure Thingy – For those who like to keep a close eye on tire pressure, digital gauges keep everything just right.
- Valve Extender Gizmos – When you’ve got deep rims, these extenders make reaching the valve so much easier.
- Complete Valve Repair Kit – Everything you need to play doctor to your valves: cores, caps, seals, you name it.
| Specialized Tool | What It Does |
|---|---|
| Presta Valve Adapter | Links to Schrader pump |
| Digital Pressure Thingy | Spot-on pressure readings |
| Valve Extender Gizmos | Makes hard-to-reach valves a breeze |
| Valve Fix-Up Kit | All-in-one repair |
Want the skinny on specialized handy tools? Dive into our best bike multi tools.
Keeping those valves in check not only zips up your ride’s performance but also makes pedaling around town safer and more fun. When you roll these tools into your routine, you’ll see your bike’s health hitting the jackpot—check our bike maintenance schedule to keep everything on track.
Valve Maintenance for Motorcycle Engines
Maintaining the little heart valves of your trusty motorcycle is absolutely key to keeping that beast roaring down the road for years to come. Understand what makes these engine valves tick (pun intended) and watch out for when they’re crying for help, and you’ll ensure a smooth ride every time.
Engine Valve Functionality
Let’s break it down. Inside your motorcycle engine, these nifty valves are like gatekeepers. They’re responsible for letting in the air and fuel that powers your ride and shooing out the exhaust gases. As the piston does its thing, these valves open and close the doors of the cylinder head, helping your engine run like a champ.
Each engine has two main types of gatekeepers:
| Type of Valve | What They Do |
|---|---|
| Intake Valve | Welcomes the air-fuel mix into the engine party |
| Exhaust Valve | Shows those exhaust gases the exit door |
Keeping these valves in tip-top shape means your engine runs like a well-oiled, purring machine.
Signs of Engine Valve Damage
No one likes unexpected breakdowns, so catching valve problems early can save you from those wallet-draining repairs down the line. Here’s what to listen and watch for:
- Noise (Ticking or Clicking): Is your bike making a racket? Those odd noises might mean your valves aren’t sitting pretty.
- Loss of Power: Feeling a bit sluggish? It could be your valves throwing a wrench in the works.
- Fuel Consumption: Getting fewer miles to the gallon? Your valves might be guzzling more than their fair share.
- Ignition Difficulties: Struggling to start up? Valve issues might be the culprit.
- Excessive Smoke from the Exhaust: Clouds of black or blue smoke? That’s usually a telltale sign valves aren’t doing their job right.
Keep your eyes and ears peeled for these signs and stick to a regular bike check-up routine to prolong valve life. For more nuggets on bike TLC, pop over to our bike maintenance schedule.
Related Readings
- Adjusting Engine Valves
- Maintaining Valve Clearance
- Cleaning Engine Valves and Maintenance Practices
Getting into the groove of understanding and tending to your motorcycle’s engine valves means you’ll keep your bike at its peak, so you can continue to ride off into the sunset without a worry in the world.
Motorcycle Engine Valve Adjustment
If you’re a do-it-yourself kind of person or just looking to save some cash, keeping your motorcycle’s engine valves in tip-top shape is a must. Knowing why valve clearance matters and how to give those engine valves a little TLC can keep your bike humming like a dream and extend its life.
Why Valve Clearance Matters
Valve clearance is like the Goldilocks of your motorcycle’s engine—not too tight, not too loose, just right. Going too extreme either way can lead to unpleasant surprises like noisy rides, valves getting stuck, or worse, burning out. Keeping things balanced makes sure those valves open and close in sync, delivering a smooth and efficient ride.
Adjusting Engine Valves
Tuning up those engine valves to match what the manufacturer advises is your go-to move for durability and performance. Remember, it’s best to tinker with a cold engine to get accurate results.
Getting the Piston in Place:
- First off, make sure the piston is at the top dead center (TDC).
- You gotta align those cam lobes just right.
Measure with a Feeler Gauge:
- Whip out that feeler gauge to check the clearance between the valve stem and the rocker arm or cam.
- Match it against the specs provided by the manufacturer.
Make Adjustments:
- If things aren’t adding up, you’ll need to loosen that lock nut and turn the adjustment screw to set it straight.
- Double-check with your gauge till it’s perfect.
Tighten and Verify:
- Once all is well, crank down the lock nut.
- Run through your steps again to make sure everything’s on point.
Precision here isn’t just a suggestion—it’s critical. Mess it up and you’re looking at worn-out valve seats, lost power, and maybe even some backfiring (Athena SPA). If you’re new to this or want a refresher on other parts, peep our bike repair guides and bike maintenance schedule.
| Step | Job | Tool of Choice |
|---|---|---|
| 1 | Get that piston to TDC | Piston Position Tool |
| 2 | Check clearance with feeler gauge | Feeler Gauge Kit |
| 3 | Tweak clearance if it’s off | Wrench & Screwdriver |
| 4 | Tighten those nuts and double-check | Torque Wrench |
Want more tips on keeping your bike in shape? Sneak a peek at our tips on cleaning bike chains and adjusting bike brakes.
Keeping tabs on valve maintenance keeps your bike cruising smoothly and saves you from shelling out on hefty repairs. For the nitty-gritty details, always crack open that manufacturer’s manual or get a pro’s help when fiddling with valve adjustments.
Motorcycle Engine Valve Care
Taking good care of motorcycle engine valves isn’t just a good-to-have; it keeps your ride smooth and your engine kicking for the long haul. Dive in to learn how to keep those valves sparkling and in tip-top shape.
Cleaning Engine Valves
Keeping engine valves clean is like giving your bike a tune-up—just a bit of TLC can ward off a laundry list of problems, like sluggish performance or guzzling more gas than usual. Here are some simple ways to keep the grime away:
- Use Additives: Give your bike a bonus with fuel additives made for sprucing up engine valves. These little helpers go in the tank and work their magic, dissolving the gunk that messes things up.
- Valve Cleaning Sprays: These sprays are like a spa day for your valves. Follow the instructions like a treasure map, and watch the crud disappear into thin air.
- High-Quality Fuel and Lubricants: Opt for the elite stuff when it comes to gas and oil. They help keep the nasty carbon stuff at bay and your valves looking fresh (Athena SPA).
- Professional Cleaning: When in doubt, hit up your favorite mechanic for a deep clean. Let the pros do their thing at the right intervals to save you from headaches later on.
Maintenance Practices for Valve Longevity
Keeping your engine valves in check isn’t rocket science. With a few regular habits, you can keep them from throwing tantrums:
- Regular Valve Clearance Checks: Just a tiny gap makes a big difference. Check those clearances when the engine’s cold, and tweak them if needed. It’s like keeping your bike on speaking terms with itself.
- Consistent Oil Changes: Fresh oil is the lifeblood of your bike. Change it like it’s going out of style, around every 3,000 to 5,000 miles, to keep everything moving smoothly.
- Routine Inspections: Give your bike the ol’ once-over for leaks or funny business with seals or gaskets. Also, peek at the air filter and coolant levels, flushing the coolant every couple of years just for kicks.
- Carburetor Tuning: Get that carburetor singing with the perfect air-fuel mix. It’s like giving your valves a security system against carbon invaders.
- Use Quality Tools: Your tools are your friends. Treat them right, and save yourself from the heartbreak of stripped screws or trips to the ER.
Paying attention to your engine valves means your motorcycle stays in the game longer without hiccups. For more handy tips on keeping your ride in stellar condition, check out our other guides on bike maintenance schedules, fixing bike flat tires, and the scoop on the best bike cleaning products.
Engine Valve Performance Tips
Keeping your motorcycle’s engine valves in top shape is key for that smooth, powerful thrill on two wheels. Here’s the lowdown on tweaking your valves and some nifty ways to keep them healthy and humming.
Tuning Engine Valves
Tuning your engine valves isn’t just for the gearheads—it’s something every rider should know to squeeze the best out of their engine. This involves playing around with the fuel-air mix, ignition timing, and tweaking the exhaust system. Getting these things right can turn your ride from “meh” to “wow” in no time.
Key Tuning Steps:
- Adjust Fuel-Air Mixture: Think Goldilocks—the mix needs to be just right for your engine to run like a dream.
- Set Ignition Timing: Picture this—fuel igniting at the perfect moment. That’s ignition timing for ya.
- Optimize Exhaust System: Free up that engine power with a slick, well-tuned exhaust setup.
Before you start tinkering, arm yourself with the right gear. Our guide on bike tool kit essentials is a great place to start.
Preventative Measures for Valve Health
A little TLC goes a long way in keeping those valves sound. Here’s what the smart riders do:
- Regular Cleaning: Wipe out grime and carbon gunk with some magic potions (a.k.a. cleaners). Keeps your valves running smoothly as butter.
- High-Quality Fuels and Lubricants: Don’t feed your baby trash; good fuel and oils keep it from wearing out too quickly.
- Routine Maintenance: Be a stickler for that little book of wisdom—the owner’s manual. It tells you when to poke around and make sure the valves are happy.
- Proper Tools: Using the right tools is like having the right spell for your maintenance magic. Need a refresher? Check out our bike repair guides.
| Preventative Measure | Benefit |
|---|---|
| Regular Cleaning | Kicks dirt to the curb for better performance |
| High-Quality Fuels & Lubricants | Cuts down on wear like magic |
| Routine Maintenance | Spots trouble before it starts, extending valve life |
| Proper Tools | Keeps you from accidentally wrecking stuff |
With these tips in your back pocket, those motorcycle engine valves will purr for miles to come. Hungry for more on keeping your bike in mint condition? Peep our write-ups on bike maintenance schedules, clean bike chains, and adjust bike brakes.
Conclusion
Maintaining your bike’s valves is more than just a routine check—it’s a commitment to ensuring every ride is as smooth and enjoyable as possible. From understanding the differences between Schrader and Presta valves to mastering the art of troubleshooting and replacement, each step you take in valve maintenance directly contributes to your bike’s performance and longevity.
Regular inspections and timely interventions prevent unexpected flats and costly repairs, allowing you to focus on what truly matters: the joy of cycling. Additionally, equipping yourself with the right tools and knowledge empowers you to handle minor issues on the go, enhancing your confidence and independence as a rider.
Whether you’re navigating city streets or tackling rugged trails, well-maintained valves ensure that your bike remains a reliable companion on every adventure. Embrace these maintenance practices, and you’ll not only extend the life of your bike but also elevate your overall riding experience.
Remember, a little care goes a long way in keeping your wheels turning smoothly and your spirits high. Happy cycling!
FAQs
What are the main types of bike valves?
There are two primary types of bike valves: Schrader and Presta. Schrader valves are commonly found on mountain and hybrid bikes, while Presta valves are typically used on road and high-performance bikes. Understanding the differences helps in selecting the right tools and maintenance techniques.
How often should I check my bike’s valves?
It’s recommended to inspect your bike’s valves before every ride and perform a thorough check during regular maintenance sessions, typically every few weeks or monthly, depending on usage. Regular checks help identify issues early and maintain optimal tire pressure.
Can I fix a leaking valve myself?
Yes, minor valve leaks can often be fixed with basic tools like a valve core tool and some valve-specific repair kits. Cleaning the valve and tightening the core usually resolves the issue. However, if the leak persists, replacing the valve or seeking professional help may be necessary.
What tools do I need for valve maintenance?
Essential tools include a reliable bike pump, valve core tool, fix-it patch kit, tire leverage bars, and a tinker spoke key. Specialized tools like Presta valve adapters and digital pressure gauges can also enhance your maintenance routine.
Is valve maintenance different for motorcycles?
Yes, motorcycle engine valves require specific maintenance practices, such as regular valve clearance checks, consistent oil changes, and professional cleaning. Proper care ensures engine performance and longevity, similar to bike valve maintenance but tailored for motorcycle engines.
Final Thoughts
Maintaining your bike’s valves is a fundamental aspect of ensuring a reliable and enjoyable riding experience. By dedicating a little time to regular inspections and upkeep, you can prevent unexpected flats and extend the life of your tires.
Understanding the differences between Schrader and Presta valves allows you to choose the right tools and maintenance strategies tailored to your bike’s needs.
Additionally, being equipped with the proper tools and knowledge empowers you to tackle minor issues on your own, enhancing your confidence and independence as a cyclist. Whether you’re navigating urban streets or exploring rugged trails, well-maintained valves contribute significantly to your bike’s overall performance and safety.
Embrace these maintenance practices, and you’ll not only save money on repairs but also ensure that every ride is as smooth and enjoyable as possible. Remember, a well-cared-for bike is a happy bike, ready to take you on countless adventures. Keep pedaling towards perfection!
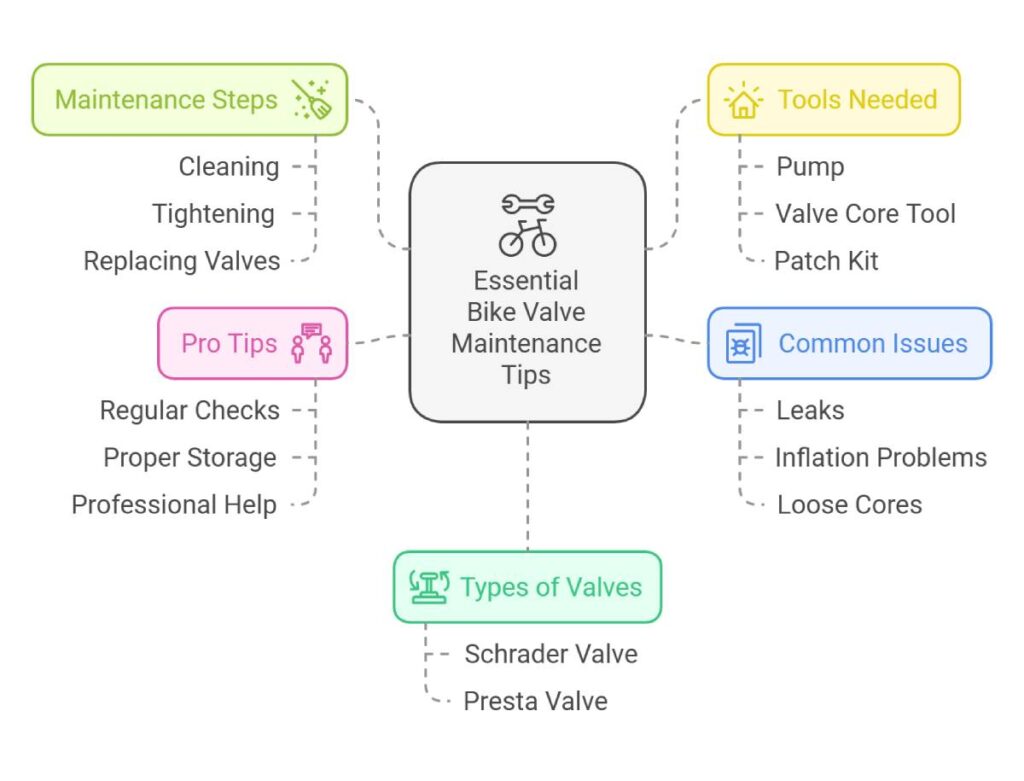
Key Tips for Bike Valve Maintenance
- Regular Inspections: Check your valves before every ride to catch issues early.
- Keep Valves Clean: Use appropriate cleaning tools and avoid debris buildup.
- Proper Inflation: Maintain recommended tire pressure to prevent valve strain.
- Use Quality Tools: Invest in reliable tools like valve core removers and pumps.
- Understand Your Valve Type: Know whether you have Schrader or Presta valves for appropriate maintenance.
- Replace When Necessary: Don’t hesitate to swap out faulty valves to ensure optimal performance.
- Store Correctly: Protect valves from dirt and damage when your bike is not in use.
- Seek Professional Help: When in doubt, consult a bike mechanic for complex issues.
Recommended Biking Products and Accessories
- Dual-Head Bike Pump: Compatible with both Schrader and Presta valves for versatile inflation needs.
- Recommended Brand: Topeak JoeBlow Sport III
- Valve Core Tool Kit: Essential for tightening or replacing valve cores efficiently.
- Recommended Brand: Park Tool VC-3 Valve Core Remover
- Fix-It Patch Kit: Portable solutions for quick tube repairs on the go.
- Recommended Brand: Slime Mini Patch Kit
- Digital Tire Pressure Gauge: Accurate pressure readings to maintain optimal tire performance.
- Recommended Brand: ThermoPro TP03 Digital Tire Gauge
- Presta Valve Adapters: Ensure compatibility between different valve types and pumps.
- Recommended Brand: Vittoria Valve Adapter Set
- Tinker Spoke Key: Precision tool for fine-tuning spokes and maintaining valve alignment.
- Recommended Brand: Park Tool SK-2 Spoke Wrench
- Valve Cleaning Spray: This keeps valves free from dirt and debris for leak-free performance.
- Recommended Brand: Finish Line Valve Cleaning Spray
- High-Quality Bike Lubricant: Protects valves and other bike components from wear and tear.
- Recommended Brand: WD-40 Bike Chain Lubricant
- Complete Valve Repair Kit: All-in-one solution for comprehensive valve maintenance.
- Recommended Brand: Pedro’s Tools Bike Valve Repair Kit
- Professional Bike Maintenance Stand: Facilitates easy access to valves and other bike parts during maintenance.
- Recommended Brand: Feedback Sports V-10 Elite Bike Stand
By implementing these strategies and utilizing the recommended resources, your bike valve maintenance routine will not only become more efficient but also enhance your overall cycling experience. Keep your valves in top shape, and enjoy countless smooth and worry-free rides!


