Bike Paint Repair Basics
Got a dinged-up bike? Fixing the paint might be just what you need to keep your ride looking sharp and snazzy. Knowing the how-tos of different fixes can help keep your bike turning heads.
Understanding Paint Repair Types
Fixing up your bike’s paint isn’t super complicated, but it helps to know what you’re getting into. Here are some things you might need to tackle:
- Surface Scratches: These are those tiny scratches that barely scratch the surface and just mess with the paint. They don’t affect how your bike works, but they can make it look a little shabby. More about scratches here.
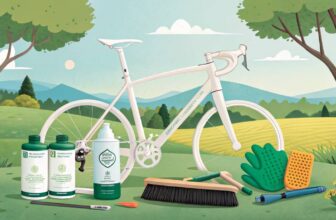
- Touch-Up Repairs: Got a chip or a tiny scratch? Touch-up paint is your friend. MyPerfectColor offers paint pens, little bottles with brushes, and spray cans to match that exact bike color (MyPerfectColor).
- Full Repaints: When your bike needs a makeover! You strip the old paint, sand it down, prime it, and then slap on a new coat. This is a bit of a project and requires a bunch of steps (Instructables).
- Powder Coating: Now we’re talking heavy-duty. This involves baking the paint onto your bike for something that lasts longer than standard paint jobs. It holds up better and stays looking fresh (Bicycles Stack Exchange).
Importance of Proper Paint Repair
Keeping your bike’s paint in shape is more than just vanity—it’s important!
- Aesthetic Appeal: A bike that looks good can boost your street cred. This is especially true if you’re racing or riding an electric bike.
- Preventing Rust: Exposed metal bits and moisture don’t mix well. Cover those up before rust throws a wrench in your plans.
- Maintaining Resell Value: Just like you’d clean up your car before selling it, keeping your bike’s paint in top-notch condition can get you a better price.
- Protection Against Further Damage: Fix those chips and nicks now before they get worse and cause bigger problems.
Before you dive into painting, make sure you have all the gadgets and supplies handy. For the nitty-gritty on how to do it, check out our step-by-step paint repair guide. Not sure whether to fix it yourself or call in the pros? We’ve got a guide comparing DIY vs. Professional services to help you decide.
Remember, keeping your ride in check means more than just good looks. Regular bike maintenance should keep everything running smoothly. You might want to give it a wipe-down by cleaning your bike frame and making sure every other part is ready to roll.
DIY Bike Paint Repair
Do you have a bike that looks more “rust chic” than polished and shiny? No worries, restoring your two-wheeler’s paint job at home is an easy-to-tackle project that won’t break the bank. Just gather a few tools and follow these simple steps to get your wheels looking brand new.
Necessary Tools and Materials
Before diving in, make sure you’ve rounded up this stuff:
| Tool/Material | Why You Need It |
|---|---|
| Sandpaper | Different grits (320-800) to roughen and smooth the surface |
| Masking Tape | Keeps paint off places you don’t want it |
| Drop Cloth | Catches paint spills and keeps the floor clean |
| Primer | Epoxy is your go-to for a durable base |
| Bondo | Fills in dents and holes, smoothing out damage |
| Spray Paint | High-quality colors to bring your bike back to life |
| Clear Coat | Seals everything off with a glossy finish |
| Paint Thinner | Handy for cleanup and fixing goofs |
| Cotton Rags | Essential for wiping off grease and grime |
| Safety Gear | Mask, gloves, and goggles — better safe than sorry |
If you’re missing any other tools on your journey, check out our DIY bike tool kit essentials.
Step-by-Step Paint Repair Guide
Follow these steps to get your old bike looking like it just rolled out of the shop:
- Take It Apart: Dismantle your bike—remove the wheels, handlebars, seat, and any other bits. This gives you a clean, open canvas to work on. Check out our guide on service bike hub for details.
- Clean It Up: Scrub down your bike frame to get rid of dirt and grease. A little soap and water do wonders. For full cleaning tips, peep our guide on clean a bike frame.
- Get to Sanding: Grab your sandpaper, start with the coarser grit like 320, moving to finer 800. This preps the surface for that new coat of paint your bike’s gonna love.
- Fill It In: Got any big scratches or dents? Slap some Bondo on there. Let it dry before you sand it smooth again. Easy peasy.
- Tape It Up: Cover up parts you don’t want to be painted with masking tape and drop cloths. This includes any branding or places like threads and bearing spots.
- Primer Time: Lay down a coat of epoxy primer on your prepped surface. This is the magic that keeps your paint from peeling off in the first drizzle. Dry as per the instruction manual.
- Paint Away: Spray your chosen color in light coats. No big drippy messes here—several light layers are the trick. Let each dry before the next.
- A Clear Finish: Once your color layers are dry and happy, apply a clear coat. It gives a nice sparkle and protects your work. Again, go with multiple light layers for that pro finish.
- Polish It Up: Let the clear coat set, then hit the frame with a buffing cloth for that showroom shine.
- Put It Back Together: Reassemble all the parts in the reverse of how you took them off. Crank ’em tight and nice.
For more detailed instructions and other guides, swing by our bike repair guides.
And there you have it. Get ready to wow everyone on the road with your snazzy recycled ride. If you want to stick to this newfound bike-care routine, explore more with our guides on protecting bike paint and bike maintenance schedule. Keep rollin’!
Professional Paint Repair Options
Contemplating how to spruce up your bike’s paint job? Well, you’re not alone in that conundrum. Let’s dive into the perks of calling in professional help versus tackling the challenge yourself. Here’s a rundown on why going pro might just be your bike’s best friend.
Benefits of Professional Services
Thinking about getting the big guns for your bike paint job? Here’s what you’re signing up for:
Stellar Looks:
- Pros use top-notch techniques and materials, making your bike look not just good but great. Stuff like powder coating doesn’t just look slick; it stands the test of time way better than rattle cans (Bicycles Stack Exchange).
Expert Handling:
- With pros, you get more than just a fancy paint job. They come with high-grade tools made for the nooks and crannies of bike frames.
- They’re magicians at color matching, getting the touch-ups to melt into the original like they were never there (MyPerfectColor).
Clock-Saving:
- Handing over the reins to professionals cuts out the long haul of DIY, filled with prepping, painting, and waiting around for paint to dry.
Damage Check:
- Pros don’t just slap on paint. They give your bike a look-see for hidden issues because a tiny ding might hide more damage, especially on carbon frames (Pearson 1860).
Comparing DIY vs. Professional
If you’re at a crossroads, here’s a cheeky little guide to weigh up both sides of the repair battle:
| Aspect | DIY Painting | Professional Services |
|---|---|---|
| Cost | Easy on the wallet | Hits heavier, usually in the $840 to $5,000 range (StormWise) |
| Finish Quality | Varied, often doesn’t last | Top-tier techniques and killer material durability |
| Dedication of Time | A black hole for time with all the steps | Breeze through time as pros juggle all the steps |
| Skill-Level Needed | Takes learning to nail it | Let the pros flex their skills |
| Color Coordination | Tricky to match the old paint | Seamless color matching with professional care (MyPerfectColor) |
| Longevity | Iffy, more so with cheap paint | The rockstar choice for staying power with coatings like powder (Bicycles Stack Exchange) |
For more secret sauces on keeping your ride in mint condition, wander over to our bike maintenance schedule and clean bike frame pro tips. Whether you’re the hands-on type or ready to shell out for professionals, think long-term. Mull over both sides to give your bike the love it deserves.
Choosing the Right Paint
If you’re determined to keep your bike looking like a million bucks, picking the right paint is half the battle. Here’s the rundown on different paints and what to look for when sprucing up your ride.
Types of Paint for Bike Repair
When patching up your bike, you’ve got options. Let’s break down what’s on the market so you can pick what’s right for your two-wheeled steed:
| Paint Type | What It Is | Pros | Cons |
|---|---|---|---|
| Enamel | An oil-based, shiny paint often favored by the pros (Bicycles Stack Exchange) | Tough and glossy, does a pretty good job at hiding scratches | Slowpoke when it comes to drying |
| Acrylic | Easy-peasy water-based paint | Dries faster than yesterday’s bread, less smelly than other paints | Not the toughest kid on the block—may need a topcoat |
| Epoxy | Tough and glossy, does a pretty good job of hiding scratches | Bonds like glue and hard as nails | Sun’s not its best friend—UV exposure is a no-no |
| Powder Coating | A dry paint that gets oven-baked to stick (Bicycles Stack Exchange) | Tough as a bear—resists scratches like a champ | Super sticky stuff, and makes a great base coat (Bicycles Stack Exchange) |
| Touch-Up Paint | Little bottles meant for dings and scratches (Pearson 1860) | Quick fix for the small stuff | Won’t fix any big boo-boos |
Factors to Consider in Paint Selection
Paint ain’t just paint. You’ve gotta think about a few things before diving in:
Durability
Big on biking? You’ll need a paint that can take a beating. Enamel and powder coating are like the knights in shining armor of paint—durable and ready to tackle nicks and scratches.
Finish
That shiny or matte vibe? Enamel gives your bike some shine, while acrylic keeps things chill with a more muted look. Pick what makes your heart happy.
Ease of Application
If you’re not a Picasso, you might want something like acrylic—it’s easy to slap on and clean up after. Epoxy requires some elbow grease but sticks like a dream.
Environmental Impact
Want to hug trees? Go for water-based acrylics—they’re kinder to the planet than oil-based options like enamels.
Cost
On a budget? Go with acrylic or touch-up paint. But if you want your bike to look like a showpiece, you might want to splurge on enamel or powder coating.
UV Resistance
For those sun-filled rides, paints like enamel and powder coating ward off those pesky UV rays better than epoxy.
Need more tips? Check out our article on bike paint repair.
Remember, picking your paint is more than just flipping a coin. Whether you go for the simple charm of acrylics or the staying power of enamels, the right paint keeps your bike the talking point and ready to hit the road. Also, take a look-see at our bike maintenance schedule to keep your bike singing a smooth tune.
Bike Frame Prep for Paint
Getting your bike’s frame ready to dazzle involves cleaning, sanding, masking, and priming. These steps are like the secret handshake for a paint job that sticks and shines like a pro.
Cleaning and Sanding
Before you unleash your inner artist, keep it clean! Scrub your bike frame like it owes you money because leftover dirt, grease, or grime will mess with your paint’s vibe. Pick up a mild detergent, wash it all down, and then give it the degreaser treatment. Feeling a bit lost? We’ve got a deep dive on a clean bike frame to guide you.
Sanding Process
Next up is sanding. It’s how you make the old paint call it quits and get the surface all prepped for its new look. Go with fine-grit sandpaper (think 1500 grit or higher) and sand that frame until it feels like the smooth operator it’s about to become (Pearson 1860). Keep the pressure steady to avoid an amateur hour finish.
| Sandpaper Grit | Purpose |
|---|---|
| 1500 | Start ‘Em Up |
| 2000 | Smooth Operator |
| 2500 | Final Lap |
Masking and Priming
Your bike’s ready for a makeover, but don’t go painting everything in sight! Masking is your go-to for the “Look, Ma, I’m a pro!” result. Cover any bits, logos, or areas that are off-limits for color.
Masking Technique
Get hands-on with painter’s tape and plastic sheets to protect those zones. Tape sticking like gum on a hot sidewalk is key to crisp lines and stopping color from creeping under in places it doesn’t belong.
Priming Process
Now it’s time to prime. This is like laying a solid foundation before you slap on the paint. Make sure the primer is BFFs with your frame’s material, be it steel, aluminum, or carbon fiber. Aim for an even primer coat and give it all the time it needs to dry.
Pro Tip: Bike-specific primer is not just some fancy gimmick—it makes the paint stick around for the long haul, unlike generic primers.
| Steps | What to Do |
|---|---|
| Cleaning | Bye-bye grime |
| Sanding | Grab fine-grit sandpaper |
| Masking | Protect no-paint zones |
| Priming | Lay down primer love |
Nail these prep steps, and your bike will be turning heads with its new paint job. Want to keep that ride fresh? Peek at our bike maintenance guides and learn how to protect bike paint. Plus, because no one likes a chipped finish, armor your bike’s new look with some extra care tips.
Applying Paint to the Bike
Nailing that sleek and shiny finish when repainting a bike isn’t just a walk in the park—it’s all about the right moves and timing. Let’s dive into some paint-slinging tips and why playing it cool between each coat is your golden ticket to a killer bike makeover.
Painting Techniques
So you’re ready to give your bike a makeover, huh? Here are some ways to lay down some color with flair:
- Spray Painting: If cans could talk, they’d tell you to shake ’em up good! Hold your spray can about the length of a ruler away from the frame. Glide back and forth like you’re waving goodbye to patches and blobs. Just keep moving so the paint doesn’t turn into a waterfall.
- Brush Painting: Got just a little nick or scratch? Whip out a classy brush or one of those nifty paint pens. Paint it nice and thin, like spreading jam on toast. Keep it even and don’t clog your brush with too much.
- Airbrush Painting: Want precision? This is like painting your bike with a gentle breeze. Perfect for fancy designs or tiny areas. Light and steady wins this race, so make ’em as thin as your patience allows.
For every painting adventure:
- Make sure that the bike’s as squeaky clean and dry as a bone.
- Go light with the coats—better to build up slowly than to create a mess.
- Gentle, even strokes are your new best friends.
Layering and Drying Times
Stacking those paint layers and letting them chill out in between is what makes magic:
| Layer Type | Number of Coats | Dry Time Between Coats |
|---|---|---|
| Primer | 1-2 coats | Give it an hour |
| Base Coat | 2-3 coats | 20-30 mins nap |
| Clear Coat | 2-3 coats | Let it breathe for 30 mins |
Being patient with your drying times means the layers stick together, like cereal in milk, preventing flakes or boo-boos like bubbling or cracking. Don’t rush it.
Also, keep in mind the weather! Working in a clean, dust-free spot within 60-75°F means your bike won’t end up looking like a lint magnet or succumb to frostbite.
Get the art of bike painting down to a science and bask in your smooth and glossy triumph. For more on pampering your trusty ride, check out how to clean your chain, sort out your gear indexing, or snag your go-to bike tools. Your bike will love you for it!
Wrapping Up the Paint Job
So you’ve slapped on that fresh paint to your bike frame, great! But you’re not done yet. The cherry on top is adding a clear coat, and then some serious buffing and polishing action. These really seal the deal to make your bike look sleek and last long.
Adding Clear Coat
The clear coat is like the tough guy in the paint world, warding off the grime and giving the paint job some armor. Doing this right separates the rookies from the pros.
- Pick Your Poison: Go for a top-notch clear coat made for bike frames. You’ve got options like acrylic, enamel, and polyurethane. Toss those cheap alternatives aside – your bike deserves better.
- Layer Up: Spray on two or three thin coats of clear. Follow the directions on the can like you’re assembling IKEA furniture—drying times matter! Leave about 15-30 minutes between coats.
- Steady as She Goes: Keep that spray can steady, about 6-8 inches away, for even coverage. Don’t rush it, overlap each spray pass a bit to dodge gaps.
- Waiting Game: Let the clear coat chill for a day in a place where dust is just a myth. That’ll make sure it sets just right.
A well-laid clear coat not only guards but makes your bike’s paint glow like it’s fresh out of the showroom. Want to keep that shine spotless? Sneak a peek at our bike paint protection tips.
Buffing and Polishing
Once your clear coat has had its beauty sleep, it’s time to make the bike frame twinkle with buffing and polishing.
- Scuff It Up (Gently): Grab some fine-grit sandpaper (think 2000 to 3000 grit) and lightly sand out any blemishes. It’s like exfoliating but for your bike.
- Shine Time: Squirt a bit of polishing compound on a soft cloth. Buff the frame with circular moves to nix scratches and get back that sparkly shine.
- Power Tools, Anyone?: Bigger spots on the frame? Whip out a low-speed buffer with a polishing pad. Keep it moving, though – you don’t want to end up with a burnt look.
- The Grand Finale: Think of automotive wax as the tuxedo. Apply it for a final polish and extra gloss. Bonus: it adds an invisible fence for that new paint job.
| Step | Tool/Material | Details |
|---|---|---|
| Scuff It Up | Fine-grit sandpaper (2000-3000) | Lightly smooth the surface of the clear coat |
| Shine Time | Polishing compound, soft cloth | Circle motions to bring out that shine |
| Power Tools | Low-speed buffer, polishing pad | Optional for big areas, keep moving to avoid heat |
| The Grand Finale | Automotive wax or polish | Extra gloss and protection layer |
By sticking to these steps, your bike’s paint repair will scream “pro job!” and stand the test of time. Whether you’re a hands-on DIY champ or you enlist the help of the experts, getting that spotless shine’s a breeze with the right know-how. If you’re keen to dive deeper into bike TLC, don’t miss our bike repair guides.
Specialized Paint Solutions
Custom Paint Matching
If you’re a cyclist who has ever cringed at a scratch on your bike’s pristine paint job, you know how crucial custom paint matching is. This meticulous process ensures any repairs are as stealthy as a cat in the night, seamlessly blending with the original paint. Manufacturers often skip over stocking touch-up paints, mainly due to the headache of inventory management. Enter the lifesavers like MyPerfectColor, stepping up to fill this gap.
MyPerfectColor does exactly what it says on the tin. They whip up paint concoctions that are spot-on matches for your bike, available in handy forms like paint pens, brush-in-cap bottles, and spray cans. They’re like a paint buffet with no cover charge—no minimum order required. Perfect for folks who aren’t planning on opening a paint store anytime soon. Whether you’re tackling dings with metallic or pearlescent finishes, they’ve got you covered with colors that are a dead ringer for the original.
| Service | Features | Benefits |
|---|---|---|
| Paint Pens | Spot-on matches | Great for little dings |
| Brush-in-Cap Bottles | Tailored hues | Perfect for those precision jobs |
| Aerosol Spray Cans | Quick ship times | Handy for bigger touch-ups |
| No Minimum Order Sizes | Fits any order size | Wallet-friendly option |
Tackling Paint Problems
Not all paint boo-boos are created equal. From sneaky scratches to battle wounds, dealing with paint damage can range from mild annoyance to full-blown project. At-home scratch kits might handle small scuffs but when it comes to nasty gouges, you’ll want to call in the pros. Expert detailing services bring magic wands of expertise and precision.
Here’s the game plan for different paint drama:
- Minor Scratches: Grab a touch-up pen or brush-in-cap bottle for those finicky spots.
- Deep Scratches and Chips: For the serious stuff, trust the pros to work their magic.
- Metallic and Pearlescent Blends: Get exact matches with specialized services like MyPerfectColor’s savvy solutions.
By knowing what you’re up against with paint issues, you can keep your bike looking as sharp as the day you rolled it out of the shop. Whether you’re a manufacturer juggling new designs or a DIY whiz, custom color creation is a gem for everyone involved.
Keep your ride in top shape by diving into essential bike maintenance and repairs. Check out bike maintenance schedule, fix bike flat tire, and protect bike paint to keep it spinning smoothly.


