Riding Position Techniques
Getting the hang of the right riding position is a total game-changer when you’re biking through tricky terrain on your mountain bike. Grasping the finer points of uphill and downhill riding can make a big difference in how steady and in control you feel.
Uphill Riding Position
Going up a hill? You’ll want to throw your weight forward to keep that front wheel grounded. If you lean back, that wheel’s going to pop up like it’s on the trampoline, and nobody’s got time for that. Stick to this position and climbing won’t feel like a dreaded gym workout.
Keep these in mind for uphill:
- Get cozy with those handlebars.
- Give your elbows a little freedom; keep ’em loose.
- Pedal steady, no need for shaky legs.
| Aspect | Recommended Position |
|---|---|
| Weight Distribution | Forward |
| Elbow Position | Slightly Bent |
| Pedal Stroke | Consistent |
For more nitty-gritty on climbing, check out our guide on mtb technical climbing.
Downhill Riding Position
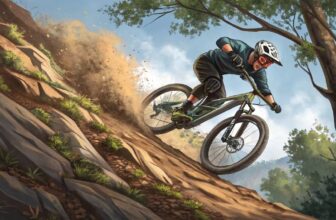
Going downhill should feel like you’re flying but with more control. Lean your weight back a smidge so you don’t end up taking a nose dive over the handlebars.
Remember these tips for downhill:
- Think of yourself as a slingshot, lean back!
- Keep low and steady, and channel your inner ninja.
- Let your legs do the absorbing; they’re your best shock absorbers.
| Aspect | Recommended Position |
|---|---|
| Weight Distribution | Back |
| Body Position | Low and Centered |
| Leg Position | Shock Absorbers |
For more downhill wisdom, stop by our article on mtb body position.
Add these tweaks to your riding style and you’ll be ready to take on trickier stuff like the mtb drop technique. Getting to know your mountain bike up close and personal, plus sorting out stuff like mtb suspension setup, will seriously up your trail game.
Hitting Drops on a Mountain Bike
Getting the hang of drops can make you feel like a mountain biking champ, whether you’re just starting out or you’ve been around the trails a few times. Let’s break down how to nail these gravity-fueled leaps, tweak your speed, and stick to those landings every time.
Basics of Drop Technique
Imagine you’re at the edge, eyes focused, heart pumping. As you near the drop, push those hips back. Not only does this get you better balanced, but it also keeps your front wheel in the air where it ought to be. Gravity’s doing its thing, and you control the drop. A little palm pressure helps the front wheel hover while you steady the back end.
- Hips Back: Hit the brakes in your mind before the plunge.
- Push Front: Keep a light front wheel by pressing down with your palms.
- Nail the Timing: Keep it smooth with spot-on timing.
Try these steps on smaller drops before you’re tearing up the big ones. Trust me, your confidence will skyrocket.
Speed Adjustment for Drops
Think speed’s just about going fast? Not quite. Your approach matters. More speed means less hip shuffling, but go slow and you’ll need to throw your weight back.
| Speed Type | Hip Movement |
|---|---|
| Slow | Get those hips way back |
| Medium | Shift moderately |
| Fast | Just a little tweak |
Play around with your speed, and you’ll notice the boost in control and courage when you meet different drops.
Landing Techniques
Sticking that landing is where the magic happens. Bend those knees as you leave the edge—it’ll feel like you’re flying with grace. Keep your legs extended in the air to soak up the bump and stay glued to those pedals. Pop up too much, and you might lose your footing, so gently touch down like a feather.
- Bend those Knees: Slight bend keeps everything controlled.
- Legs in Flight: Extend in the air to ride out the shock.
- Controlled Touchdown: Resist the urge to leap too high.
Master these moves and you’ll not only boost your drop game but keep injuries at bay.
Understanding these moves can turn dodgy drops into smooth sailings, upping your trail game and boosting your confidence. For more cool tips, check out our articles on basic mountain biking skills and bike body positioning. Dive into essentials like gear ratios and must-have bike gear for the ultimate riding experience.
Advanced Drop Techniques
Are you ready to up your mountain biking game? Dive into advanced drop techniques like Squashing and Helmet Line Movement. It’s the key to nailing smooth, controlled landings that’ll make you feel like a pro.
Squashing Technique
The “Squashing” technique? It’s like your secret weapon for tackling drops at high speed without flying into the air and crash-landing. Kind of like crouching to avoid getting hit in dodgeball — but way cooler. Stand tall as you approach, then swiftly pull your body down and back at the edge. This eases the tension off your hands, letting you boss the drop on your terms.
Steps for Squashing Technique:
- Approach: Be tall and proud as you inch closer to the drop.
- Execute: At the edge, pull your body down and back rapidly.
- Control: Relax your hands to glide through the drop like a pro.
Mastering this reduces your airtime and helps you stick the landing with style.
Helmet Line Movement
The Helmet Line Movement isn’t just a fancy phrase. It’s all about where your helmet’s pointed during a drop. Shift that line toward the landing before you actually hit the edge. This helps you avoid skydiving and keeps your ride buttery smooth.
Steps for Helmet Line Movement:
- Preparation: Lock eyes (and helmet) on where you’ll land.
- Initiate: As you near the edge, start moving your helmet line to that landing spot.
- Execution: As you drop, focus on the helmet line gliding towards a soft landing.
Getting the hang of this spells better weight distribution and tighter control throughout the ride.
If you’re just starting, don’t stress over the big stuff. Start small and work your way up as you gain skill and swagger.
Check out more MTB techniques and guides:
- mountain biking basic skills
- mtb body position
- mtb braking techniques
- riding rock gardens mtb
- how to jump mtb
Nailing techniques like squashing and helmet line movement is a game-changer in conquering rocky paths and rugged trails with style and accuracy.
Improving Mountain Biking Skills
Technical Riding Ability
Want to rock those trails like a pro? Gaining some solid technical riding skills can make the wild paths less of a heart attack and more of a joy ride. Get comfy with the basics, like taking corners, stopping on a dime, and tiptoeing through rocky sections. Check out mtb cornering techniques to glide through curves like you’re dancing.
Keep those brakes in fierce shape by learning how to bleed mtb brakes, so you don’t end up using a tree as an emergency stop. Playing nice with rock gardens is also a must—take a peek at our guide on riding rock gardens MTB for a heads up on bossing them like a champ.
Body Positioning
Ever tried riding while wrestling a wild kangaroo? Neither have we, but keeping your body in check feels kinda similar. Good body positioning is like the magic glue for your bike-riding adventures. The folks over at DirtSmartMTB swear by it: stay aligned and use your core to soak up bumps and sail through twists without breaking a sweat. Tighten up your body stance game by diving into our MTB body position guide.
Handling Small Features
Cracking the code on small features like rock jumps, ledges, and tiny flights can seriously up your bike swagger. Start small, get a feel for it, and grow your comfort zone. A trick they call the “front tire poke” or “push” lets you glide over logs and bumps without staring at the sky (Bicycling).
Got your eyes on the next level? The mtb bunny hop tutorial is your golden ticket. It helps you float over the prickly bits by lifting both wheels off the ground, keeping you flying without stalling out.
These hidden gems will step up your gnar game:
- Mountain Biking Basic Skills
- MTB Braking Techniques
- How to Jump MTB
- MTB Technical Climbing
Give these sucker tactics a go and watch your skill level shoot to the moon!
Essential Mountain Biking Tips
Picking Smart Paths
When you’re riding through tricky trails, choosing your path wisely is key. Forget about chasing the toughest routes; instead, aim for the ones that keep you moving smoothly and quickly. Smart path picking helps you save energy and avoid getting too worn out. For more on navigating trails, check out our mtb line choice guide.
How To Brake
Braking like a pro is a must in mountain biking. Master the art of “feathering” your brakes—easing off rather than slamming on—especially before corners and downhill rides. This technique helps you keep control without skidding all over the place. Remember, it’s best to use both front and back brakes together for steady handling. Dive into our mtb braking techniques guide for more info.
Drop Difficulty Levels
Beginner Drops
Beginner drops, usually less than a foot high, are perfect for newbies. Found on both natural and designed trails, these drops are smooth enough that you can keep both tires on the ground as you glide down. They’re great for building confidence and basic skills, prepping you for the bigger stuff. Check out more in our mountain biking basic skills section.
| Drop Level | Description | Height (feet) |
|---|---|---|
| Beginner | Easy, can keep tires on the ground | < 1 |
Intermediate Drops
When you’re stepping up to intermediate drops, expect them to be trickier, somewhere up to two feet high. Here, you’ll need to lift that front wheel first, letting the back follow naturally. It’s a cool skill that gets you ready for tougher terrains and polishes your mountain biking game. Get more tips in our How to jump mtb guide.
| Drop Level | Description | Height (feet) |
|---|---|---|
| Intermediate | Lift front wheel, can’t roll over | 1 – 2 |
Advanced Drops
Advanced drops, soaring two to three feet or even higher, require serious prep. You gotta scope out the landing and get your body in the right spot to soak up the impact. It’s all about having the chops and confidence to conquer these giants. Learn more about tackling rocky paths on our Riding Rock Gardens mtb page.
| Drop Level | Description | Height (feet) |
|---|---|---|
| Advanced | Needs careful planning, strong landing control | > 2 |
Getting comfy with these trickier drop levels will up your riding game and keep you safe out there. Want more ways to sharpen those skills? Swing by our pages on mountain biking safety tips and MTB body position for the lowdown.


