Imagine navigating a challenging trail, the wind rushing past, and trusting your brakes to respond instantly when you need them most.
Whether you’re a seasoned mountain biker or just embarking on your off-road adventures, maintaining your MTB brakes is non-negotiable for both performance and safety.
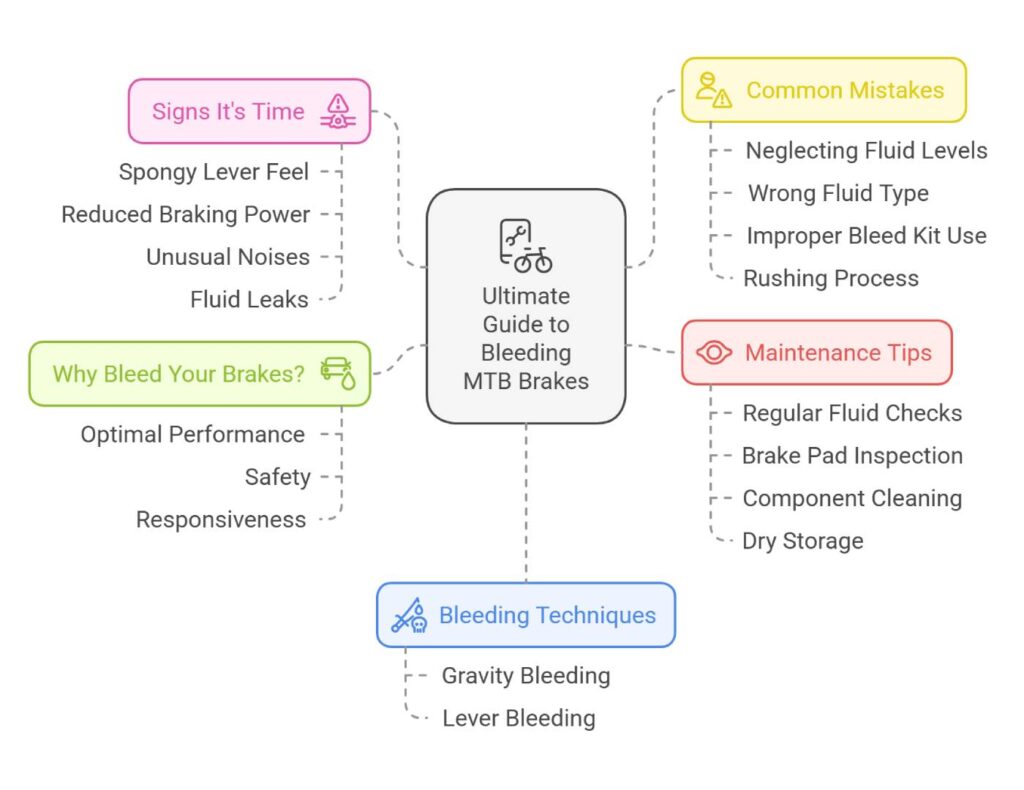
This ultimate guide delves deep into the art of bleeding mountain bike brakes, transforming a daunting task into a manageable DIY project.
Say goodbye to spongy levers and inconsistent stopping power—equip yourself with the knowledge to keep your ride smooth, reliable, and exhilarating every time you hit the trail.
Understanding MTB Brake Bleeding
Bleeding your mountain bike brakes is pretty much essential if you want to keep your bike stopping like a pro and ensure your safety. Let’s dig into why bleeding the brakes matters and how to know when it’s time to give them some TLC.
Why Bleed Your Brakes?
Maintaining strong stopping power on your mountain bike is a biggie. Over time, pesky air can sneak into the brake system, making that brake lever feel like mashed potatoes and reducing how well you can stop yourself from careening past the trail stop sign.
Changing that brake fluid regularly, especially if you’re running with DOT fluid, keeps everything nice and consistent, with a high boiling point to boot. It’s generally a good move to bleed your brakes every couple of years to keep things in tip-top shape.
How to Tell It’s Bleed-Time
Knowing when to grab your toolkit is key for keeping that bike performing slick. Here’s when you should think about bleeding:
- Spongy Brake Lever: If pulling the brake lever feels like you’re squishing a marshmallow, there’s probably air in there.
- Lackluster Stopping Power: Not stopping on a dime anymore? Then, it’s time for an intervention.
- Visible Air Bubbles: Spotting bubbles in your brake’s fluid stash is like your brakes saying, “Hey, help me out here!”
- Stick to Routine Maintenance: Even if all’s quiet, give the system a check every two years to keep any surprises at bay.
| Sign | What It Means |
|---|---|
| Spongy Brake Lever | Feels like you’re squeezing a pillow |
| Lackluster Stopping Power | Braking feels more “meh” than mighty |
| Visible Air Bubbles | Little bubbles saying, “Fix me!” |
| Routine Maintenance | Do this every other year just because |
Taking care of these hiccups right away keeps your bike’s brakes trustworthy and efficient. If you’re on the hunt for more juicy tidbits on keeping your ride smooth, check out our mountain bike maintenance and diy mountain bike repairs guides.
Keeping those brakes top-notch through regular bleeding is your ticket to safer rides. Stay on top of those signs, and make bleeding a regular part of your upkeep routine for the most fun on your mountain adventures.
Common Mistakes to Avoid
Knowing what could mess up your MTB brakes is key to keeping your bike smooth and steady. Two hiccups you really want to dodge: brake pad contamination and picking the wrong brake fluid.
Brake Pad Contamination
The hassle of dirty brake pads or rotors is all too familiar, especially if brake fluid accidentally dribbles onto them while bleeding the brakes. When this happens, your bike might sound like a banshee and feel like it’s tap dancing every time you brake.
Here’s how to steer clear of this mess:
- Be a neat freak—keep the brake pads and rotors clear of any brake fluid when you’re bleeding.
- Throw a clean cloth over them or take them out altogether before you get started.
- Double-check for leaks over at the caliper fittings and make them snug to prevent spills.
| Issue | Sounds and Feels Like | Fix It By… |
|---|---|---|
| Dirty brake pads | Weak brakes, squealy noise | Cover them up, check fittings, remove if needed |
Want to know more about keeping your brake pads squeaky clean? Check out clean your mountain bike and bike maintenance.
Using Incorrect Brake Fluid
Using the wrong brake fluid is like drinking orange juice after brushing your teeth—a bad idea. Brakes are picky about their fluids; they’re either meant for DOT fluids or mineral oil. Get it wrong, and your brakes might just quit on you.
- DOT fluid: Seen in brands like SRAM, Avid, and Hayes. This fluid drinks up water over time, which can make it less effective. Always grab fluid from a sealed bottle and steer clear of any old stuff (Epic Bleed Solutions).
- Mineral oil: This is the go-to for Shimano and Magura. It doesn’t absorb water like DOT fluid, but you still have to handle it right to keep everything in check.
| Brake Family | What it Likes | Know This… |
|---|---|---|
| SRAM, Avid, Hayes | DOT Fluid | Sucks up water, always use fresh fluid |
| Shimano, Magura | Mineral Oil | Doesn’t absorb water, handle with care |
For more on what fluid goes with which brake, have a peek at bike brakes comparison.
Keeping your brakes in top shape isn’t just about avoiding these slip-ups—it’s about enjoying the ride and staying safe. If you want more tips, pop by our guide on DIY bike repairs and braking tips.
Brake Bleeding Techniques
If you want your mountain bike’s brakes to always hit the mark, you’ll need to get familiar with proper bleeding methods. We’re talking about two nifty tricks here: gravity bleeding and lever bleeding.
Gravity Bleeding Method
Gravity bleeding is the “set it and forget it” way to kick those pesky air bubbles to the curb. You know, the ones that mess up your bike’s braking mojo and give you that squishy lever feel.
- Prep the Bike: Set your bike up on a steady stand, making sure the handlebars are nice and level. This is where things start out evenly.
- Brake Pads and Caliper Off: Pop off those brake pads to keep ’em from getting dirty, and you’ll have more wiggle room for the rest of the job.
- Get the Bleed Kit Ready: Hook up the hose from your bleed kit to the caliper’s bleed nipple, and let the other end hang out in a waste container.
- Open the Thingy: Crack open the brake fluid reservoir on the lever – let the juice flow freely.
- Let ‘er Bleed: Open the bleed nipple and let gravity do its thing—watch as the old brake fluid and air bubbles float away.
- Topping Off: Grab some Shimano Mineral Oil or whatever fluid your system needs, keeping the reservoir filled like it’s a bottomless cup.
- Close Up Shop: Once you see nothing but clear fluid and no more bubbles, close that bleed nipple tight.
- Put the Bits Back: Reassemble your caliper and brake pads. Make sure it all fits snugly as a bug.
Lever Bleeding Process
The lever bleeding process is your go-to when you’re switching out rotors or pads, or if your bike’s got a vacuum leak sneakin’ around.
- Lock and Load Your Bike: Just like before, secure that bike on a stand and keep the handlebars level.
- Lever Setup: Tilt it so the reservoir is at the gravy’s top.
- Attach the Bleed Kit: Fill up a syringe with fresh brake fluid and connect it to the caliper’s bleed spot.
- Bubble Battles: Gently tug the lever while nudging the syringe. This should get the fluid moving and evict any air bubbles.
- Keeping it Topped and Locked: Maintain a smooth flow of brake fluid, and keep the reservoir topped off before closing the bleed port after you’re sure the bubble villains have vacated.
- Swipe and Inspect: Wipe away any extra fluid and check that the lever is feeling tight and responsive.
Understanding these brake bleeding tips, helps mountain bikers keep brakes tight and reliable. Using gear like a pro-grade bleed kit and following these steps makes rides safer and more fun. For the ins and outs of bike care and dodging common blunders, dive into our articles on mountain bike maintenance and DIY bike fixes.
| Step | Gravity Bleeding | Lever Bleeding |
|---|---|---|
| System Setup | Secure bike and handlebar level | The hose from the bleed kit to the caliper |
| Bleeding Configuration | The hose from bleed kit to the caliper | The syringe of brake fluid to the caliper |
| Process Initiation | Open reservoir and bleed nipple | Position the lever and attach the syringe |
| Fluid Replacement | Allow fluid to flow by gravity | Pull the brake lever while pushing the syringe |
| Finalization | Close bleed nipple after bubble removal | Clean excess fluid and check lever responsiveness |
For all things bike care and specifics on brake systems, browse our detailed guides on mountain bike brakes comparison and conquering rocky trails.
Tools and Materials Needed
Bleeding your MTB brakes don’t need to feel like brain surgery, but you gotta have the right gear to do it right. This bit’s gonna walk you through the must-haves, with a nod to Shimano mineral oil and a few kit essentials you might need.
Shimano Mineral Oil
When it comes to Shimano brakes, you wanna stick with Shimano’s own mineral oil – no substitutes. Other fluids? They’ll mess with the brake seals and could end up causing you a nasty surprise on your next ride. Trust me, that’s one thrill you do not want (Worldwide Cyclery).
Why Shimano Mineral Oil Rocks:
- It’s made just for Shimano brakes
- Won’t eat away at those brake seals
- Keeps it cool (to a boiling point) for solid performance
Bleed Kit Components
A good bleed kit is like your pit crew when it comes to brake maintenance. Here’s what makes up a solid Shimano bleed kit, according to the folks at Worldwide Cyclery:
| Component | What It’s For |
|---|---|
| Bleed Cup | Catches the extra fluid during the job |
| Oil Catch Bottle | Where all the out-of-the-system fluid hangs out |
| Bleed Block | Holds those brake pads and pistons in check while you work |
| Syringe (not used) | Usually in the kit, but not your buddy for bottom-up systems |
| 7mm Wrench | Handy for dealing with the bleed nozzle |
| Phillips Head Screwdriver | Takes care of reservoir screws before you get going |
| Allen Keys | If you need to wrangle any brake bits on or off |
Having these tools at the ready will make the braking process smooth sailing. If you’re looking for step-by-step guidance, hop on over to our article on the systematic bleeding process.
Oh, and a quick note about brake fluid – stuff like DOT fluid likes to soak up water from the air, which isn’t so hot for keeping things working right under pressure. Use fresh, sealed DOT fluid and chuck any old stuff that’s been open too long.
By rounding up this gang of gizmos, you’re setting yourself up for a winning DIY brake bleed. Getting the right stuff means not only safer rides but a longer life for your bike brakes. Curious about more ways to keep your ride in top shape? Peek at our pieces on mtb tire pressure and mtb drivetrain compatibility.
Step-by-Step Bleeding Guide
Getting your mountain bike’s brakes in top shape means giving ‘em a good bleed every now and then. This helps push out those pesky air bubbles, keeping your stopping power strong and reliable. Let’s roll through a simple how-to for bleeding MTB brakes.
Pre-Bleed Prep
Before diving in, make sure you’ve got all the gear:
- Fresh brake fluid (DOT or mineral oil).
- Bleed kit (syringe, bleed block, tubing, adapters).
- Some clean rags and gloves.
- Allen keys and screwdrivers.
Heads Up:
- Always use fresh DOT fluid from sealed containers to keep moisture out, which messes with brake mojo.
- Don’t murder the o-ring by over-tightening things. Just secure the fittings till they are snug.
- Pull out those brake pads, scoot back the caliper pistons, and pop in a bleed block. This keeps fluid levels in check and avoids overdoing it.
Systematic Bleeding Process
1. Position the Bike:
- Pop your bike onto a stand, ensuring the handlebars sit level and brake levers are horizontal.
2. Remove Brake Pads and Insert Bleed Block:
- Pull out the brake pads from the caliper.
- Push those pistons back and pop in a bleed block.
3. Attach Bleed Kit:
- Hook the syringe and tube to the caliper’s bleed nipple.
- Keep it airtight by just hand tightening.
4. Open Bleed Port:
- For the right tool to open up the bleed port.
- Squirt fresh fluid into the syringe.
5. Bleed the Brakes:
- Slowly push fluid through, nudging pesky bubbles out.
- Squeeze the brake lever here and there to help with trapped air.
- Keep your eyes peeled for air escaping the tube.
6. Close Bleed Port:
- Once fluids flow smoothly, tighten up the bleed port.
- Yank out the syringe and tubing without making a mess.
7. Top Off Fluid:
- If needed, splash some new fluid into the brake reservoir.
8. Replace Brake Pads:
- Pull out the bleed block and stick the brake pads back in.
- Ensure they’re aligned just right.
9. Test Brakes:
- Squeeze the brake lever; it should feel solid.
- Look for steady pressure without any mushy feel.
10. Clean Up:
- Wipe off extra fluid.
- Dispose of old fluid the right way.
For a deeper dive into specialized brakes like Shimano, swing by The Lost Co, which knocks out bubbles and swaps out gunky mineral oil. Keeping your brakes crisp boosts your biking adventure, making rides safer and more fun. For juicy bits on braking techniques and biking safety, check out our other reads.
Specific Brake Systems
Tuning up your brakes for top-notch performance? It’s smart to get the lowdown on what different brake systems need. Each brand’s got its own rules to keep your brakes stopping like a dream and prevent hiccups in the bleeding process.
SRAM, Avid, Hayes, and Hope
If you’re rocking SRAM, Avid, Hayes, or Hope brakes, you’re dealing with DOT fluid. This glycol-based fluid is your best friend under pressure, keeping things cool when the heat’s on. Stick to the correct type, usually DOT 4 or 5.1, depending on what your setup demands.
Tools and Materials:
- DOT fluid (choose between DOT 4 or 5.1 as per manufacturer’s advice)
- Bleed kit with syringes
- Bleed block
- Allen keys
- Wrenches
Follow a thorough bleeding process if you’re using these systems. Keep an eye on those brake pads to avoid any nasty surprises (Brake Pad Contamination). Regular checkups keep your riding smooth and safe. Dive into our mountain bike brakes comparison for more juicy details.
Shimano, TRP, and Magura
Shimano, TRP, and Magura brakes prefer Mineral Oil to DOT fluid. Less harsh and moisture-resistant, it’s easy on your brake parts. Trust me, using the right fluid spells a long, happy life for your brake seals.
Tools and Materials:
- Shimano, TRP, or Magura-specific Mineral Oil
- Bleed kit with funnel and syringe
- Bleed block
- Allen keys
- Wrenches
While bleeding these systems, the game plan looks similar to others but remember the tools and fluids differ.
Table: Fluid Specifications
| Brake System | Fluid Type | Boiling Point (approx.) |
|---|---|---|
| SRAM | DOT 5.1 | 270°C |
| Avid | DOT 5.1 | 270°C |
| Hayes | DOT 4 | 230°C |
| Hope | DOT 5.1 | 270°C |
| Shimano | Mineral Oil | 200°C |
| TRP | Mineral Oil | 200°C |
| Magura | Mineral Oil | 200°C |
Numbers pulled from Epic Bleed Solutions.
More maintenance tips and how to baby your gear? Hit up our articles on MTB gear ratios and mountain bike maintenance. Do Shimano brakes? Prep and learn to handle that system in our guide on mtb suspension setup. Knowing your brake system’s quirks means nailing performance and safety, giving your bike some good longevity.
Keeping Your Brakes in Check
Making sure those trusty brakes on your mountain bike work like a charm isn’t just about squeezing those levers and hoping for the best. It calls for a bit of regular lovin’ and know-how, like swapping brake pads on time and keeping brake fluid fresh and fitting.
Swapping Brake Pads
Changing out brake pads before they’re too worn is non-negotiable if you want to keep the thrill rides safe and fun. When the pads are past their prime, you might find yourself struggling to stop on a dime or even damaging the rotors. Here are a few bits of advice for getting this right:
- Do a Check-up Now and Then: Give your brake pads a look regularly. If they’re thinner than a millimeter, it’s time for new ones.
- Keep Things Squeaky Clean: Hands off if you’ve got greasy fingers! Brakes and oil don’t mix well. Be careful when you’re bleeding the brakes; don’t let anything contaminate those pads or rotors—or you’ll be back to square one with noisy brakes.
- Get ‘Em Ready: Before popping in that new set, give the surfaces a little rub with water to scrub off that top layer. It’ll make sure your brakes aren’t just good—they’re grand.
The Right Stuff for Your Brakes
Just like putting the right fuel in your car, using the right brake fluid matters, big time, for your mountain bike:
- Don’t Mix ‘n Match: Brake fluids aren’t one-size-fits-all. Shimano lovers need mineral oil, but others might call for DOT fluid. Stick to what your bike needs.
- Fresh is Best: Brake fluid, especially the DOT kind, loves to soak up moisture from the air if it’s hanging around too long. Always go for a fresh squeeze from a sealed bottle for peak braking.
- Easy Does It: In case you get too carried away when tightening up during a brake bleed, you might end up squashing the o-ring, wrecking that airtight seal you need. So go easy, and just finger-tighten those fittings.
Keeping your bike’s brakes tip-top is a bit like keeping a plant alive: regular care and some attention go a long way. For a deeper dive into keeping your mountain bike in mint condition, take a peek at our mountain bike maintenance and MTB braking tricks articles.
Conclusion
Maintaining your mountain bike’s braking system through regular bleeding is pivotal for both your safety and the bike’s performance.
By understanding the signs that indicate it’s time to bleed your brakes, such as spongy lever feel or diminished stopping power, you can proactively address issues before they escalate.
Avoiding common pitfalls like brake pad contamination and using the wrong brake fluid ensures that your braking system remains reliable and efficient. Whether you opt for gravity bleeding or lever bleeding, mastering these techniques will empower you to perform effective maintenance, tailored to your specific brake system.
Remember, the right tools and materials make all the difference, turning a potentially intimidating task into a straightforward DIY project. Embrace these maintenance practices, and you’ll enjoy smoother, safer rides with the confidence that your brakes will perform when it matters most. Keep your bike in peak condition, and let every trail adventure be as thrilling as it is safe.
FAQs
How often should I bleed my MTB brakes?
Bleed your brakes every one to two years, or sooner if you notice signs like spongy lever feel or reduced stopping power. Regular maintenance prevents air buildup and ensures optimal performance.
What tools do I need to bleed MTB brakes?
You’ll need a bleed kit specific to your brake system, fresh brake fluid (DOT or mineral oil), syringes, bleed blocks, clean rags, gloves, Allen keys, and screwdrivers. Having the right tools ensures a smooth and mess-free bleeding process.
Can I use any brake fluid for my mountain bike?
No, it’s crucial to use the brake fluid recommended by your brake manufacturer. SRAM, Avid, Hayes, and Hope brakes use DOT fluid, while Shimano, TRP, and Magura require mineral oil. Using the wrong fluid can damage your brake system and compromise safety.
What are the signs that my brakes need bleeding?
Signs include a spongy or mushy brake lever, decreased stopping power, and visible air bubbles in the brake fluid reservoir. Regularly checking these indicators helps maintain brake efficiency and rider safety.
Is brake bleeding difficult for a beginner?
With the right tools and a step-by-step guide, brake bleeding can be a manageable DIY task. However, if you’re unsure or uncomfortable, it’s advisable to seek professional assistance to ensure your brakes function correctly.
Final Thoughts
Keeping your mountain bike’s brakes in pristine condition is more than just a maintenance task—it’s a commitment to your safety and the quality of your riding experience.
By understanding the nuances of brake bleeding and adhering to best practices, you ensure that every stop is as reliable as the first. Embrace the knowledge shared in this guide, equip yourself with the right tools, and take the time to perform regular maintenance.
Not only will this prolong the life of your brake system, but it will also enhance your overall performance on the trails.
Remember, a well-maintained bike is a happy bike, ready to tackle any adventure you throw its way. Stay proactive, stay safe, and enjoy the exhilarating world of mountain biking with confidence.
Key Tips
- Regular Maintenance: Bleed your brakes every 1-2 years or when you notice performance issues.
- Use Correct Fluids: Always use the brake fluid specified by your brake manufacturer.
- Keep It Clean: Prevent brake pad contamination by keeping brake components free from excess fluid.
- Choose the Right Technique: Select gravity bleeding or lever bleeding based on your brake system and comfort level.
- Inspect Components: Regularly check brake pads and rotors for wear and replace them as needed.
- Use Quality Tools: Invest in a good bleed kit and maintain your tools for efficient brake maintenance.
- Follow Instructions: Adhere to step-by-step guides to ensure a successful brake bleeding process.
Recommended Biking Products and Accessories
- Shimano Mineral Oil Brake Fluid
- “Ensure compatibility and optimal performance with Shimano’s trusted mineral oil.”
- SRAM DOT Brake Fluid
- “High-quality DOT fluid designed for SRAM, Avid, Hayes, and Hope brake systems.”
- Epic Bleed Solutions Bleed Kit
- “Comprehensive bleed kit with all necessary components for a smooth brake bleeding process.”
- Park Tool BT-4 Bleed Clamp
- “Secure and reliable clamp for effective brake bleeding on various MTB brake systems.”
- Professional Bike Repair Stand
- “Sturdy bike stand to keep your mountain bike steady during maintenance and brake bleeding.”
- Magura Mineral Oil Brake Fluid
- “Premium brake fluid tailored for Magura and compatible brake systems.”
- Bleed Blocks Set
- “Protect your brake pads and ensure proper piston positioning with high-quality bleed blocks.”
- Allen Key Set
- “Essential toolset for any bike maintenance task, including brake bleeding.”
- Clean Rags and Gloves
- “Keep your hands clean and your bike components spotless during maintenance.”
- Brake Pad Cleaner
- “Specialized cleaner to maintain brake pad integrity and prevent contamination.”
By following this comprehensive guide and utilizing the recommended resources and products, you’ll ensure that your mountain bike’s braking system remains reliable, efficient, and safe for all your trail adventures.