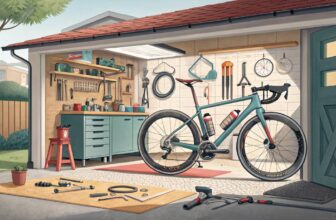
Initial Assessment
Checking out a used bike often kicks off with a quick once-over regarding its looks and how clean it is, plus keeping an eye out for any signs that it’s been left in the lurch. This initial peek will clue you in on whether it’s been babied or if it’s been through the wringer a few too many times.
Appearance and Cleanliness Check
When sizing up a used bike’s looks:
- Cleanliness: A squeaky-clean bike often means it’s been babied by its owner. Hunt for dirt, grime, or oil muck, especially in those nooks and crannies like where the frame comes together or under the seat. If it’s spotless, the owner probably took care of the business.
- Paint and Finish: Check out the paint job for the usual suspects—scratches, dings, or faded patches. Sure, some wear is no big deal, but if it looks like it’s been through a war, the bike probably wasn’t handled with care.
- Frame Condition: Look for dents or cracks. Little scrapes might just be small potatoes, but those bigger problems can turn riding into a risky business. Want to dig into frame sizes and why they matter? Head over to our bike frame sizing guide.
| Appearance Factor | What to Look For |
|---|---|
| Cleanliness | Dirt, grime, oil gunk |
| Paint and Finish | Scratches, dings, fading |
| Frame Condition | Dents, cracks, rust |
Signs of Neglect to Look For
Spotting signs of neglect can give you a leg up on the bike’s history. Keep your eyes peeled for:
- Rust: Peep the frame, chain, and all the metal bits. Rust can mean it’s been left out in the rain too long and might not last as long as you’d like.
- Dents and Scratches: Hunt for any big dings or scratches on the frame. This might mean it’s hit the ground more times than it should. If things look off-balance or like the paint doesn’t quite match, it could’ve been fixed up after a spill.
- Wear and Tear on Components: Scope out the tires, brakes, and drivetrain. If they look worn down, it might have been run hard and put away wet or just hasn’t seen much TLC.
- Fluid Condition: Peek at things like engine oil and hydraulic fluids if you can. If it’s gritty or milky, back away slowly.
| Sign of Neglect | Indicators |
|---|---|
| Rust | Frame, chain, metal bits |
| Dents and Scratches | Frame, out-of-whack parts |
| Wear and Tear | Tires, brakes, drivetrain |
| Fluid Condition | Gritty, milky oil |
A good first look-see will help you decide if the bike’s worth diving into further with a mechanical inspection. Picking up on these visual hints means you’re a step ahead in making a smart buy and dodging the wrong turns in bike buying mistakes. If you’re pondering your next ride and where to find it, check out our advice on where to buy bikes.
Comprehensive Mechanical Inspection
Snagging a sweet used bike? You better make sure it’s not gonna leave you in the lurch! Here’s the low-down on checking out the engine, transmission, brakes, and suspension like a pro.
Engine and Transmission Assessment
When sizing up a used bike, those engines and gears are where the rubber meets the road. Start by giving the engine a good listen while it’s both chilling at idle and when you rev it up a bit. You’re after a smooth operator, not one that’s knocking like a woodpecker on a caffeine fix.
Here’s the 411 on what to scope out:
- Engine Noise: Any clanking or rattling? That means trouble ahead.
- Oil Leaks: Peek around the engine—any oil making a getaway? That means worn-out gaskets or seals.
- Fluid Levels: Is everything topped off and lookin’ fresh? If that oil looks more like a milkshake, bail!
- Transmission Performance: Run it through the gears—should shift like an athlete, not a rusty gate.
| Component | What to Check |
|---|---|
| Engine Noise | Only sweet purrs—no gremlins clanking away |
| Oil Leaks | Dry as a bone underneath |
| Fluid Levels | Fluids clear and right up to the mark |
| Transmission | Seamlessly smooth without a fuss |
All these checkboxes give you the skinny on the bike’s soul. Need more? Pop on over to our bike condition tips.
Brake and Suspension Check-Up
You have to have those brakes and suspension tuned up tight, or you’re asking for a rough ride. Here’s your checklist:
Brake System
- Brake Pads: Take a peek—if they’re paper-thin, you’re headed for trouble.
- Brake Rotors: Wobbling or worn out? Time for replacements.
- Fluid Check: Should be topped up and not lookin’ like sludge.
Suspension
- Front Forks: Drip test—any oil? That means no bueno.
- Shock Absorbers: Give ’em a push—should pop back like a champ, no hiccups.
- Stability: Take her for a spin; make sure the suspension isn’t jumpy on different tracks.
| Component | What to Check |
|---|---|
| Brake Pads | Plenty of meat left—no steel grinders here |
| Brake Rotors | Warp-free and ready for action |
| Brake Fluid | Clear and to the brim |
| Front Forks | Tight as a drum, no leaks |
| Shock Absorbers | Smooth hustle and bounce-back |
Keeping brakes and suspension in line means you’re cruising safe and sound. For tricks on test-riding, take a peek at test ride tips.
Wrapping things up, and having your targets zeroed in from the engine to the suspension means reeling in a trusty used bike buddy. Stay on top of your game with our maintenance cheat sheet to keep that bike rolling right.
Fluids Check
Giving a once-over to the fluids in a used bike is like checking the pulse. You’re gauging its health by peeking at the engine oil, coolant, hydraulic fluid, and final drive oil.
Engine Oil Evaluation
Alright folks, let’s talk engine oil. It’s sort of the lifeblood of the motorbike. Is the oil gritty, looking like someone added some sand? Or maybe it’s got a milkshake vibe going? These aren’t just quirky oddities; they’re signals, folks, waving to alert you of engine troubles. You want to see a nice, clear brew with no chunks floating around.
| Check | Normal | Abnormal |
|---|---|---|
| Color | Clear to Amber | Dark or Milky |
| Consistency | Smooth | Gritty or Frothy |
| Level | Full | Low or Overfilled |
Coolant and Hydraulic Fluid Inspection
Now onto the unsung heroes of motorcycles: your coolant and hydraulic fluids. They’re the secret sauce that keeps the engine and clutch humming smoothly. When you’re checking them out, you want these to be as flawless as a mountain stream—clear, with no funky colors, and definitely no floaties. If they look murky, somebody’s been slacking on maintenance.
| Fluid | Normal | Abnormal |
|---|---|---|
| Coolant | Clear, Green (or specified color) | Discolored, Particulate Matter |
| Hydraulic Fluid | Clear, Amber | Dark, Opaque |
Final Drive Oil Assessment
Don’t forget the final drive oil, the underdog that deserves its moment in the sun. It’s not just oil; it’s more of a peacekeeper, avoiding gear fights. Clean and Amber is your friend here, but if it looks like a metal smoothie, you might be facing future gear drama.
| Check | Normal | Abnormal |
|---|---|---|
| Color | Clear, Amber | Dark, Metallic Particles |
| Consistency | Smooth | Rough or Gritty |
| Level | Full | Low or Overfilled |
Getting these fluid checks done isn’t just routine; it’s like shaking hands with the bike’s soul. Oh, and don’t skip the pre-ride inspection because surprises should be for birthdays, not bikes. Being thorough now means you’re dodging a future filled with mechanic bills and regrets.
Electrical System Examination
Battery and Lights Inspection
When checking out a used bike, don’t skip over the electrical stuff—it’s a big deal! Start off with the battery and lights. Peek at the battery terminals to catch any rust or wobbly connections. A sketchy battery can mess things up later. Make sure all the lights—headlights, taillights, signals, and brake lights—are shining bright and doing their job.
| Component | What to Look For |
|---|---|
| Battery | Rust-free terminals, no loose ends |
| Headlights | Shining bright, not dimming |
| Taillights | Flashing like they should |
| Indicators | Pointing correctly left and right |
| Brake Lights | Lighting up when you hit the brakes |
Instrumentation Panel Check
Now, look at the dashboard. This includes digital or old-school displays, speedometers, odometers, and fuel gauges. Everything should be in good working order because if they’re not, it might mean there’s a bigger electrical problem lurking. Make sure the numbers and lights are accurate and easy to see.
If there are any hiccups with this panel, it could mess with how well the bike rolls and your trust in it.
Wiring Harness and Fuse Box Evaluation
Have a good look at the spaghetti of wires and the fuse box, since these are key for the bike’s electrical mojo. Make sure there are no dodgy wires or bare bits that could cause short or other electrical snags. Peek at the fuse box to ensure all fuses are in one piece and there’s no funny business that could lead to trouble or charred fuses.
A lot of electric headaches can be traced back to issues here, so keeping these guys healthy means avoiding expensive fixes down the line. Get more dirt on skipping common errors with our bike buying mistakes guide.
By giving these electrical bits a once-over, you can count on your potential used bike to be both solid and secure. For more ideas on buying tips and haggling tactics, check out our pages on negotiate bike prices and the bike price guide.
Frame and Body Inspection
On the journey of buying a used bike, make sure to give the frame and body a good once-over to avoid headaches down the road. Here’s what you wanna keep an eye out for:
Accident History Assessment
First things first, make sure the bike hasn’t been through the wringer. Dig into its past life and check if it’s been involved in any fender-benders, major or minor.
Steps:
- Maintenance Records Check: Peek at any records available to spot any big repairs. A big repair bill might mean a crash in the past.
- Inspect Body Panels: A little detective work here—watch out for paint jobs that seem off, dings, scratches, or signs that someone gave it a facelift. Consistent paint all around is your friend.
- Seller Confession: Have a chat with the person selling it to see if they come clean about its wild past, including any crashes or serious repairs.
Frame and Body Damage Check
Give the bike’s frame and body a real look-see to make sure it’s got solid bones, ’cause no one wants to ride a wobbly bike.
Checklist:
- Cracks and Bends: Give the frame a really good look for any cracks or bends. There could be major safety issues lurking there.
- Rust: Those brown spots? Yeah, not a fan. Especially keep an eye around joints—they can tell you if the bike’s silently wasting away.
- Misalignment: Check if everything lines up. Misalignment can be a silent tattletale of past accidents. The handlebar, wheels, and frame should be in sync.
- Fork and Suspension: Make sure these parts aren’t leaking and are doing their job. Leaks could hurt your ride’s smoothness and control.
- Mismatched Parts: Be cautious about parts that don’t belong together—they might be from an old accident fix.
- Tires and Wheels: Peek at the tires and wheels for any funky contact with the road. Give ’em a spin to check for any weird vibes or noises.
| Component | Issue to Look For |
|---|---|
| Frame | Cracks, bends, rust |
| Body Panels | Mismatched paint, dents |
| Alignment | Misaligned handlebars, wheels, frame |
| Suspension | Leaks, dodgy functioning |
| Tires and Wheels | Cuts, flat spots, phases of the wobbalies |
For more juicy tidbits on evaluating a bike like a pro, hop over to our guides on documenting bike condition and bike purchase agreement.
Going over the bike’s frame and body thoroughly helps you ensure it’s a solid ride and might even let you haggle a bit on price. Get ready to make a wise choice with these critical pointers.
Looking for some extra goodies like tips on how to test ride a bike or compare bike specs? Check out our other reads.
Maintenance Recommendations
Keeping your bike in tip-top shape is key to making every ride awesome. Here’s how you can keep your wheels turning smoothly:
Regular Bike Tune-Ups
Let’s keep it simple—regular tune-ups with a trusty bike mechanic are super important. If you’re clocking in miles regularly, think about a twice-a-year checkup to keep everything—from spokes to the tiniest bolts—running smoothly. These check-ups aren’t just about fixing stuff that’s broke; they’re like preventing surprises later on.
| Tune-Up Frequency | Rider Type |
|---|---|
| Twice-Yearly | Frequent Riders |
| Annually | Casual Cruisers |
Do you have questions about tune-ups? Check out our bike maintenance plans.
Pre-Ride Inspection Importance
Before you mount up and pedal away, a quick bike check is a must. Even the smallest hiccup can spell disaster. Most of what you need can be handled with a handy-dandy bike multitool. Here’s your cheat sheet:
- Tire Pressure: Keep those tires pumped for a smoother journey.
- Brakes: Make sure they stop on a dime.
- Chain and Gears: Give ’em a once-over for rust and ensure they shift like butter.
- Bolts and Screws: Anything wobbly could become trouble; tighten it up.
Doing these checks is about riding safe and loving it. Want the full scoop on keeping track of your bike’s condition? Hit up our documenting bike condition guide.
To dive deeper into how to keep your bike happy, check out more tips:
Stay on top of these maintenance tips, and your bike will thank you with smoother, safer rides every time.
Proper Maintenance Practices
Taking care of your bike isn’t just about looking good; it’s key to making sure it lasts and rides smoothly. It boils down to checking those nuts and bolts, keeping things clean, and picking the right stuff for your bike’s chain to keep it humming along just right.
Tightening Bike Parts
Don’t wait until something’s rattling—loose parts can spell trouble, from nasty wear and tear to downright risks. Checking and tightening those bolts, like it says in the owner’s manual, stops your bike from falling apart. Stick to the recommended torque to dodge wrecking anything.
| Component | Torque (Nm) |
|---|---|
| Handlebar Clamp | 5-8 Nm |
| Seat Post Clamp | 4-6 Nm |
| Stem Bolts | 5-7 Nm |
| Crank Arm Bolts | 35-50 Nm |
Always go by what the bike folks suggest for torque values. Miss something? Swing by our bike buying mistakes page and get things sorted.
Cleaning and Lubricating Components
Want that smooth ride? Cleaning and lubing are your pals. It keeps your bike’s bits from grinding away into oblivion and wards off that pesky rust.
- Cleaning:
- Whip up some soapy water.
- Scrub-a-dub the chain, gears, and everything else with a brush.
- Give it a rinse and dry it off—no rusting allowed!
- Lubricating:
- Get lube on the chain, derailleur, and pivot points.
- Wipe off the extra so gunk doesn’t set in.
Do this regularly, and it’ll keep your bike purring like a kitten. More tips? Check out our bike maintenance plans.
Choosing Chain Lubricants
Chain lube isn’t just lube—it’s about matching it to where you’ll be riding. The two main types: are wet and dry lubes, each with their own shtick.
| Lubricant Type | Conditions | Perks |
|---|---|---|
| Wet Lubricant | Wet, muddy | Stays put, won’t wash away in rain |
| Dry Lubricant | Dry, dusty | Cleaner and less gunky over time |
- Wet Lube: Handy for those soggy or mucky rides. Sticks like glue to the chain and doesn’t rinse off.
- Dry Lube: Perfect for kicking up dust in dry areas. Stays cleaner but needs a redo now and then.
Keep the chain clean and efficient—wipe off any extra after lubing. For more tips and tricks to boost your biking experience, swing by our bike component comparison.
Stick with these sensible maintenance practices, and on or off the trail, new or seasoned bikers alike can keep those wheels turning smoothly and safely. Enjoy the ride!
Buying Used Bikes
Inspection Tips
Checking out a used bike before you buy is like your mom’s once-over before you left for prom – important to dodge future headaches. Here’s how to give that bike a second date-worthy look:
- Initial Assessment: First things first, give it a good gander. Does it look like it’s been through a war zone or well-loved? Rust and scratches can tell tales of adventures gone wrong or a lazy owner.
- Mechanical Inspection: Shift yourself to the technical stuff. Poke around the engine, transmission, brakes, and suspension. If it wheezes when it should purr, maybe keep looking.
- Fluid Levels: Think of fluids like the bike’s lifeline. Peek into the engine oil, coolant, and hydraulic fluid. If these are as clean as a new whistle, it’s a thumbs-up for regular care.
- Electrical System: Flick the switches, push buttons, and glare at the battery. A bike without lights or beeps won’t win any road races (or start, for that matter).
- Frame and Body: Look out for secrets it’s hiding – like sneeze-sized dents or mismatched paint jobs. These might mask past wrecks or sketchy repairs.
If you need more navigating adventures in life, take a look at stuff like straightening curly hair or get yourself set for a smooth ride with pre-ride inspection tips.
Pricing Research and Negotiation
The price game for used bikes can be as tricky as convincing a cat to take a bath, but not impossible:
- Identify Pricing Trends: Surf the web waves on sites like eBay or Craigslist and become the Sherlock of used bike prices. Our bike price guide is like that trusty magnifying glass.
- Certified Pre-Owned (CPO) Options: If a brand-spanking new bike feels like buying gold, CPO bikes are gold with a few character lines. They’re inspected, polished, and ready for action without the price tag shock.
- Quality at Lower Prices: Fancy bikes for less are out there for those with eagle eyes and tight wallets. Think about high-class performance without sacrificing your favorite snacks budget.
- Factors to Consider: Weigh up the bike’s history. Is it an oldie but a goodie, or did it travel the globe thrice? Watch out for extras; they might just be the cherry on top.
- Negotiation Tips: Flash the cash (not literally) but have it ready. It adds muscle to your bargaining power. Want more muscle? Flex your reading muscles with our negotiation strategies.
Time to make it easy with a table buddy:
| Category | Considerations | Tips |
|---|---|---|
| Condition | See if it’s been through the wringer | Haggle for every dent and ding |
| Age | Older means vintage cool or just old? | Serial numbers tell the real story |
| Accessories | Bonus items are a sweet deal | Double-check they work |
| Mileage | Has it been on endless road trips? | Less road wear is better for longevity |
Don’t stop here! Explore more nuggets in bike financing, figure out the best time to buy, and nail your bike budget with ownership costs.