Embarking on a mountain biking adventure? Navigating the myriad of trail ratings can feel like deciphering a secret language.
Imagine knowing exactly what challenges lie ahead, ensuring every ride is thrilling yet safe. Whether you’re a novice seeking gentle slopes or a seasoned rider chasing adrenaline on double black diamonds, understanding MTB trail ratings is your key to unlocking the perfect trail.
Dive into our comprehensive guide to decode the rating systems, elevate your biking experience, and ride with confidence on every path you choose.
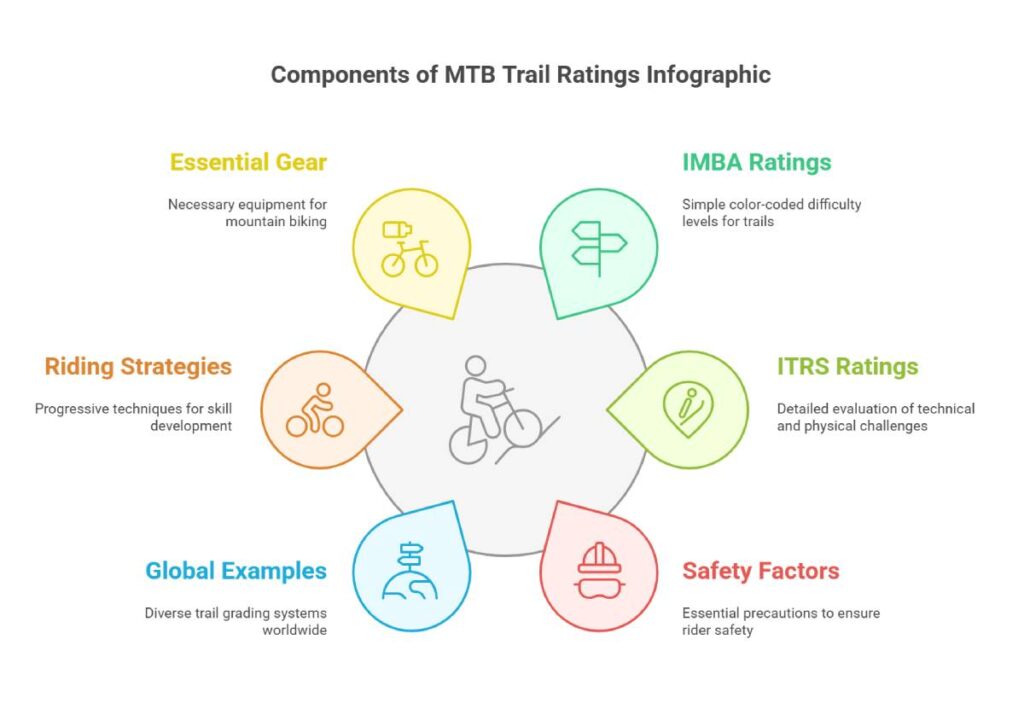
Understanding Trail Ratings
For mountain biking fans, knowing trail ratings is like having the ultimate cheat sheet. There’s nothing quite like getting the lowdown on what kind of wild ride you’re in for. To sort the safe from the spine-tingling, two main systems step up: the IMBA Trail Rating and the International Trail Rating.
IMBA Trail Difficulty Rating System
The IMBA (International Mountain Bicycling Association) speaks the universal language of trail difficulty. This handy system borrows its cues from the ski slopes—you know, those color-coded signs that literally save your life on vacation.
Here’s how it shakes out:
| Color | Rating | Description |
|---|---|---|
| Green Circle | Easy | Smooth sailing over gentle hills—beginners, rejoice! |
| Blue Square | Intermediate | Things are getting real with tighter, twisty trails and friendly obstacles. |
| Black Diamond | Difficult | Watch out! Narrow paths, steep climbs, and an obstacle course of nature’s finest. |
| Double Black Diamond | Very Difficult | Only the bravest dare. Think extreme sports, ninja warrior style! |
For more geek-out moments on trail magic and skill level requirements, hop over to our section on Factors Impacting Trail Safety.
International Trail Rating System
The International Trail Rating System (sounds fancy, eh?) steps in where old methods fall short. This system wants to get everyone on the same page because nothing’s worse than unexpected trail drama when you’re not cool with it.
Here’s their no-nonsense lineup:
| Color | Rating | Description |
|---|---|---|
| Green | Easy | Every rider’s dream. Think flat paths that won’t bite back. |
| Blue | Intermediate | Got some skills? This’ll stretch them a bit—technical tricks and turns await. |
| Red | Advanced | Buckle up for serious maneuvers around big-time obstacles and spicy climbs! |
| Black | Expert | Made for those who laugh in the face of danger with epic features and gravity-defying slopes. |
| Orange | Professional | Only the pros, please. It’s like the Olympics out there with hardcore challenges. |
These colors come with techy support, thanks to the ITRS app, making sure every trail gets its proper report card. The app isn’t just for kicks; it rates trails on tech stuff, length, ups and downs, and even how “out there” things get.
Want to dig more into this trail talk? Check out the world’s take on rating systems in our section on Trail Rating Systems Worldwide.
Knowing these ratings is your secret weapon to an epic mountain biking adventure, ensuring you’re not stuck with a gnarly trail you weren’t ready for. From new-to-the-scene beginners to trail-shredding veterans, picking the right path adds both joy and peace of mind to the ride. Craving more trail smarts? Dash over to our guide on Practical Guidance for Riders.
Factors Impacting Trail Safety
Mountain biking on challenging trails isn’t just about having fun; safety needs to be top of mind. It’s no surprise that skill level and trail design make a big difference.
Rider Skill Level
Skill level is like your safety bumper in the world of trails. Beginners might find some paths a tad daunting, making falls more likely. Experienced riders, on the other hand, zip through with ease, using their balance and smart moves to conquer those wild terrains. A study from PubMed Central found downhill MTB riders often suffer more severe injuries due to tricky trails and high-speed thrills.
| Skill Level | What They’re Like | Best Trail Types |
|---|---|---|
| Beginner | Just getting their feet wet, taking it slow | Smooth, easy-going paths, clear signs |
| Intermediate | Balancing better, cruising at moderate speed | Paths with some bumps and hills |
| Advanced | Pros at control, flying fast, | Super technical trails with tight bends and steep slopes |
Sharpening your mountain biking basics helps you move up the ranks and tackle more daring trails safely.
Trail Design Considerations
Trail design can make a trek a breeze or a beast. Some systems like the IMBA Trail Difficulty Rating System spell out trail quirks like gnarly terrain, dodgy obstacles, and skinny paths to help riders choose wisely.
Watch out for these trail design deets:
- Elevation Changes: Steep trails can be hair-raising, especially when flying downhill and risking a head-over-handlebars moment (PubMed Central).
- Trail Width: Squeeze, and you’ll find it tricky to swerve just right.
- Surface Material: Rocks, roots, and gravel might have you slipping and sliding rather than riding.
- Obstacles: Think jumps or rock gardens? They’re not for the faint-hearted. Check out our guides like riding rock gardens mtb for survival tips.
- Visibility: Not seeing around a bend or through thick foliage? Boom—sudden surprises.
Trail designers craft paths for all skill levels so everyone can have a safe spin. Green trails? They’re manageable for novices. Black diamond stretches? Leave them for the experts who can handle twisty, steep, obstacley rides.
| Trail Feature | Safety Factor |
|---|---|
| Elevation Tweaks | Fast spins can lead to wipeouts |
| Narrow Paths | Limits your wiggle room |
| Sketchy Surface | Skipping tires can mean trouble |
| Tricky Obstacles | Need top-tier skill for hops and drops |
| Can’t See Ahead | Whoops, didn’t spot that there! |
Safety doesn’t stop at the trail. Weather and nearby help matter, too. Always size up the trail and check your gear before going out there. For more hacks, drop by our mountain biking safety tips.
Essentially, your biking flair and how a trail is put together make a big difference. Prepping right, learning well, and picking trails that suit your skill live can really dial down the danger and amp up the fun.
Injury Analysis and Prevention
Taking a closer look at why folks get hurt while mountain biking (MTB) gives both casual riders and hardcore cyclists a better idea of what they’re up against. Here we’ll spotlight the dangers of downhill MTB and the toll competitive mountain biking might take on injury rates.
Severe Injury Risks in Downhill MTB
Downhill MTB is like the double-black-diamond slope of mountain biking—full of speed and spills. Serious injuries happen more often here thanks to things like the biker’s experience, who they are, race participation, trail craziness, and even the weather. Flipping over the handlebars on steep parts is a big reason folks end up hurt.
| Factors | How They Boost Injury Risk |
|---|---|
| Experience | Novices are likelier to wipe out |
| Trail Madness | Twisty, turny trails mean more crashes |
| Weather & Terrain | Rain and rocks don’t mix well with biking |
| Emergency Help | More hospitals around? Fewer bad outcomes |
Impact of Competitive MTB on Injuries
In competitive MTB, injuries happen a lot in races like downhill and enduro, more so than the chill cross-country trail rides. The rivalry and wild pathways make wiping out more common, but cracking the code on exact injury appeal is still a puzzle since numbers change with each MTB type.
MTB parks are hot zones for spills and thrills, with accident levels sometimes hitting 15 per 1000 riders. Younger folks especially end up with head knocks and brain bruises.
For those daring downhill or competing, knowing these risks is golden for prep and prevention. Helmets, knee pads, and other safety gear can save your bacon when things get sideways. Learning the ropes of technical riding and keeping skills sharp can also keep you upright (mountain biking basic skills).
Want more on how not to end up in the ER? Check out our mountain biking safety tips and maybe something for your hair too—though, fix those curls straight up before hitting the trail here.
Grabbing these insights and making them a part of your ride can really cut down on risks, making your mountain biking time a whole lot safer and more fun.
Trail Rating Systems Worldwide
For mountain biking buffs, hitting the trails is often a game of deciphering different rating systems used across the globe. Here’s a peek at how Europe does it and the emerging ITRS way.
European Trail Rating Systems
In Europe, trail rating systems are as varied as the trails themselves. There are at least 20 different methods out there as noted by Singletracks. These systems aim to reflect both the local trail vibes and what bikers in the area expect.
European systems mostly assess trails using a mix of elements like:
- Technical Difficulty: Stuff like rocks, roots, and sharp drops.
- Endurance Requirements: How much of a workout do you get from those climbs and descents?
- Exposure: What risks you’re up against with things like steepness or remote locations?
- Wilderness: How far you are from the comforts of modern civilization.
Countries often color their trails much like ski slopes (green, blue, red, black) or opt for numbers and wordy descriptions.
| Country | Commonly Used Symbols |
|---|---|
| Germany | Green, Blue, Red, Black |
| Switzerland | Single to Triple Black Diamonds |
| France | Green Circle, Blue Square, Red Diamond, Black Diamond |
The ITRS Standardized Approach
The International Trail Rating System (ITRS) is trying to bring some uniformity to the wild world of mountain biking trail ratings. Incorporating factors like technical features and endurance, the ITRS approach is laid out in detail on Singletracks.
Under the ITRS umbrella, trails get a more scientific breakdown with:
- Technical Features: Sizing up challenges—think gnarly rock gardens or killer descents.
- Endurance: How hard you’ll huff and puff along the trail.
- Exposure: The dicey stuff depending on the landscape.
- Wilderness: Checking how isolated the trail is from the urban stomp.
They’ve even rolled out a nifty app to help trained pros score trails accurately. These raters might soon be globe-trotting to give trails everywhere a consistent scorecard.
| Rating Factor | Description |
|---|---|
| Technical Difficulty | Challenges like obstacles on the trail. |
| Endurance | How much energy you’ll spend on the trail. |
| Exposure | Risks tied to the landscape features. |
| Wilderness | How secluded the trail is from towns or cities. |
Grasping these different systems can ramp up your biking adventure, matching trails to your level like picking the right pair of shoes. And if you’ve got any doubts or need more advice, check out our other articles on mtb tire pressure, mountain biking safety tips, and mountain biking essentials.
Trail Classification Criteria
Figuring out how mountain biking (MTB) trails are classified helps you pick the ride that matches your vibe and skill level. Let’s break down the terrains and difficulty levels that guide bikers through these twisty, bumpy, and sometimes downright tricky paths.
Terrain Types
Mountain biking trails come in different styles, each serving up a unique riding experience. Here’s what you might encounter:
- Singletrack: These skinny paths demand your full attention—balance and handling skills are your best friends here.
- Doubletrack: Wide enough for two, these trails are more casual, letting you share the ride with a buddy.
- Fire Roads: As wide as a fire truck and as straightforward as they come, these dirt roads offer an easy-going challenge.
- Rock Gardens: Not the zen kind—these are filled with various-sized rocks to test your maneuvering and grit.
- Slickrock Trails: Imagine biking over giant slabs of sandpaper. Common in deserts, they grip your tires just right.
- Snow-covered Routes: For those who like their biking with a side of frostbite—perfect for snowy adventures.
- Terrain Parks: Think playgrounds, but for bikes. Built with jumps, bumps, spins, and thrills in mind.
These types clue you in on what you’re in for and get you ready for what lies ahead. Want some pro tips on tackling tough rocks? Check out our guide to riding Rock Gardens MTB.
Difficulty Rating Categories
Enter the International Mountain Bicycling Association (IMBA), the hero with its own simple rating system. It uses shapes and colors to spill the deets of trail difficulty:
| Difficulty Rating | Symbol | Description |
|---|---|---|
| Easy | Green Circle | Good for newbies; wide trails, smooth sailing, and gentle slopes. |
| Intermediate | Blue Square | If you’ve got some skills; expect moderate slopes and a few hurdles. |
| Difficult | Black Diamond | Only for the seasoned pros; steep climbs with tricky features. |
| Extremely Difficult | Double Black Diamond | Not for the faint-hearted—steep, technical, and demanding. |
This system is like your personal trail guide, picking paths that cater to your skill level, so you enjoy the ride and stay safe. Craving more on how these trail ratings affect your adventure? Dive deep with our full scoop on MTB trail ratings.
By grasping this info, bikers can wisely choose where to roll. Don’t forget to adjust your MTB tire pressure and handle the mountain bike maintenance to ensure a smooth ride.
Practical Guidance for Riders
Jumping into mountain biking without knowing your limits is like tossing yourself into the deep end of a pool before learning to swim. Riders need to get a grip on trail ratings and match them with their skills. In this section, we talk about the starter paths for newbies and tactics for leveling up.
Starting on Beginner Trails
If you’re fresh off the bike rack, start on beginner trails. Look for paths marked with a green circle in the IMBA rating system. These routes have mellow inclines, comfy tread surfaces, and obstacles that are either easily dodged or tiny.
| Trail Rating | Symbol | Features |
|---|---|---|
| Easy | Green Circle | Wide (≥ 36″), gentle slopes, few/small obstacles |
| Intermediate | Blue Square | Narrower (≥ 24″), moderate slopes, some obstacles |
| Difficult | Black Diamond | Steep slopes, technical features, loose terrain |
| Extremely Difficult | Double Black Diamond | Crazy steep, large obstacles, super technical |
First things first: tweak your tire pressure based on the trail and your weight for a better ride. Check out our safety tips to stay outta trouble.
Progressive Riding Strategies
Once you’re comfy on your bike, take it up a notch with these tips:
- Step Up the Challenge: Begin with easy trails, then step up to intermediate, marked by blue squares. These have a bit more bite with steeper grades and trickier spots to navigate.
- Build Your Skills: Focus on nailing down key skills like cornering techniques, braking techniques, and body positioning on your bike. Confidence comes with practice.
- Gear Up Right: Don’t skimp on the gear. Grab a good helmet and knee pads for that added pinch of safety and ease on your rides.
- Keep the Wheels Turning: Follow our bike maintenance guide to keep your ride from falling apart mid-trail.
- Ride with Buddies: Hook up with some local biking groups. It’s a great way to pick up new skills and get tips from the seasoned pros.
By working through these strategies, riders can boost their skill set and take on tougher trails without breaking a sweat. Crave more tricks? Peek at our guides on how to manual on a bike and navigate rocky trails.
OHV Trail Difficulty Ratings
Understanding off-highway vehicle (OHV) trail difficulty levels is like unlocking a map to safe and thrilling adventures. In the U.S., there’s a handy way to tell how tough a trail might be: Color Symbols or a Numerical Rating System.
Color Symbols vs. Numerical System
The Color Symbols, rolled out by groups like American Trails, give you quick visual cues:
- Green Circle: Kick-back easy
- Blue Square: A bit tricky
- Black Diamond: Tough as nails
- Orange Blazed: For motorcycle daredevils
This system’s like traffic lights for trails: simple and clear for a quick judgment call.
| Symbol | Challenge Level | What You’re In For |
|---|---|---|
| Green Circle | Easiest | Gentle hills, open spaces, smooth sailing |
| Blue Square | A Bit Tougher | Steeper hills, tighter spaces, more hurdles |
| Black Diamond | Most Grueling | Steep, narrow, loaded with obstacles |
| Orange Blazed | Motorcycle Zone | Narrow with tight twists, designed for motorcycles |
Then there’s the Numerical Rating, which digs deeper, giving trails numbers 1 through 10, 1 is a walk in the park, and 10 is a monster challenge. Perfect for pros ready to tackle the wildest rides.
| Rating | Challenge Level | What You’re In For |
|---|---|---|
| 1-3 | Easy | Chill for beginners, gentle slopes, obstacle-free cruising |
| 4-6 | Medium | Moderate ups and downs, regular challenges |
| 7-9 | Hard | Loads of steep hills and serious obstacles |
| 10 | Expert | Insane slopes, complex and frequent challenges |
Subjectivity in Trail Difficulty
One person’s breeze might be another’s windstorm. How tough a trail feels depends on your ride and skills. An all-star with a decked-out vehicle might breeze through what feels like a beast to a newbie with a basic rig.
You gotta know your limits and what your ride can handle before jumping into a trail. These ratings? They’re there to guide you in choosing trails that match your skills and ride proficiency.
Safety always comes first when hitting OHV trails. Need the lowdown on gearing up right? Check our article on mountain biking essentials. For making sure your gear’s in top shape, especially your MTB suspension setup, head over there.
By getting the hang of these trail ratings and knowing your stuff (skills and vehicle abilities), you’re setting yourself up for top-notch trail adventures. Want more pro tips to conquer those rugged paths? Check out our guru guides on mountain biking safety tips and mtb cornering techniques.
Regional Trail Grading Systems
British Cycling MTB Grading
Picture this: the British came up with a mountain biking trail system that breaks down trails by how tough they are, giving bike enthusiasts a heads-up on what lies ahead. This guidance helps riders match trails to their skills, keeping them safe and making the ride a blast.
| Grade | Description | Suitable For |
|---|---|---|
| Green | Easy-going: Wide paths that feel like a stroll in the park | Beginners and families |
| Blue | Some bumps: Paths with roots and rocky spots | Intermediate riders |
| Red | Up the ante: Steeper paths with more twists and turns | Skilled riders |
| Black | Hardcore: Trails that test your mettle | Expert riders |
| Double Black | Daredevil territory: For those who laugh in the face of danger | Highly experienced riders |
Data from Cykel House
The British system gives newbies a good starting point by guiding them to beginner trails. Ready to up your game? Check out progressive riding strategies to level up your skills and tackle tougher runs.
Trail Grading in Other Countries
Countries all over the map have their own way of grading mountain bike trails. Check out how others do it below:
| Country | Grading System | Description | Suitable For |
|---|---|---|---|
| Scotland | Forestry and Land Scotland | Green to Double Black | For every cyclist |
| Austria | Tirol | Easy, Moderate, Difficult | Bikers of all skills |
| USA | IMBA | Green Circle to Black Diamond | Any level of rider |
Scotland: Forestry and Land Scotland breaks down trails into five groups, from Green (easy-peasy) to Double Black (break-out-the-pads), giving everyone a spot to ride.
Austria: The Tirol setup looks at width, surface, and gnarliness to slot trails into Easy, Moderate, and Difficult. Whatever your heart, or legs, fancy, there’s a trail for you.
USA: IMBA’s system in the USA is kinda like a universal language for trail toughness, making it a piece of cake for both local and jet-setting bikers alike.
Need to sharpen some skills for your next ride? Check out mountain biking basic skills. Are you seeing a technical climb soon? Then mtb technical climbing is for you. And if your gear’s acting up, get your hands dirty with mountain bike maintenance. For those curious about comparing brakes, give mountain bike brakes comparison a look.
These grading systems mean bikers can hit trails safely and choose spots that match their chops. Want more tips on staying safe out there? Check out our mountain biking safety tips.
Conclusion
Navigating the complex world of MTB trail ratings doesn’t have to be daunting. By understanding the IMBA and International Trail Rating systems, riders can make informed decisions that align with their skill levels and adventurous spirits.
Safety remains paramount, influenced by trail design, rider proficiency, and environmental factors. Embracing progressive riding strategies not only enhances your skills but also prepares you to conquer more challenging terrains with confidence.
Additionally, recognizing the variations in global trail grading systems broadens your ability to enjoy mountain biking anywhere in the world. Equipping yourself with the right gear and continuously honing your skills ensures every ride is both exhilarating and secure.
Ultimately, mastering trail ratings transforms your mountain biking experience, turning every trail into an opportunity for adventure and growth. So, gear up, choose wisely, and let the trails guide you to unforgettable biking journeys.
FAQs
What are the main MTB trail rating systems?
The primary MTB trail rating systems are the IMBA Trail Difficulty Rating and the International Trail Rating System (ITRS).
How do trail ratings enhance safety for mountain bikers?
Trail ratings help riders select trails that match their skill levels, reducing the risk of accidents and ensuring a more enjoyable ride.
Can trail ratings vary internationally?
Yes, different countries may use varying trail rating systems, but understanding these can help bikers navigate trails worldwide confidently.
What factors should I consider when choosing a trail?
Consider your skill level, trail design features, elevation changes, surface material, and current weather conditions to choose an appropriate trail.
What essential gear should I have for mountain biking?
A quality helmet, knee pads, appropriate bike maintenance tools, and protective gear are essential for a safe and enjoyable ride.
Final Thoughts
Mountain biking is more than just a sport; it’s a journey that blends adventure, skill, and a deep connection with nature.
Understanding trail ratings is crucial in this journey, acting as your roadmap to trails that not only challenge you but also keep you safe. Whether you’re a beginner finding your footing on green trails or an expert tackling double black diamonds, the right knowledge empowers you to make informed decisions.
Embrace the diversity of global trail systems, continuously refine your skills, and invest in quality gear to elevate every ride.
Remember, every trail conquered is a testament to your growth as a rider.
So, stay curious, ride responsibly, and let each trail lead you to new heights of exhilaration and personal achievement. Your next unforgettable biking adventure awaits—are you ready to ride?
Key Tips
- Assess Your Skill Level: Always choose trails that match your current abilities to ensure safety and enjoyment.
- Gear Up Properly: Invest in quality protective gear like helmets, knee pads, and gloves to minimize injury risks.
- Check Trail Conditions: Before heading out, review trail reports and weather conditions to prepare for any challenges.
- Progress Gradually: Slowly increase trail difficulty as your skills improve to build confidence and capability.
- Maintain Your Bike: Regularly service your bike to ensure it’s in optimal condition for tackling various terrains.
Recommended Biking Products and Accessories
- Helmet: Giro Aether MIPS Helmet – Superior protection with adjustable fit and ventilation.
- Knee Pads: Fox Racing Ranger Knee Guards – Durable and comfortable for maximum protection.
- Mountain Bike: Trek Fuel EX 9.9 – High-performance bike suitable for diverse trail ratings.
- Hydration Pack: CamelBak M.U.L.E. – Keeps you hydrated and carries essential gear.
- Protective Gloves: Fox Racing Ranger Gloves – Enhance grip and protect your hands on rough trails.
- Bike Maintenance Kit: Park Tool Home Mechanic Kit – Essential tools for on-the-go bike repairs.
- Cycling Computer: Garmin Edge 830 – Tracks your ride metrics and navigates trails efficiently.
- Suspension Fork: RockShox Pike Ultimate – Provides smooth handling on technical trails.
- Protective Eyewear: Oakley Radar EV Path – Shields your eyes from debris and enhances visibility.
- Multi-tool: Crankbrothers M17 Multi-Tool – Compact and versatile for various bike adjustments.