Power Up on a Budget: DIY Electric Bike Builds vs. Pre-built Options
Are you ready to give your old bike a new lease on life with some electrifying power? If you’ve considered converting your bicycle into an ebike, you’re likely wondering about cost-effective options.
From all-in-one turn-key electric bikes to adaptable conversion kits, each path has unique perks.
In this guide, we’ll compare the choices to help you decide on the best way to hit the road with speed and style—without breaking the bank.
Exploring Electric Bike Options
Are you thinking of jazzing up your ride by turning your good old bicycle into an electric powerhouse? Well, you’re looking at two primo ways to do it: snagging a turn-key electric bike or getting a conversion kit. They both bring their own perks, catering to different needs. Let’s break down what these choices offer and why conversion kits are all the rage with bike buffs.
Turn-Key vs. Conversion Kits
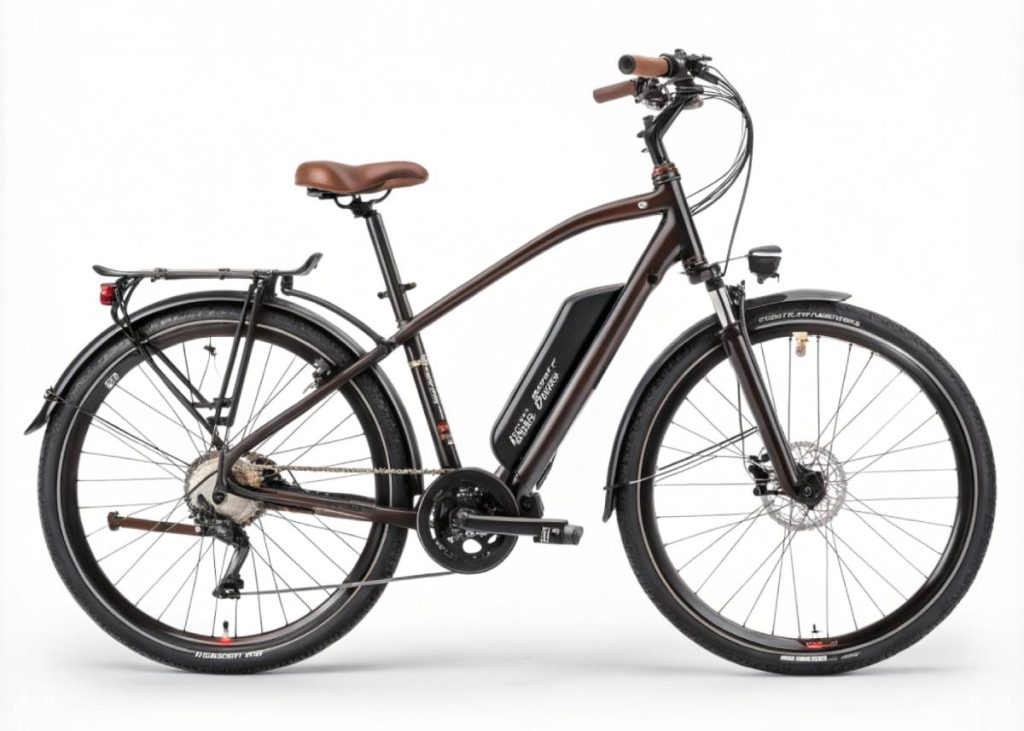
Turn-key electric bikes arrive ready to roll. They’re crafted by manufacturers as entire packages, offering an effortless experience where you just hop on and go. Depending on the brand and model, there’s a spectrum of features meant to fit various riding styles. The beauty of these bikes is that they all come set up with support from the maker.
But here’s the kicker: turn-key electric bikes can hit you where it hurts, in the wallet, and they aren’t all that flexible. If you crave a personal touch, conversion kits might be your jam. These kits let you deck out your current bike with electric gear, giving you the freedom to tweak and tinker to suit your exact biking wants and needs.
Advantages of Electric Conversion Kits
Conversion kits bring a nifty suite of benefits, making them a fantastic pick for penny-pinchers and tech-savvy folks alike. Per eBikes.ca, these kits boast of being budget-friendly, adaptable, and pretty darn handy.
Here’s why conversion kits can rock your world:
1. Cost-Effectiveness: Conversion kits generally won’t cost you as much as spanking new turn-key electric bikes. By pimping out a bike you’ve already got, you save some dough, which you can then splurge on some quality electric bits.
| Turn-Key Ebike | Conversion Kit | |
|---|---|---|
| Initial Cost | $1,000 – $5,000+ | $300 – $1,500 |
| Customizability | Limited | High |
| Ease of Use | Plug-and-play | Requires tinkering |
| Upgradeability | Limited | High |
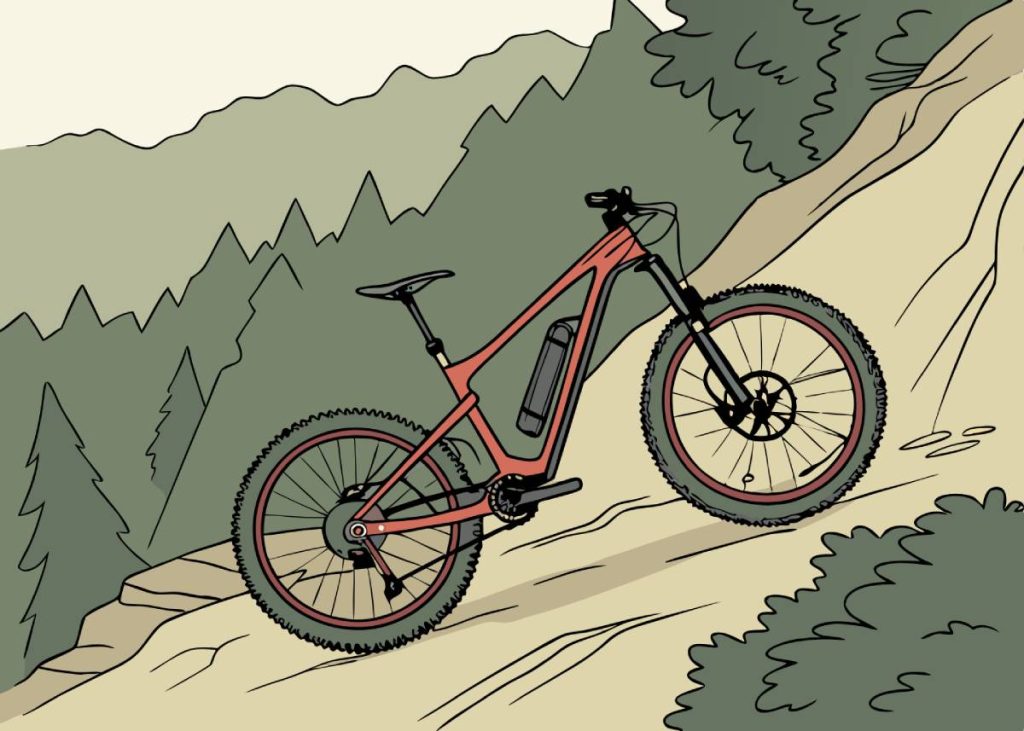
2. Versatility: These kits are champs when it comes to playing nice with various bike styles. Whether you’re outfitting a mountain beast, a slick roadster, or a hefty cargo hauler, conversion kits play well with all, minus the headache of manufacturer constraints.
3. Transferability: You can take the electric goodies from a conversion kit and slap them onto a new bike down the road. This kind of flexibility is awesome for folks who like to keep their options open as riding habits change.
4. Upgradeability: Built on open standards, these kits allow easy-peasy upgrades. Swap out batteries, motors, or pedal assist systems whenever the next big tech hits the scene. This means your ebike can stick around and stay fresh for the long haul.
5. Maintenance and Repair: Those off-the-shelf ebikes sometimes have brand-specific parts that are a pain to replace. Conversion kits, on the flip side, use standard parts, making upkeep, modding, and repairs a whole lot easier.
If you’re itching to kick off your DIY project, tons of guides and resources can give you a leg up. Check out our detailed guide on diy ebike conversion for straightforward, step-by-step help.
Taking the conversion kit route means you get a customized ride without blowing the budget. Whether you’re zipping through the city, pedaling for fun, or making speedy deliveries, knowing your options helps you pick what’s perfect just for you.
“Conversion kits let you take control of your ride, from speed to battery life, all while staying on budget.”
Flexibility and Adaptability
Electric conversion kits are like the Swiss Army knife for ebike fans—versatile and ready to adapt! Let’s take a peek at how these nifty gadgets offer wiggle room for electric drive systems and souped-up kits.
Transferability of Electric Drive System
So, here’s the magic bit about electric conversion kits: they’re not glued to one bike frame. Unlike the “one-and-done” deal you get with off-the-shelf electric bikes, these kits let you hop the electric goodies from one bike to another whenever the mood strikes. Whether you’re a city slicker zipping through traffic or a green warrior looking to up your biking game, these kits let your bike grow with you.
Here’s the lowdown on how it all clicks:
Transferability:
- Flexibility in configuration: Shuffle those electric parts onto a new bike frame just like Lego bricks.
- Adaptation to changing cycling needs: Tweak things around for different biking adventures.
Upgradeability of Conversion Kits
Now, if there’s one thing these kits also nailed, it’s the upgrade vibes! Using open component standards means you can swap out bits and pieces as they get cooler and more high-tech. This makes sure your stash stays fresh and kickin’ for all you tech geeks and wise elders wanting a smooth ride.
Take a gander at what you can soup up:
| Component | Upgrade Options |
|---|---|
| Battery Packs | Bigger juice, speedy charge |
| Motor Controllers | Better efficiency, cooler control styles |
| Pedal Assist Controls | Slicker sensors, fancier tech |
Switching up these parts means you could zip along faster, rack up more miles, and just generally enjoy the ride more. For tips on keeping your electric steed in top shape, swing by our handy electric bike maintenance guide. Also, check our ebike warranty comparison page to make sure you’re covered if something goes awry.
When push comes to shove, the punch they pack in flexibility and upgrades make electric conversion kits a crackin’ choice. They let folks tailor their electric journey just right. Curious about jumping in feet first? We’ve got the goods in our guide on diy ebike conversion.
Understanding Costs of Mid-Drive Ebikes
Factors Affecting Mid-Drive Ebike Costs
Thinking about getting a mid-drive ebike? There are a bunch of things that influence what you might pay. These include how they’re made, what goes into researching new designs, how the market’s doing, and whose name is on it.
- Manufacturing Magic: Crafting mid-drive ebikes ain’t cheap. They’re built using top-notch bits that make ‘em last longer—perfect for city rides, workouts, or just cruising around.
- Mind-blowing Innovation: Coming up with cool new ebike tech ain’t free. Companies spend heaps on the latest gadgets, and those costs tend to sneak into the price tag.
- Market Mayhem: How much you pay also depends on what’s hot and what’s not in the ebike scene. When everyone and their grandma wants one and they’re hard to come by, prices go up. Competition and marketing tricks also play their part.
- Big-Name Branding: Got a well-known brand? Expect to pay a bit more. Those flashy logos come with a price, but they often mean you’re getting something tried and true.
High-Quality Components Do The Trick
Using primo components in mid-drive ebikes means they’re safe, reliable, and top-notch performers. Here’s what parts make your bike stand out (and bump up the cost):
- Battery Boasts: Quality cells from Panasonic, Samsung, Sony, or LG can run $3-$4 each. These babies are known for steady performance and can handle up to 2C continuous discharge (eBikeSchool). Curious about ebike batteries? Here’s our take on best ebike batteries.
- Motor Marvels: Those mid-drive motors are no joke—they’re more intricate and efficient than hub motors. This means they’ve got more smarts and use posh materials, which ups the cost. Dive into the motor mix with our ebike motor types article.
- Frame and Fork Fun: Need a sturdy ride? A solid frame and fork handle the weight and stress from the electrics. High-end materials like aluminum or carbon fiber give needed strength, affecting the price (Isin-Wheel). Want more info on frames? Pop over to ebike frame materials.
- Controller Kudos: The motor controller is like the bike’s brain, managing power between the battery and motor. Top-grade controllers with careful fine-tuning ensure smooth rides and efficient energy burn, adding to the costs. More intel can be found in our ebike controller settings guide.
- Display Dazzle: Fancy displays offer insights into speed, battery life, and power levels. If durability and snazzy features are your thing, you might see a higher price tag. Check out ebike display settings for more hints.
See below for how high-quality parts affect your ebike budget:
| Component | Impact on Cost |
|---|---|
| Battery | $3-$4 per cell |
| Motor | High due to complexity |
| Frame and Fork | High-end materials add cost |
| Controller | Advanced features increase the price |
| Display | Advanced features increase price |
Having a handle on these factors and bits helps folks decide if building or buying a mid-drive ebike fits the wallet. For many more insights on electric bikes, jump into our ebike commuting guide, and don’t miss electric bike maintenance.
The Role of Battery in Ebike Cost
The battery is like the heart of an electric bike, and it’s a big chunk of what makes up the cost. Knowing what goes into battery pricing can lend urban commuters, those who love Mother Earth, fitness buffs, and the like a hand when it comes to making choices they won’t regret.
Components of Ebike Batteries
When it comes to ebike batteries, we’re talking about a cluster of tiny lithium-ion cells working their magic together. These aren’t the clunky lead-acid ones from yesteryears; these guys are feather-light, super reliable, and really perform. Big-name folks like Panasonic, Sony, Samsung, and LG are at the helm, cooking up these cells with a serious focus on making them last.
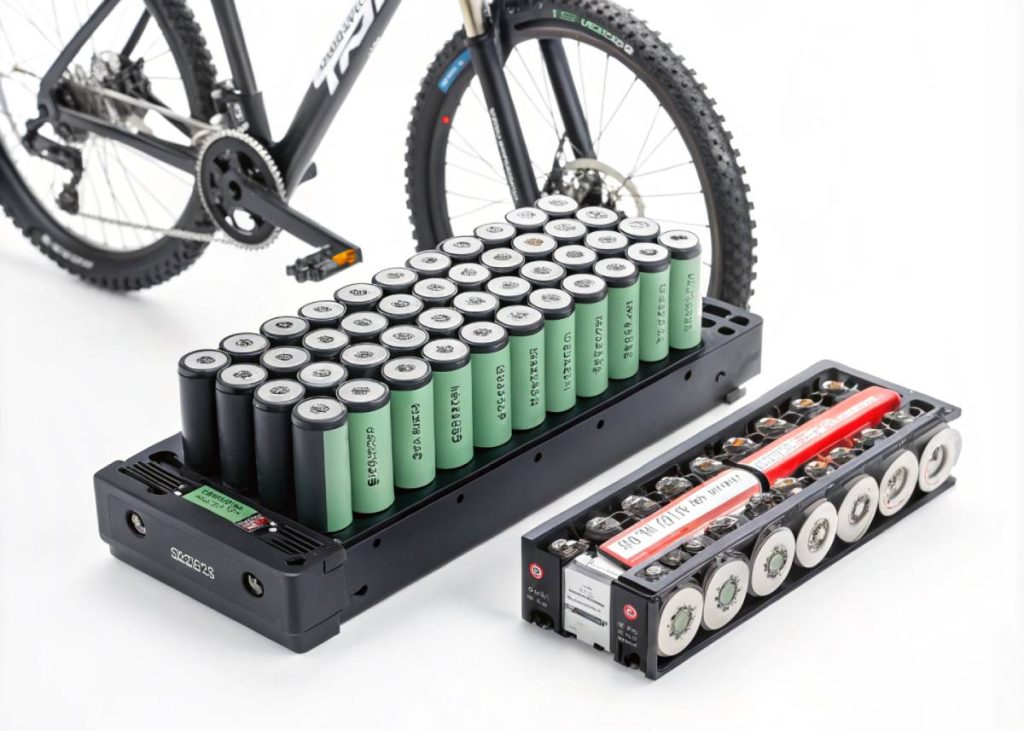
Here’s the lowdown on what’s cruising inside an ebike battery:
- Battery Cells: These little powerhouses are all lined up in a series and parallel, giving your bike the juice it needs.
- Battery Management System (BMS): Think of this as the battery’s guardian, keeping it safe from overdoing things.
- Casing: This outer shell acts like a bodyguard, keeping the battery intact.
- Connectors and Wires: These ensure everything’s talking to each other like it should.
Take a peek at how these components stack up:
| Component | Purpose | Contribution to Cost |
|---|---|---|
| Battery Cells | Energy storage | High |
| Battery Management System (BMS) | Safety and performance management | Medium |
| Casing | Protection | Low to Medium |
| Connectors and Wires | Connectivity | Low |
Factors Affecting Battery Cost
Here’s the scoop on what makes ebike batteries cost what they do. Get clued up on these bits so you can put your money where it’ll work hardest, making sure your ride’s as smooth as butter.
- Quality of Battery Cells: The name and repute of the lithium-ion cells speak volumes in pricing. Top-notch brands like Panasonic, Sony, Samsung, and LG might cost a pretty penny, but they’re worth the peace of mind.
- Battery Capacity (Ah): Going for more capacity means more miles rocking it out, but that’s gonna swell the price tag.
- Battery Voltage (V): A higher voltage gives your ride extra zoom, and, yeah, it’ll ding your wallet a bit more.
- Battery Management System (BMS): A slick BMS costs more but saves future hassles, keeping things shipshape without fail.
- Construction Materials: Opting for top-dollar materials like pure nickel strips over the cheaper stuff means less energy wasted and a longer-lasting battery.
Here’s the rundown on what influences the cost:
| Factor | Impact on Cost |
|---|---|
| Quality of Battery Cells | High |
| Battery Capacity (Ah) | High |
| Battery Voltage (V) | Medium to High |
| Battery Management System | Medium to High |
| Construction Materials | Medium |
For the DIY enthusiasts itching to build their own battery, snagging some Primo 18650 cells and a spot welder for tight connections is the ticket (DIY Battery Construction Process). Babying your battery with good maintenance makes it last the distance. Check out our more-than-handy guide on electric bike battery care.
Knowing about these parts and the cost factors helps future ebike builders keep the ebike build cost in check, so they can hit that sweet spot of performance, toughness, and bang for the buck.
Battery Voltage and Capacity
Just as your Grandma’s secret cookie recipe needs the right mix of ingredients, so does your ebike when it comes to battery voltage and capacity. These two bad boys are critical to how your ride performs and how much it lightens your wallet. Knowing how these factors play together will save you from feeling lost when picking out or souping up an ebike.
Relationship Between Voltage and Capacity
Voltage and capacity are the Batman and Robin of ebike batteries—they’re kinda inseparable. The voltage is all about the power—think of it as the muscle of your bike—while the capacity, measured in amp-hours (Ah), tells you how long that muscle can flex.
If your battery’s packing the volts like a 48V beast, you’re in for some serious power and speed, leaving those weak 36V fellas in the dust. Meanwhile, a high capacity (say, 20Ah) lets you joyride longer before your bike starts whining for a juice-up. Energy storage—how long you can keep the party going—is measured in watt-hours (Wh), coming from both voltage and capacity.
| Voltage (V) | Capacity (Ah) | Energy Storage (Wh) |
|---|---|---|
| 36 | 20 | 720 |
| 48 | 15 | 720 |
| 36 | 10 | 360 |
| 48 | 10 | 480 |
A 36V 20Ah battery and a 48V 15Ah battery both dish out 720 watt-hours of energy, doing different jobs but in totally cool ways.
Impact on Energy Storage
Energy storage? It’s what decides how far your ebike can take you before checking into the battery bar for a fill-up. A higher voltage battery isn’t just for show—it’s your best friend for tackling those beastly hills and turbo-charging your ride. Less current means you’re not frying the wires, keeping things safer and lighter for amped-up rides.
But if you’re about those chill vibes and long journeys, a higher capacity battery is your jam. It keeps you cruising longer, perfect for those extended city runs or laid-back weekend jaunts. Whether high voltage or high capacity hits the sweet spot depends on what you’re after.
| Voltage | Range (Miles) | Optimal Use Case |
|---|---|---|
| 36V | 20-40 | Urban commuting |
| 48V | 30-50 | Hill climbing |
| 36V | 10-20 | Short trips |
| 48V | 20-35 | Recreational rides |
When it comes to pricing, more voltage and capacity also means more dough. Folks who know their stuff usually pick batteries that hit their sweet spot energy-wise. For all the nitty-gritty on keeping batteries alive and kicking, jet over to our piece on electric bike battery care.
Before hitting the DIY button for an ebike conversion, think about how voltage and capacity affect performance, range, and your wallet. Want more tips on charging and maintaining your juice box? Check our easy-peasy guide on how to charge ebike.
Master the voltage-capacity dance, and you’ll have an ebike that’s all about you—whether you’re tackling the morning commute, unwinding on a weekend ride, or pushing the limits on performance. Curious about which battery fits your vibe? Hop on over to our section on best ebike batteries.
Essential Components of Ebike Systems
Building an ebike is like crafting your own wonder wheels, where the right parts make all the difference in fun and efficiency. Let’s look at two big players in this game: hub motors and motor controllers.
Hub Motors and Their Winding
Hub motors are like the sweet spot for ebike enthusiasts. They’re tucked right into the wheel hub, skipping all the messy chain and gear stuff, making your ride smooth and simple. Now, when you’re picking out your hub motor, you gotta think about something called the motor winding constant or Kv, which is fancy talk for how fast your motor spins per battery juice—RPM per volt.
Most hub motors for ebikes are wound at about 8 RPM/V, which strikes a nice balance between blasting down the road and chugging up hills. If you’re looking for a speed demon or your bike’s got smaller wheels, you might wanna check out motors that spin at 10 to 12 RPM/V. It’s kinda like picking the right shoes for your feet—you want ‘em to fit your style and needs. There’s more motor wisdom over at.
Hub Motor Specifications
| Motor Winding | RPM/V | Good For |
|---|---|---|
| Standard | 8 | Everyday use |
| Fast | 10 – 12 | Speed lovers, small wheels |
Picking a hub motor is all about matching it to what you wanna do on your ride. Whether you’re going for top speed or just steady cruising with your wheel size, there’s a motor out there for you. If you’re craving more motor details, take a peek at ebike motor types.
Importance of Motor Controllers
The motor controller is kinda like the brains of the operation. It’s the wizard that takes your battery power and sends it in just the right doses to the motor, making sure you’re getting a smooth, steady ride.
Functions of Motor Controllers
- Voltage Adjustment: Think of it as turning the faucet to get just enough water coming through. It tweaks the voltage, keeping everything flowing just right.
- Efficiency Optimization: Keeps power levels just perfect no matter what kind of terrain you’re tackling.
- Safety Features: Protects your ride with tricks like shutting things down if there’s too much heat or voltage.
Getting to know what a motor controller does can seriously boost both the joy and safety of your ride. If you’re curious about the techy bits, ebike controller settings has your back.
Hub motors and motor controllers are the secret sauce in your ebike recipe, keeping that balance of fun and function while sneaking in under budget. Ready to roll up your sleeves and start building? Our guide on diy ebike conversion is your next stop.
Building a DIY Ebike Battery
Crafting your own ebike battery can feel like quite the adventure, especially if you’re looking to shave off some bucks from the ebike build cost. We’ll chat about the nuts and bolts of what you need: picking out top-notch 18650 cells and making sure those bad boys are hooked up safely.
Choosing Quality 18650 Cells
When you’re rolling your sleeves up to build a DIY ebike battery, those 18650 cells are gonna be your bread and butter. The gold standard? Grabbing cells from big names like Panasonic, Samsung, Sony, and LG. They’re well-known for coming through on performance. Fork over about $3 to $4 each for these beauts, especially if you’re buying a bunch. They’ll handle up to 2C continuous discharge.
| Brand | Cost per Cell | Max Discharge Rate | Thumbs Up? |
|---|---|---|---|
| Panasonic | $3-$4 | 2C | Yep |
| Samsung | $3-$4 | 2C | Absolutely |
| Sony | $3-$4 | 2C | You bet |
| LG | $3-$4 | 2C | Sure thing |
| Ultrafire | Varies | Who knows? | Nope |
| Surefire | Varies | Iffy | Nah |
| Trustfire | Varies | Dicey | Pass |
If you’re tempted by dirt-cheap cells like Ultrafire, Surefire, or Trustfire, steer clear. These often end up being factory leftovers that hardly ever cut. So in the end, sticking with trusted players like Samsung pays off in terms of keeping your battery pack in one piece and rocking.
“For the bike enthusiast, nothing beats the satisfaction of transforming a traditional bike into a personal ebike powerhouse.”
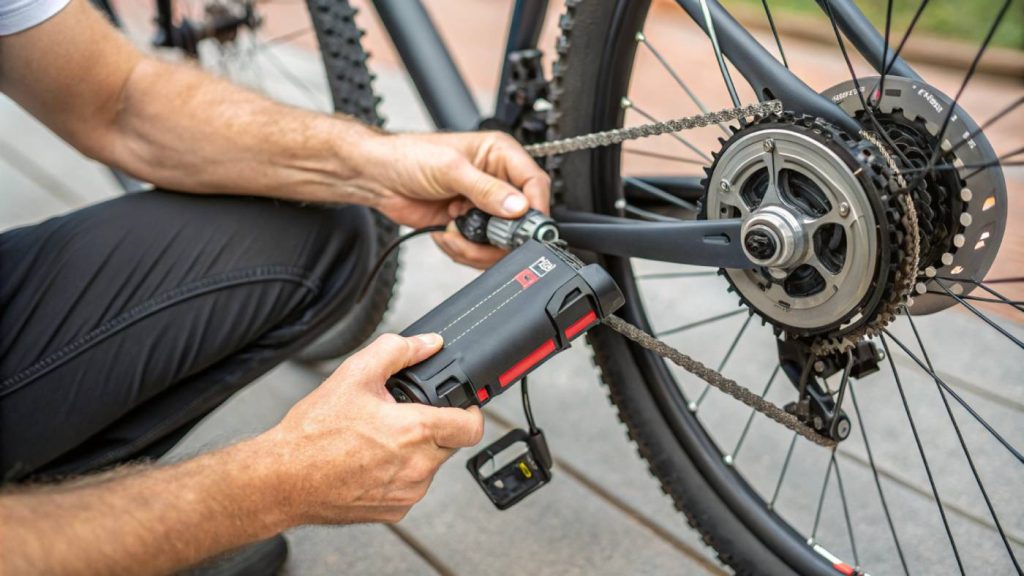
Securely Connecting Battery Cells
Now, to get these 18650 cells singing in harmony, pure nickel strips are your go-to. They play nice with your battery’s flow thanks to lower resistance compared to nickel-plated steel, which gives you more juice minus the heat drama. And you’ll need a spot welder to seal the deal with these cells, not some crummy soldering iron that could fry your cells.
Here’s a how-to on tying together battery cells:
- Line Them Up: Got your cells? Stack them in whatever pattern tickles your fancy. Say for a 36V battery pack, line up 10 in a series and 3 parallel, making it a 36V 8.7Ah pack.
- Go with Nickel Strips: Snip those pure nickel strips to the right size for bridging the cells.
- Spot Welding Time: Whip out that spot welder and tack those strips onto the cells securely. Need those connections strong and snug to keep resistance low and avoid any unwanted heat.
Not quite a pro at spot welding? No sweat, practice on spare cells until you’ve nailed the job. For even more battery know-how, snoop around our electric bike battery care page.
Jumping on the DIY train for ebike batteries can really bring down your ebike build costs if you go for those high-quality 18650 cells. Want the full scoop, safety tips, and more battery-building deets? Head over to our complete guide on diy ebike conversion.
DIY Battery Construction Process
Building your own ebike battery can be an affordable and rewarding way to get your wheels moving without spending a ton of dough. A couple of critical steps are using a spot welder to bring together those battery cells and putting together a buzzing 36V battery pack. Follow this step-by-step guide as you roll up your sleeves and take on the challenge.

Using a Spot Welder
When it comes to connecting battery cells, the spot welder is your trusty sidekick. What it does is stick the cells together without cranking up so much heat that it fries them to a crisp. Steer clear of soldering, folks. That’s like setting a bonfire at the cells’ doorstep, paving the way to reduced performance.
| Connection Approach | Heat Level | Damage to Cells |
|---|---|---|
| Spot Welding | Low | Barely a Scratch |
| Soldering | High | Risk of Major Burns |
Building a 36V Ebike Battery Pack
Rigging up a 36V battery pack for your ebike? That’s gonna take a bit of cell magic and precision. Here’s how ya do it:
1. Picking 18650 Cells:
18650 cells are the worker bees of battery land – efficient little critters. To whip up a 36V battery pack, you gotta lay them out in a nifty pattern.
2. Series and Parallel Configuration:
- Slap together 10 cells in a series to grab that 36V punch.
- Then, bundle 3 cells in parallel with each series; make ’em stick together.
Bam! You’ve got a 36V 8.7Ah battery pack. Here’s what the layout might look like:
| Series (S) and Parallel (P) Setups | Total Cells | Voltage | Juice (Ah) |
|---|---|---|---|
| 10S3P | 30 cells | 36V | 8.7Ah |
| Type of Connection | Number of Cells | Voltage | Power Capacity (Ah) |
|---|---|---|---|
| 10 Series | 10 | 36V | 2.9Ah each |
| 3 Parallel | 30 | Same as Series | 8.7Ah sum total |
3. Fitting the Cells:
Stack those cells cleverly with an offset design to save space and streamline everything nicely.
4. Spot Welding:
Grab your spot welder again to get those nickel strips stuck to the cells. Make sure those connections are as tight as your grandma’s hugs to avoid any surprises on the road.
So there you have it – a snug, dependable 36V battery pack all ready for your ebike. Put safety first: remember to suit up with the right protective gear while crafting.
For more juicy tidbits on DIY ebike setups, check out our page on diy ebike conversion. Plus, don’t miss tips on electric bike battery care to keep your powerhouse ticking longer.
Conclusion
Converting a traditional bike into an ebike on a budget doesn’t mean compromising on quality or flexibility. While turn-key ebikes offer convenience and a ready-to-ride experience, conversion kits empower enthusiasts to create personalized, upgradeable rides tailored to specific biking needs.
With insights into essential components, battery selection, and DIY assembly, this guide has equipped you with everything needed to make an informed choice.
Whether you opt for a brand-new ebike or enjoy the DIY thrill of a conversion kit, you’re one step closer to an exciting, eco-friendly ride that fits your budget and lifestyle.
FAQs
What is the average cost to convert a bike to an electric bike?
- Converting a bike typically costs between $300 to $1,500, depending on the quality and type of conversion kit chosen.
Are conversion kits as reliable as turn-key electric bikes?
- Yes, conversion kits offer reliability and flexibility. Many use standard parts, making repairs and upgrades straightforward.
What type of bike works best for conversion?
- Most bike types, from mountain to road bikes, are compatible with conversion kits. Ensure your bike frame is sturdy enough to support the additional components.
How long does a DIY electric bike conversion take?
- With the right tools, a conversion kit installation can take between 2 to 5 hours. Following step-by-step guides can help simplify the process.
Can I upgrade the battery or motor of my converted ebike?
- Yes, conversion kits support upgrades, allowing you to enhance battery capacity, motor power, or other components as desired.