Conquer every hill with confidence and finesse! Whether you’re a seasoned cyclist or just starting out, mastering road bike climbing techniques can transform your rides from grueling to exhilarating.
Imagine effortlessly powering up steep inclines, leaving competitors in the dust, and savoring the triumph at every summit. At MyBikeReview.com, we delve deep into the art and science of climbing, blending expert strategies with practical tips to elevate your performance.
Ready to unleash your inner climber? Let’s pedal towards greatness together!
Mastering Climbing Techniques
Essential Skills for Climbing
Climbing a hill on a bike isn’t just about brute strength; it’s about a blend of finesse and power. Cyclists need a trio of skills to make those ascents less of a grind and more of a triumph. Thanks to TrainerRoad, we know these skills inside out: sustained power, cranking up that power during the climb, and being able to keep it up for the long haul.
- Sustained Power: Like keeping the lights on at home, keep that power steady throughout the ride up.
- High Power Output: You’ve got to give it some welly all the way to the top.
- Endurance and Repeatability: Think of yourself as that friend who can keep going back to the buffet—only strength and stamina instead.
Nail these skills with focused training, a splash of sweat, and practice, practice, practice. It’s all about climbing like a boss.
Improving Power-to-Weight Ratio
If there’s one number that gets cyclists talking, it’s the power-to-weight ratio. It’s like the cheat code for getting faster. You get this by dividing how much you can push (your FTP) by your weight.
Get even a little better here, and you’ll climb like a mountain goat, even without shedding pounds. Beef up that power output or trim what you can from your waistline (or both), and you’ll be leaving folks in the dust.
Power-to-Weight Ratio Calculation:
| Cyclist’s FTP (W) | Body Weight (kg) | Power-to-Weight Ratio (W/kg) |
|---|---|---|
| 250 W | 70 kg | 3.57 |
| 300 W | 70 kg | 4.29 |
| 250 W | 65 kg | 3.85 |
| 300 W | 65 kg | 4.62 |
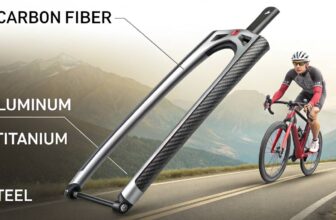
Want a quick win? Ditch the extra baggage – off your body and your bike. Upgrading bike parts like switching to carbon vs aluminum road bikes or getting the best road bike wheels can make a difference. And hey, take a hard look at your pantry—clean eating and dedicated training can really make you zoom uphill.
It ain’t just about raw power, though. Strategy and tweaking your gear play a key part too. Knowledge about gearing and shifting can give your climbs a boost. Fancy a better road cycling position? We’ve got you covered—check out more related stuff to better align your body and ace that climb.
Training Strategies for Climbing Success
Cracking the code to master those uphill battles on your road bike isn’t just about brute strength or a fancy cycle. It’s about a game plan. With a solid plan, you can pedal your way to greatness. Let’s break down a plan that’s all about conquering those climbs and harnessing the magic of staying power.
Climbing-Specific Training Plan
Alright, so you’re keen on stepping up your uphill game? You’re gonna need a plan that’s as sharp as a tack. TrainerRoad chats about splitting a plan into three bite-sized chunks: Base, Build, and Specialty.
- Base Phase: Here’s where you put in the miles. It’s like a slow-cooked meal – takes time but oh, it’s worth it! Steady rides, letting your cardio groove bloom. Keep it chill but steady, and slowly push those ride times longer.
- Build Phase: Now we’re talking! Let’s crank up the volume. This stage is all about pushing limits. You’ll dance on those pedals with climbing drills. Time to bring in threshold riding, breathing-through-your-eyelashes sprints, and those bursts that explode past comfort.
- Specialty Phase: Dress rehearsal time. You refine and polish, making sure you bring your A-game to every climb. Pretend it’s the big race, mixing things up with speed and skill.
By sticking to this groove, you’ll find yourself stronger, maybe even lighter, and definitely more durable.
Sample Climbing-Specific Training Structure
| Phase | Focus | Training Example |
|---|---|---|
| Base | Endurance | 2-hour steady rides at zone 2 |
| Build | Climbing Power | 3 x 10-minute climbs at threshold power |
| Specialty | Peak Performance | Race simulations with mixed intervals |
Yearning for a step-by-step guide on cycling training? Check out our article on road cycling training plans.
The Importance of Sustained Power
On those nasty long climbs, what keeps you afloat is sustained power. It’s like your bike’s superpower, letting you hold out longer with fewer pit stops: aka FTP.
To beef up that power, diversify your training smorgasbord:
- Zone 2 Training: It’s like chalking up miles on cruise control. Putter along in low gear, letting your fat fry off over time, setting you up for marathons, not sprints.
- Threshold Intervals: Here’s where you growl at your limits. Push until the wheels juice every watt from those muscles. It’s about developing that sweet spot power sustain–hold it like a pro.
- Hill Repeats: Short and sharp, these go hard. Rattle your bones in fast bursts, fighting for breath, then breathe. Repeat. Feel the burn, and improve quick twitch muscles.
Training Components to Enhance Sustained Power
| Training Type | Example | Duration |
|---|---|---|
| Zone 2 Training | Steady aerobic ride | 2-3 hours |
| Threshold Intervals | 3 x 15 minutes at FTP | 45 minutes |
| Hill Repeats | 4 x 5 minutes at 110-125% FTP | 20 minutes |
Wanna make those legs unstoppable? Stick to the plan, tweak it to suit your zest and stamina, and put your mettle to the pedal. Need more deets? Swing by for our cycling power meter guide.
Refining Climbing Efficiency
So you wanna fly up those hills on your road bike, huh? Let’s get to it! We’ll cover the basics—a trusty mix of grubbing, pacing, and gear-tinkering that’ll have you climbing like mountain goats in no time.
Nutrition for Climbing
You ain’t gonna last on energy drinks and wishes alone. Eating right sets you up for a good climb. Here’s the nutrition rundown:
- Eats Before the Climb: Fuel up with carbs, and throw in some protein, but keep the fats on the down-low about three hours before hitting the hills.
- Snack While You Climb: Keep the energy train rolling with gels, bars, or drinks. Aim for 30-60 grams of carbs per hour—like a candy buffet for cyclists.
- Stay Wet (Hydration, Folks): Sip water or electrolyte drinks little by little as you go up. No camel-like chugging is required!
To keep you climbing like a feather, manage your power-to-weight ratio. Think of shaving off any extra pounds as fine-tuning your bike, except it’s you (Road Cycling Academy).
Wanna get geeky about grub? Check out our lowdown on road cycling nutrition.
Pacing Strategies for Climbing
No sprinting to glory here. Get the pace right, keep your energy in check, and make sure those lungs don’t burst.
- Keep It Chill: Start slower than your inner speed demon wants. Find that sweet spot and stick there.
- Watch That Power Meter: Geek out with your power stats to make sure you’re not blowing a gasket. Consistent numbers, people.
- Break It Up: Divide and conquer. Focus on each segment, not the whole uphill battle at once.
For longer climbs, think of it like a gym session designed for mountains: endurance, strength, and maximum gasping for air.
Gearing and Cadence Tips
Choosing the right gears…it’s not just about looking like a pro. It’s about effective climbing:
| Climb Type | Gear Setup | Best Cadence (RPMs) |
|---|---|---|
| Easy Slopes | Medium gears | 80-90 |
| Steep Ascents | Low gears (teeny chainring & big ol’ cog) | 70-80 |
| Epic Long Climbs | Mix gears | 75-85 |
Pick your gear wisely. When things get steep, go small in front and big in back to keep you rolling smoothly and your legs spinning happily (Road Cycling Academy).
Like fiddling with your gears? Our guide on road bike gearing spills all the beans you need.
Nail these tricks and you’ll be beating the hills like never before. Stay prepped, stay cool, and conquer those climbs. Take a deeper dive with our detailed pieces on road cycling cadence and road cycling techniques to sharpen those skills.
Body Position for Climbing
Getting your body in the right spot is key for climbing like a pro on your road bike. It can make a big difference in how comfy you feel, keep those aches at bay, and boost your performance as you tackle those hills.
Proper Body Alignment
Whether you’re a seasoned rider or just starting out, having your body lined up right is a game-changer. Staying balanced and chill prevents the dreaded neck kinks and cranks up your climbing game. Let’s break it down:
- Head: Look ahead, not down. Don’t turtle up with your shoulders.
- Shoulders: Keep ’em loose and even, no scrunch-up-to-your-ears action.
- Arms: Have a slight bend to soak up those bumps.
- Core: Engage the core, and stay steady.
- Hips: Keep level, no side shuffle.
- Legs: Pedal smoothly like a well-oiled machine.
Not only does this stance keep you comfy, but it also ensures your leg muscles are working their hardest to push that bike forward.
Optimal Hand Positions
Where you place your hands matters more than you’d think. The right grip can cut down on wind resistance and up your speed.
Riding in the Hoods
Hands on hoods are most riders’ go-to. It’s comfortable, easy to control, and you can still brake and shift with ease. But beware, it’s not the most aerodynamic choice out there (Silca).
Riding in the Drops
Drop down for a speed boost. Having your hands down low and your back flat saves you 19.6 watts at a speed of 40 kph compared to the hoods. This can mean shaving off 35 seconds over a 10-mile trek when you’re out there flying solo. Great for those speed demons and saving energy in a pack.
| Hand Position | Speed (kph) | Watts Saved | Time Savings (10 miles) |
|---|---|---|---|
| Hoods | 40 | 0 | 0 |
| Drops | 40 | 19.6 | 35 seconds |
| Aerobars | 40 | 62 | 1 minute 28 seconds |
Riding with Aero Bars
Want to feel like a jet? Aerobars have you covered, common in time trials and triathlons. They save you a massive 62 watts at 40 kph, cutting down your solo race by a whopping 1 minute and 28 seconds over 10 miles.
Getting these hand positions down pat can supercharge your climbing skills. For more pointers on nailing your bike posture, swing by our road cycling position piece.
Strength Training for Climbing
Boosting your cycling mojo involves more than getting your bike to sweat uphill with you. Lifting weights can be just the trick to turn those not-so-insignificant hills into a playground where you show off your power, stamina, and ninja-like efficiency. Here’s why pumping a little iron matters and what moves to groove into your routine.
Benefits of Strength Training
If you’re on a two-wheeled quest up the mountain, strength training is your best accomplice. Check out why:
- More Power to Ya: Beef up those muscles, and you can put more zap in each pedal push, a game-changer for uphill challenges.
- Ride Smarter, Not Harder: Stronger muscles mean they work like a well-oiled machine, letting you pedal on and on without running on fumes.
- Bike Muscles on Fleek: Hit up exercises like leg presses and those half squats to focus on those all-essential cycling muscles, and you’ll be climbing better before you know it.
Hot tip from research: Strength training, even short bursts of three weeks, can pump up your climbing game. Stick with it for over eight weeks, and the improvements go bananas.
Effective Strength Exercises
Put the pedal to the metal by adding the right strength exercises into your sweat sesh, and target those muscles destined for pedal greatness. Here’s how!
Leg Press
- Targets: Quads, hammies, booty
- Why It Rocks: Juices up leg power for those never-ending climbs.
- Get It Done: Make friends with the leg press machine. Lower the safety, and push away like you mean it.
Table:
| Exercise | Muscles Worked | Reps | Sets |
|---|---|---|---|
| Leg Press | Quadriceps, Hamstrings, Glutes | 8-12 | 3-4 |
Half Squats
- Targets: Quads, glutes, back muscles
- Why It Rocks: Supercharges leg power and balance—your secret weapons for climbing.
- Get It Done: With a barbell on your shoulders, feet steady, dip into that half-squat, and rise like a boss.
Table:
| Exercise | Muscles Worked | Reps | Sets |
|---|---|---|---|
| Half Squats | Quadriceps, Glutes, Lower back | 8-10 | 3-4 |
Hanging Knee Raises
- Targets: Core muscles
- Why It Rocks: A tough core means you stay aligned and balanced, which is gold when you’re cycling uphill.
- Get It Done: Grab a pull-up bar and hang tough. Now bring those knees to your chest and back down.
Table:
| Exercise | Muscles Worked | Reps | Sets |
|---|---|---|---|
| Hanging Knee Raises | Core muscles | 10-15 | 3-4 |
Inserting these strength workouts into your routine can make mountain climbing a breeze. Want more cycle smarts? Cruise over to our road cycling training plan page for more nifty tips. And peep at our road cycling cross training guide for a full-spectrum cycling upgrade.
Nail the right road cycling position and tune up your road bike gearing to go full circle with your strength training.
For laying tracks to your bike’s ultimate form, don’t miss out on our guide to road bike geometry, road bike sizing, and road cycling cadence to rock those climbs with style.
Enhancing Climbing Performance
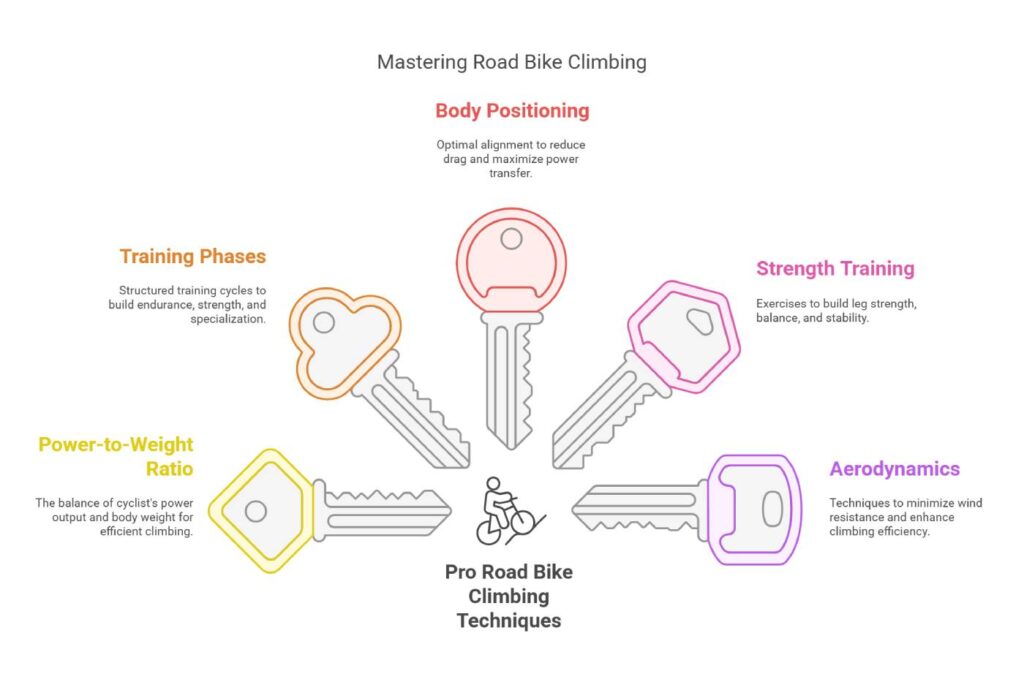
Climbing those beastly hills on your bike isn’t just about bulging muscles; it’s about having a game plan for training and skills. Cranking up your climbing ability on a road bike zeroes in on three main things: pumping up your VO2 Max, squeezing every drop from your energy systems, and nailing down your technique.
VO2 Max Improvement Strategies
Think of VO2 Max like the turbo in your car—the more oxygen your body can burn, the longer and faster you can charge up those hills. You can boost your VO2 buzz by zoning into zone 2 training and hammering out hill repeats.
Do these at a spicy 110-125% of your FTP (Functional Threshold Power) for 3-5 minutes. It’s like your body’s version of upgrading to premium fuel.
| Training Type | Duration | Intensity |
|---|---|---|
| Zone 2 Training | 20-60 minutes | 60-70% of FTP |
| Hill Repeats | 3-5 minutes | 110-125% of FTP |
Pump up your power with leg presses, squats, and good ol’ bodyweight moves. They’re the secret sauce to using that oxygen boost wisely and making every pedal count. For more training tips, jump over to our road cycling training plan.
Utilizing Aerobic and Anaerobic Energy Systems
Climbing like a boss is about finding the sweet spot between your aerobic and anaerobic mojo. Aerobic power keeps you cruising up long hills, while anaerobic bursts get you over those killer bumps.
- Aerobic Training: Long, chill rides and zone 2 drills are your allies for beefing up that aerobic stamina.
- Anaerobic Training: Think of sprints and short but intense bursts above 130% FTP to juice up that short-term power.
| Energy System | Training Focus | Example Workout |
|---|---|---|
| Aerobic | Sustained Power | 2-hour zone 2 ride |
| Anaerobic | High-Intensity Sprints | Hill sprints at >130% FTP |
Mix these training types like your mom’s secret recipe, and you’ll be more balanced up those climbs, not just wobbling around making it.
Technique Refinement for Climbing
Perfecting the art of climbing is like adding secret sauce to a favorite dish—it just makes everything better. Flip between sitting and standing to give different muscles relief and keep fatigue at bay.
- Seated Climbing: Better for chilling and saving energy, kinda like kicking back on a comfy couch.
- Standing Climbing: Throws power into your ride for those quick blasts; use sparingly.
Smooth pedaling and having breathing under control can turn you into a tungsten-chewing monster on the slopes. Practice switching between positions to see what works best depending on how steep it gets.
| Climbing Technique | Benefits |
|---|---|
| Seated Climbing | Greater endurance, lower energy |
| Standing Climbing | Higher power per pedal |
Ready to up your climbing game? Check out more tips in our road cycling techniques and road cycling cadence with a side of info on tweaking your bike to climb like a mountain goat in the road bike gearing guide.
Gearing Selection for Climbing
When the road really starts to tilt, having the right gear in place is like having a secret weapon. Whether you’re new to road cycling or an old hand and chasing that Strava segment, picking your gears wisely could be the difference between feeling like a champ or a chump on those grueling inclines.
Importance of Correct Gear Ratios
Picking gear ratios that make sense for you is not just a cyclist’s rite of passage but a game-changer for performance. A rookie mistake? Trying to copy the gear setup of those lycra-clad pros without thinking about your own legs and lungs.
Instead of mirroring their fancy systems, aim for a pedaling rhythm that feels just right for your body and the terrain you’re taking on.
Good gear choices let you keep up a nice steady pedaling pace, which keeps you going without draining your energy tank too quickly. Lower gears are your best friend on hills, making it easier to stay in control and avoid burning out or pushing those muscles into revolt.
Your legs will thank you, and so will your smile as you reach the top.
Choosing the Right Gears
Knowing your limits and the road’s twists and turns goes a long way. Here’s some real talk to help you gear up smart:
1. Compact vs. Standard Crankset
Imagine your crankset like your magic remote for climbing. A compact setup with 50/34 chainrings is usually the go-to for those steep bits, unlike the beefier 53/39 you’d find on the flats. Smaller chainrings? Easier life on hills.
2. Cassette Selection
Think of an 11-32 or 11-34 cassette as your safety net. It provides a buffet of gears to nibble through, keeping your legs turning happily as you navigate ups and downs.
3. Customizing the Drivetrain
If you’re always in the hills, consider tweaking your setup for even more low-end options. Could mean pimping out with a 48/32 crankset or an 11-40 cassette, just make sure your derailleur can hang with it.
| Component | Recommended Setup | Notes |
|---|---|---|
| Crankset | 50/34 (Compact) | Easier climbing with smaller rings |
| Cassette | 11-32 or 11-34 | Broad range keeps up the stride |
| Drivetrain Customization | 48/32, 11-40 | Extra low for super steep stuff |
Getting to grips with how your gears play into climbing is huge. Zero in on your pedaling pace and match your bike’s bits to your riding vibe and the terrain ahead. This smart selection could turn tough climbs into your playground. For more info on fine-tuning your ride, check out our road bike gearing guide and road bike shifting tips.
To really nail those climbs, don’t forget about the trifecta of cyclist must-knows: nutrition for road cycling, keeping your pace smart, and keeping an eye on that power-to-weight balance.
Turbocharge Your Climb with Slick Aerodynamics
Think slicing through the wind as you grind up that hill on your road bike. It ain’t rocket science, but focusing on aerodynamics can make a world of difference. Slipstream your way to conserving energy and nailing those climbs.
Get Set with Riding Positions
There are a bunch of riding stances that’ll have you feeling like a pro. Each comes with its own flavor of control and effort.
- Chillin’ on the Hoods:
This one’s your go-to for cruising. It’s comfy and lets you handle your bike like a champ. But hey, it’s about as aerodynamic as a brick wall. If speed is your jam, maybe skip this for now. - Aero Hoods, Baby:
Now, we’re talking! Hands on the hoods, arms flat, and back like a pancake. This setup shaves off 46 watts at 40kph, saving you a smooth 1 minute and 9 seconds on a 10-mile ride. You’ll keep control and zip along all day. - The Dreaded Puppy Paws/T-Rex Arms:
This bad boy’s all about saving those watts — 51 of them, to be exact, bringing another 7-second gain over aero hoods on the clock for a 10 miler. It’ll take some practice, though, to avoid going armpits over handlebars!
Efficiency at its Best
Throwing aerodynamic positions into the mix optimizes your game on climbs. Check out how much juice you save:
| Position | Watts Saved at 40kph | Time Saved (10-mile Solo Ride) |
|---|---|---|
| Hoods | baseline | n/a |
| Aero Hoods | 46w | 1 minute 9 seconds |
| Puppy Paws/T-Rex Arms | 51w | 1 minute 16 seconds |
- Hoods: Great for control and chill vibes. Way behind in aerodynamics.
- Aero Hoods: A sweet spot between speed and precision, perfect for those long climbs.
- Puppy Paws/T-Rex Arms: Max out on aerodynamics. Just don’t forget how to steer.
Don’t just stop with switching core positions—reach the summit by tweaking bike geometry, dialing in gear ratios, and fueling right with top-level nutrition. Peek into our treasure trove of cycling tips for a smoother road experience!
Conclusion
Climbing hills on a road bike is both an art and a science, requiring a harmonious blend of technique, training, and strategy.
By focusing on sustaining power, optimizing your power-to-weight ratio, and refining your body position, you can transform those daunting ascents into rewarding victories. Structured training plans, including Base, Build, and Specialty phases, are essential to building the endurance and strength needed for prolonged climbs.
Additionally, incorporating strength training into your regimen not only boosts your climbing power but also enhances overall cycling performance. Don’t overlook the importance of aerodynamics and proper gear selection; these elements can make a significant difference in conserving energy and increasing speed.
Nutrition and pacing strategies further complement your climbing efforts, ensuring you have the fuel and stamina to tackle any hill.
Remember, every climb is an opportunity to push your limits and achieve new personal bests.
Stay dedicated, train smart, and embrace the journey to becoming a climbing pro. With these techniques and tips, you’ll not only conquer hills but also enjoy every moment of your cycling adventures. Happy climbing!
FAQs
What is the power-to-weight ratio and why is it important for climbing?
The power-to-weight ratio (W/kg) measures the amount of power a cyclist can produce relative to their body weight. A higher ratio means better climbing efficiency, allowing you to ascend hills faster and with less effort.
How can I improve my climbing technique on a road bike?
Improve your climbing technique by refining your body position, optimizing gear selection, maintaining a steady pace, and incorporating strength and endurance training into your routine.
What training phases should I follow to enhance my climbing ability?
Follow a structured training plan with Base, Build, and Specialty phases. The Base phase focuses on endurance, the Build phase increases power and intensity, and the Specialty phase fine-tunes your climbing performance.
How does nutrition affect my climbing performance?
Proper nutrition fuels your body for sustained energy during climbs. Consuming carbohydrates before and during rides, along with staying hydrated, helps maintain your energy levels and improve endurance.
What are the best strength exercises for cyclists aiming to climb better?
Effective strength exercises include leg presses, half squats, and hanging knee raises. These target key muscle groups like quads, hamstrings, glutes, and core muscles essential for powerful and efficient climbing.
Final Thoughts
Embarking on the journey to master road bike climbing is both challenging and rewarding. It requires dedication, the right techniques, and a strategic approach to training and nutrition.
By focusing on enhancing your power-to-weight ratio, refining your climbing techniques, and maintaining optimal body positioning, you can significantly improve your climbing performance.
Remember, consistency is key—regular training and gradual progression will yield the best results. Additionally, investing in quality gear and understanding the mechanics of your bike can provide that extra edge needed to tackle the toughest climbs.
Embrace each ascent as an opportunity to grow stronger and more resilient, and celebrate every milestone achieved along the way. Whether you’re aiming to dominate local hills or conquer iconic mountain passes, the strategies outlined in this guide will equip you with the tools necessary to elevate your cycling experience.
Keep pedaling, stay motivated, and let every climb fuel your passion for the ride!
Key Tips
- Optimize Your Power-to-Weight Ratio: Focus on increasing your FTP and managing your weight for better climbing efficiency.
- Structured Training: Implement Base, Build, and Specialty phases to enhance endurance and power.
- Proper Body Position: Maintain correct alignment and hand placements to improve comfort and performance.
- Strength Training: Incorporate exercises like leg presses and squats to boost climbing power.
- Aerodynamics Matter: Utilize aerodynamic positions and gear setups to conserve energy and increase speed.
- Nutrition is Key: Fuel your climbs with the right balance of carbohydrates, proteins, and hydration.
- Smart Pacing: Maintain a steady pace and use power meters to avoid burnout during climbs.
- Gear Selection: Choose appropriate gear ratios to maintain an efficient pedaling rhythm on various terrains.
Recommended Biking Products and Accessories
- Power Meter: Garmin Vector 3 Pedals – Track your power output accurately.
- Lightweight Road Bike: Specialized S-Works Tarmac – Enhance your power-to-weight ratio.
- Aerodynamic Wheels: Zipp 303 Firecrest – Improve speed and efficiency on climbs.
- Cycling Computer: Wahoo ELEMNT Roam – Monitor your training metrics in real time.
- Carbon Fiber Frame: Cannondale SuperSix EVO – Reduce bike weight for better climbing.
- Climbing-Specific Gear Set: Shimano GRX Groupset – Optimize gear ratios for varied terrains.
- Bike Trainer: TrainerRoad Smart Trainer – Supplement outdoor training with structured indoor workouts.
- Nutrition Supplements: GU Energy Gels – Maintain energy levels during intense climbs.
- Hydration Pack: CamelBak Podium – Ensure you stay hydrated without sacrificing speed.
- Strength Training Equipment: Resistance Bands – Enhance your cycling-specific strength workouts.