Choosing the Right Bike
You know, picking that snazzy bike for your kiddo’s debut ride isn’t just about looks. Forking the right choice can kickstart a lifetime of two-wheeling fun! ????????
Cruiser vs. Mountain Bikes
Decisions, decisions. Opting for a cruiser or a mountain bike boils down to what tickles your child’s fancy and the ride they’ll mostly have.
Cruiser Bikes:
Think of cruisers as the easygoing pals in the biking world. Plump, comfy seats and big tires make them stable—kinda like riding on marshmallows. If your kid likes coasting down the sidewalk or a park path, these bikes are just the ticket! They keep it simple too, with minimal gears and an upright seating style that suits first-timers.
Mountain Bikes:
Now, if your little daredevil dreams of tearing through the trails or bouncing over bumps, a mountain bike’s trusty steed. So, what’s the big deal? They’ve got knobbly tires, shock absorbers, and gears aplenty. Perfect for tackling those rugged paths and hills like a boss! It’s ideal for kids who are all about the adventurous side of life or dig tryin’ out kids mountain biking.
Here’s a bite-sized look at each:
| Feature | Cruiser Bike | Mountain Bike |
|---|---|---|
| Ideal Terrain | Smooth surfaces | Trails, hills, rough terrain |
| Seat Comfort | Large, comfy | Middle ground |
| Tire Type | Wide and smooth | Knobby and tough |
| Gear Range | Easy-peasy, few gears | Many options for varied rides |
| Shock Absorbers | Nope | Yup, they’re there |
| Riding Position | Up and easy | Changes with the scene |
For more about picking the right bike size, check out our kids bike sizes page.
Adjusting Saddle Height
Getting that seat spot-on can make your child’s biking a joy rather than a struggle. ????
How to Adjust Saddle Height:
- Find a flat spot, voilà, balancing the bike is a breeze. Get your kid to sit on the saddle with pedals at their lowest.
- Peek over to see them on the pedal. If their leg’s straight but not locked at the knee, you’re golden!
- Tweak the seat by loosening the clamp, moving the saddle where it fits right, and locking it back snugly.
Having the correct seat height is more than just about ease—it’s biking bliss. And letting kids flex their biking muscles grows a little confidence stint by stint. You might wanna swing by our tips on kids bike maintenance.
By nailing the bike type and saddle height, you’re paving the way for a smooth spinning adventure. Happy pedaling! ????????♀️
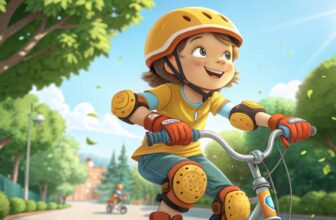
Essential Accessories for Kids
Making sure kiddos are geared up properly before they jump on a bike is all about keeping them safe and boosting their confidence. Here’s a handy checklist of must-have gear and some cycling tips to get their biking adventure off to a flying start.
Safety Gear Checklist
Safety first, always! Here’s what every young rider should have:
- Helmet: This ain’t optional, folks. A helmet that’s snug and comfy can be a lifesaver. Need help picking one out? Check our best kids bike helmets list.
- Elbow and Knee Pads: Perfect for keeping bruises and bumps at bay, especially when they’re still learning the ropes.
- Gloves: These little miracles protect tiny hands from scrapes and help with grip.
- Reflective Gear and Lights: A must-have for visibility, especially when it’s getting dark. For more tips on staying safe at night, see kids bike night safety.
- Sunglasses: Keeps eyes protected from pesky dust and the sun’s glare.
- Water Bottle: Staying hydrated is key when they’re on the move.
- Bike Lock: No one likes a stolen bike. This keeps it safe when parked.
- Repair Kit: Handy for fixing flats or minor tweaks on the go.
| Item | Purpose |
|---|---|
| Helmet | Keeps noggins safe |
| Elbow and Knee Pads | Softens the blow for elbows and knees in a fall |
| Gloves | Make sure the bike stays put |
| Reflective Gear | Helps them get spotted |
| Sunglasses | Keeps eyes comfy and safe |
| Water Bottle | Prevents dehydration |
| Bike Lock | Makes sure the bike stays put |
| Repair Kit | Fixes issues quickly and easily |
Beginner Cycling Tips
Riding a bike can be a thrill ride for kids, but there’s a learning curve. Here’s how to make it smoother:
- Start with Balance Bikes: These bad boys are great for getting kids used to balancing before they tackle pedals. Find out more here.
- Adjust Saddle Height: Make sure that seat is at the right height so their feet can touch the ground easily. It’s all about balance (measure child for bike).
- Teach Braking Techniques: Show them the ropes on braking. Knowing how to stop right is a lifesaver. Our teach kid bike brakes guide can help.
- Gearing Up Properly: If their bike’s got gears, show them how to switch it up. Easier gear for uphill, harder for downhill keeps it smooth.
- Practice in a Safe Environment: Start off somewhere open and flat, away from cars, so they can focus on staying upright.
- Ride Together: Join them on a ride! They’ll love having you there. We’ve got some family bike rides tips if you’re interested.
Gear them up and follow these tips, and you’ll set them up for a safe, fun ride.
Check out more on our site about picking the right bike size (kids bike sizes) or figuring out which style fits best (kids bmx or regular bike).
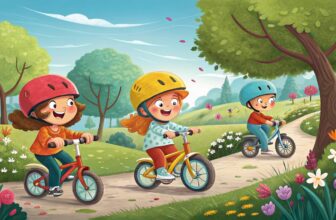
Learning Riding Techniques
So, your little dynamo is ready for their first bike lesson, huh? Before you let them loose, knowing some riding basics is key. Let’s break it down: gear up and how to stop without toppling over.
Gearing Up Properly
Gearing up isn’t just about looking cool—it’s all about staying safe. Here’s what your kiddo needs:
- Helmet: THE single most vital thing for safety. Make sure it fits like a charm (kids helmet fitting) and meets all the safety rules.
- Protective Gear: Think elbow and knee pads (kids bike protection gear). They’re the MVPs of fall safety.
- Appropriate Clothing: Opt for comfy, snug clothes that won’t get tangled in bike bits.
- Reflective Accessories: If there’s any chance of low-light adventures, grab some reflective gear (kids bike night safety).
Table: Gear Essentials You Need
| Gear Item | Purpose |
|---|---|
| Helmet | Protects their noggin |
| Pads | Shields elbows and knees |
| Reflective Gear | Keeps them visible in low light |
| Comfy Clothes | Lets ’em move freely |
Wanna deep dive into bike gear? Take a peek at our kids bike accessories guide.
Braking Techniques
Stopping like a pro is a big deal! Here’s the lowdown on brakes:
- Hand Positions: Teach them to keep those fingers on the brake levers—quick and easy access.
- Brake Usage: Here’s the tip: mostly use the rear brake to avoid a scary flip. It’s like a 60% rear, 40% front split.
- Gentle Squeezing: Encourage gentle squeezes, not sharp pulls, to steer clear of skidding.
| Brake Type | What It Does |
|---|---|
| Rear Brake | Main player (60%) |
| Front Brake | Backup (40%) |
Want more brake tips? Swing by our Teach Kid Bike Brakes article.
Start right by teaching these basics from day one, and watch your kiddo blossom into a skilled rider. Check out our sections on kids bike safety and prevent kids bike injuries for more expert advice on keeping those biking adventures fun and safe.
BICP Certification Path
Dreaming of becoming a certified mountain bike instructor? The Bike Instructor Certification Program (BICP) has got your back with a step-by-step plan whether you’re new in the game or ready to crush it at a pro level. In this section, we’ll take a peek at the riding levels you can aim for and the cool teaching gigs you can snag.
Levels and Certifications
BICP dishes out a series of certifications for budding bike pros. Here’s the lowdown on each:
| Level | Certification Description | Requirements |
|---|---|---|
| Level 1 | Fundamentals Instructor Certification | Basic riding know-how and safety savviness |
| Level 2 | Intermediate Skills Instructor Certification | Mix of slick tricks and teaching hacks |
| Level 3 | Advanced Skills Instructor Certification | Top-tier status, fewer than 25 folks worldwide have it (BICP) |
Level 1 – Fundamentals Instructor Certification
- Just getting started? Level 1 is all about the basics—think vital biking skills and staying safe.
- An ideal starting point for newbies with a love for biking. It’s a building block for bigger things.
Level 2 – Intermediate Skills Instructor Certification
- Diving in deeper, Level 2 is where you start to master advanced biker tricks and teaching finesse.
- Preps you to face gnarlier trails and fine-tunes your coaching know-how.
Level 3 – Advanced Skills Instructor Certification
- This one’s the holy grail of BICP, putting you on the map as a top gun in MTB coaching.
- Super exclusive—a rare feat with less than 25 instructors worldwide.
- You’ve got to be a biking wizard to nab this certification.
Teaching Opportunities
So you’ve nailed your BICP certification—what’s next? Loads of teaching gigs await! Here’s how you can make waves:
Adaptive Sport Organizations
- Share your biking passion with adaptive sports programs, ramping up your skills and cred.
- Lead lessons and boost the biking experience for those with diverse abilities.
Community Programs
- Local community centers are always on the hunt for certified instructors to whip up some biking magic. Host workshops, get kids and adults outside, and watch community health bloom.
Private Lessons and Clinics
- Go the extra mile with one-on-one lessons or tailor-made clinics. Perfect for kiddos finding their wheels to pros honing those killer skills.
Coaching and Mentorship
- Take that extra step. Go beyond classroom basics and dive into coaching, guiding advanced riders, and prepping them for competition.
- Embrace the BICP vibe: seasoned riders mentoring the new blood.
Chasing the BICP path isn’t just about a skill upgrade for you—it’s a high-octane boost for the biking scene. Curious about gear and the nitty-gritty parts of biking? Check out our sections on kids bike safety and teach kids bike maintenance.
Bike Instructor Courses
So, you’re interested in getting certified to teach kids how to ride bikes? It’s a great way to pass on a love of biking and help young ones learn confidently. Get comfy and let’s see what this is all about!
Curriculum Overview
The Bike Instructor Certification Program (BICP) is your go-to for learning how to help kids master biking without all the jitters. Level 1 Certification isn’t about learning to ride; it’s about teaching. So, if you can ride like a pro, but don’t know how to show it—this is your jam (Bike Instructor Certification Program).
Here’s what’s in the mix for Level 1:
- Skills Demonstrations:
- Show off moves like the Front Wheel Lift over a 4-inch obstacle—good for impressing both kids and pets.
- Master the Rear Wheel Lift over the same height. Look cool while dodging random toys on sidewalks.
- Teaching Techniques:
- Break down those complex skills like a boss so kids aren’t overwhelmed.
- Chit-chat like a friend, not a drill sergeant—communication skills are key.
- Safety Practices:
- Keep everyone safe and sound with a focus on good gear and smart practices (check our safety guide).
Preparing for Assessment
Gearing up for the big test? It’s like getting ready for a show where you’re the star. Proving you can teach bike skills is half the fun, and showing you understand teaching tricks is the other half.
Steps to Prepare for Level 1 Skills Assessment:
- Skill Practice:
- Get your routine down with those wheel lifts over 4-inch hurdles. Do it like it’s your second nature.
- Gear Up Properly:
- Go full safety mode—helmets, gloves, sturdy shoes—all that jazz (check out the best helmets for kids).
- Understanding the Curriculum:
- Know your stuff—take a deep dive into the theories and teaching styles.
- Practice talking it out like you’re explaining to a newbie—make it natural.
Required Gear for Motorcycling Class
You ain’t gonna learn much if you’re worried about your jeans catching on fire. Gear up right and you’ll feel both safe and stylish. Here’s your checklist:
| Gear | Recommendation |
|---|---|
| Footwear | Over-the-ankle sturdy shoes, rubber soles—no steel toe please. |
| Pants | Those long denim dreams or something equally tough. |
| Shirt/Jacket | Long-sleeved to keep scratches at bay. |
| Gloves | Full-fingered, leather is great (unless you’re vegan—then find a cool alternative). |
| Eyewear | Tough lenses that won’t shatter if someone sneezes too hard. |
Be ready to roll with all the right gear and safety in mind—that’s how you learn like a natural.
Becoming a certified bike instructor isn’t just a gig; it’s a gateway to endless biking fun with your kiddos, helping them learn those oh-so-important skills to ride with gusto. There’s a world of teaching possibilities out there for you (check our teaching guide). And if you’re looking for even more info, take a peek at our guides on kids bike sizes and balance bike vs training wheels.
Motorcycle Class Attire
When gearing up for a motorcycle class, what you wear can make or break your ride. Yeah, it’s about looking cool, but also about staying in one piece and comfy. Let’s dig into the must-haves for gear and what to expect when you hit the track.
Gear Recommendations
Forget about lounging in your Sunday sweats or strutting in your nine-to-five attire. In a motorcycle class, your get-up matters. One wise soul swore by this. Your learning and guts might just get a little turbo boost with the right stuff:
1. Helmet:
- DOT-approved—you know, for when your noggin’s feelin’ lucky.
2. Footwear:
- Think rugged boots covering those ankles, with rubber soles for sticking power. Ditch the steel toe boots—they’re the clumsiest solutions.
3. Clothing:
- Long-sleeved tops or jackets that hang out past your waist.
- Jeans or pants that are built tough, just like you.
4. Gloves:
- Cover those paws with full-fingered gloves, preferably leather.
5. Eyewear:
- Wrap those peepers in shatterproof lenses or other eye-saving gadgets.
Range Training Requirements
Once you’re out on the range flexing your riding skills, wearing the right gear is like having your best buddy watch your back.
| Gear Item | Requirement |
|---|---|
| Helmet | DOT-approved, because your brain needs love, too |
| Footwear | Sturdy kicks covering your ankles with rubber soles |
| Clothing | Long-sleeved tops/jackets, waist-length |
| Pants | Long, non-baggy denim or tough-as-nails material |
| Gloves | Full-fingered, leather if you can swing it |
| Eyewear | No shattering!—protect those eyes |
Wearing the right duds means you’ll be riding with confidence and picking up new skills without distractions. To keep the safe vibes going, check out our article on bike safety for kids.
Suiting up smartly ensures you’re ready for all sorts of action on the riding range. Stick to these guidelines to make every class a win and ride the roads safely.
For more on kitting yourself and the kiddos out in style and safety, swing by our guides on kids bike protection gear and kids bike helmets.
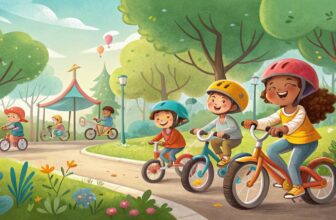
Kids Bike Basics
Oh, the thrill of that first wobbly pedal! Starting a bike-riding adventure can be both exciting and nerve-wracking for kids and parents alike. Getting a grip on the basics ensures a joyful and safe experience for everyone.
Starting Age Considerations
So, when’s the right time to get those little legs spinning? There’s no magic number, but a child should show they’re ready by balancing, coordinating, and having the strength to handle a bike. Some kiddos might start as early as 2 years, while others feel more like taking the leap at 4 or 5. It’s about growing those motor skills and strength before they tackle a pedal bike (Schwinn Bikes).
| Age Range | How You Know They’re Ready |
|---|---|
| 2-3 years | Finding that basic balance, decent coordination |
| 4-5 years | Better motor skills, more muscle power |
| 5+ years | Good to go with pedals, checking independence box |
Curious if your little one’s up for it? Check out our guide on when to start bike riding.
Balance Bikes vs. Pedal Bikes
Balance Bikes
These nifty little bikes, sans pedals, gears, or brakes, are perfect for newbies. Kids use their feet to scoot around, making balance the star of the show and boosting their confidence.
What’s Great About Balance Bikes:
- Low to the ground—fewer scraped knees.
- Helps your child nail balance early on.
- Grows confidence and independence.
Pedal Bikes
The classic choice—pedal bikes come loaded with pedals, gears, and brakes. Ideal for little ones who’ve mastered balance and are ready to roll on their biking adventure. The debate over training wheels is real. Some say skip ’em after a balance bike.
Why Pedal Bikes Rock:
- Gets them ready for bigger rides like mountain bikes.
- Teaches them pedal pushing and braking early.
Want more scoop? Look into our comparison on balance bike vs training wheels.
| Bike Type | Suitable Age | What It’s Got | Why They’ll Love It |
|---|---|---|---|
| Balance Bike | 2-4 years | Pedal-free, low slung | Balance booster, super easy to manage |
| Pedal Bike | 4+ years | Packed with pedals, gears, brakes | Real biking taste, muscle-building goodness |
For more fun biking info, dive into our pieces on kids bike sizes and balance to pedal bike. Remember: safety first! Make sure your mini-rider is decked out with kids bike protection gear and the best kids bike helmets to avoid bumps and bruises.
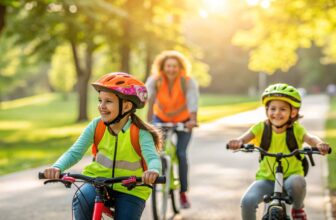
Keep Your Little Biker Safe
Getting kids geared up for their first spin on a bike? Let’s make sure they cruise safely down the sidewalk or around the park. Here’s the lowdown on why helmets are a must, and how training wheels can help them start their cycling adventure.
Why Helmets Are Your Kid’s Best Friend
Helmets are the real MVPs when it comes to biking safety for kiddos. No skipping on this gear, folks. Start early with this crucial life lesson: Every ride means a helmet because the noggin needs protection from bumps or spills.
| Safety Gear | Why It Matters |
|---|---|
| Helmet | Shields against head injuries. Gotta fit just right and be worn every ride. |
| Elbow Pads | Keeps elbows scrape-free and pretty. |
| Knee Pads | Does the same magic for knees. |
Wanna make sure the helmet sits like a glove? Check out a handy guide on kids helmet fitting. You might also want to toss on some elbow and knee pads for extra armor against those rookie wobbles. Want the full deets on keeping biking drama-free? Hit up our rundown on bike safety for kids.
Getting Rolling with Training Wheels
Training wheels are like handy little sidekicks that boost a kid’s cycling confidence. They keep the bike upright, so kids can focus on pedaling and steering, building that all-important balance.
A few things to check off when fitting training wheels:
- Adjustability: Get wheels that can be tweaked to ease off support as Junior gets the hang of things.
- Stability: They should be bolted on tight to stop any wobbles.
| Training Wheels | Things to Think About |
|---|---|
| Adjustability | Gradually helps kids find their balance. |
| Stability | Needs a solid fit on the bike. |
Or, ditch the training wheels and go for a balance bike. It’s a cool way to teach balance skills right off the bat. Dive into our deep dive on balance bike vs training wheels for more juicy tips.
Curious about when they should hop on that first bike? We’ve got pointers on when to start bike riding too.
Put safety gear on the front burner with helmets and the right training setup, and your kids’ first bike lessons will be as safe as they are fun. Don’t miss our ultimate guide on kids bike safety for all the expert advice you need.